
No Display In PC ASUS P5LD-VM Motherboard Repaired
This PC (ASUS P5LD2-VM/S) was brought to me and the complaint was the Motherboard was fully dead.
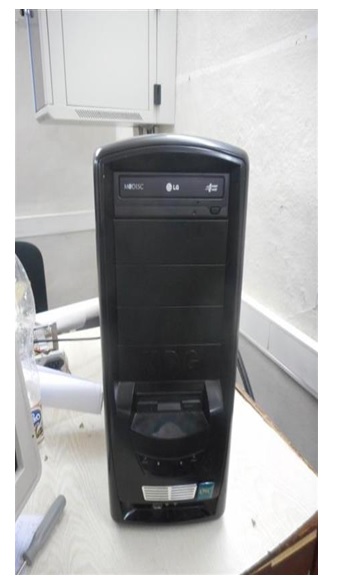
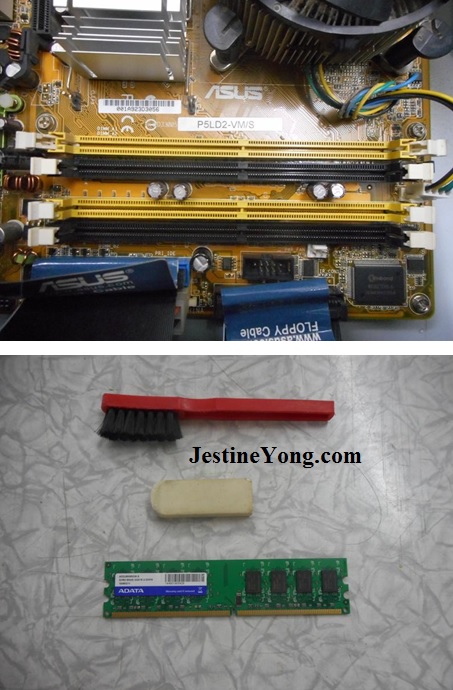
The lateral cover was dismantled (only two screws) to check on the inside especially the Motherboard.
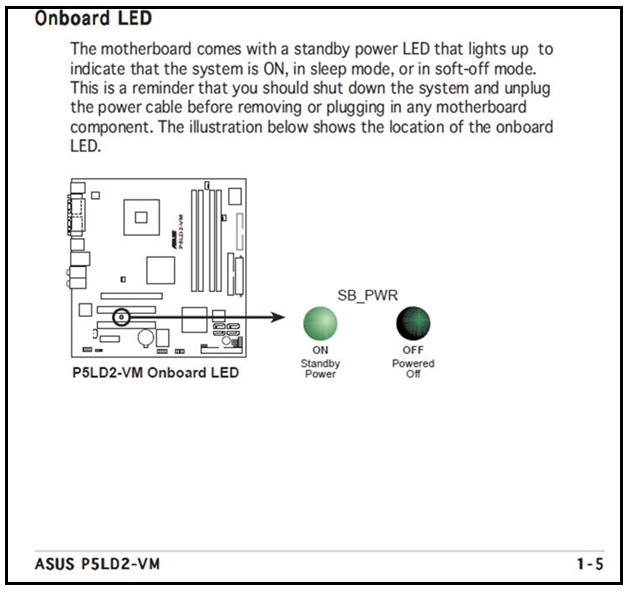
First thing I saw in the Motherboard was the Onboard LED, so far everything was good.
Look at the extract of the User Manual of this Motherboard in the photo below.
First idea that came to my mind was to extract the RAM DDR2 module of the PCB to clean the golden contacts with my STAEDTLER eraser.
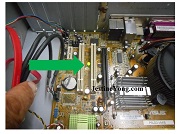
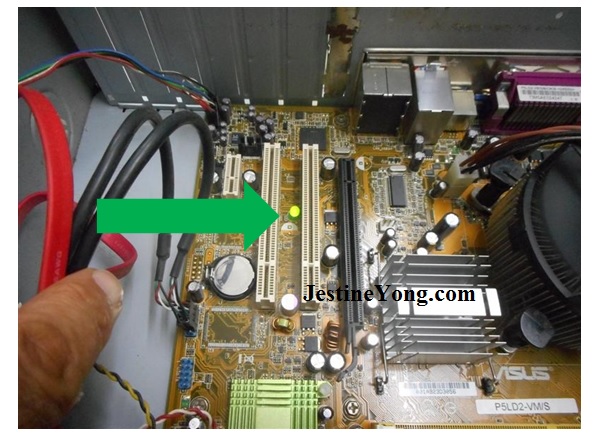
When it was cleaned and inserted into its slot, the PC was turned on, but there was no Video-out. Then other idea came to my mind (idea that has save me in some other occasions), to extract the Microprocessor for cleaning its golden contacts with the same STAEDTLER eraser.
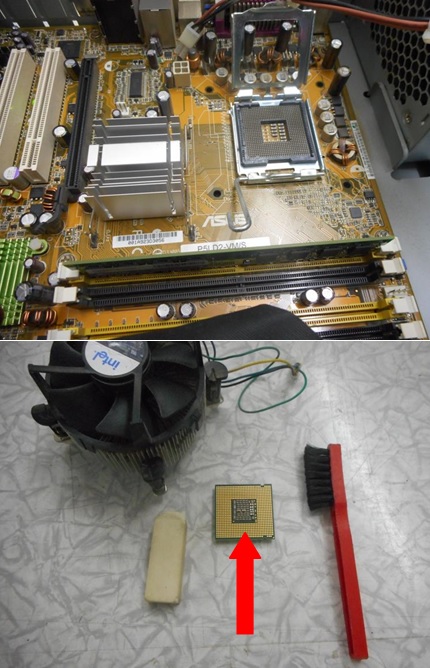
When it was inserted into its LGA-775 slot and the PC was turned on, look at the photos below-see what happened then:
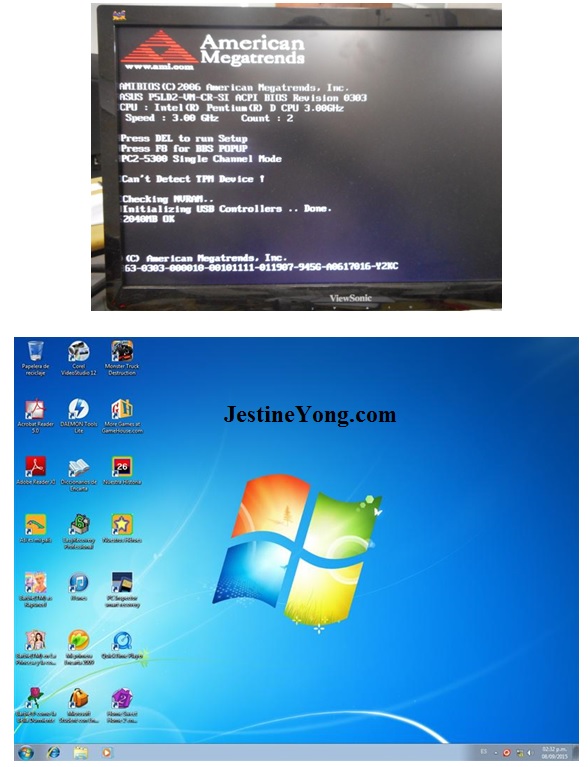
This time there was Video-out and the Motherboard was brought back to life. Mission accomplished.
This article was prepared for you by Humberto Rodriguez, one of our ‘Master Authors’ from Cuba.
Please give a support by clicking on the social buttons below. Your feedback on the post is welcome. Please leave it in the comments.
P.S- If you enjoyed reading this, click here to subscribe to my blog (free subscription). That way, you’ll never miss a post. You can also forward this website link to your friends and colleagues-thanks!
Note: You may check his previous repair article in the below link:
https://www.jestineyong.com/no-display-and-restart-in-pc-repaired/
 (92)Dislikes
 (1)
(1)
9 Comments
Leave a Reply
Cancel reply


Mervin
January 29, 2016 at 4:30 pm
Thats some great experience to think about that.
I've learn something.
Thanks.
Humberto
February 2, 2016 at 1:21 pm
Thanks Mervin
Parasuraman S
January 29, 2016 at 9:15 pm
A Good job that can only be done by an expert like you!
Humberto
February 2, 2016 at 1:28 pm
Thanks Parasuraman S.
Robert Calk
January 29, 2016 at 9:17 pm
Good job, Humberto. I'm glad you didn't bend some pins on the microprocessor.
Humberto
February 2, 2016 at 1:26 pm
Hi Robert. I´ve always been very careful in not bend any Microprocessors´pins. In this case the pins are located in the socket of the mobo. Thanks.
Henrique J. G. Ulbrich
January 30, 2016 at 2:11 am
Good job, Humberto. It's interesting to note that many times just the tools you need are the most simplest one: a prosaic brush and the notorius STAEDTLER eraser. And of course, the knowledge of the repairer.
Humberto
February 2, 2016 at 1:34 pm
Hi Henrique J. G. Ulbrich, In my own opinion I think that the keys are the patience and experience of the repairer. Of course that any kind of tool used is an important factor too.
beh
February 4, 2016 at 1:39 pm
TWO things kill electrons and electronics dirt and heat
thanks HUMBERTO for sharing your experiences with us..