
Servicing Intex Multimedia Speaker
This set was brought to me with the complaint that the woofer was not working properly, and one speaker output was also not working.

In order to open the set, we need to unscrew and remove the back cover, which holds the AC Transformer and output section.
The front panel has to be pulled out to see the front control PCB.
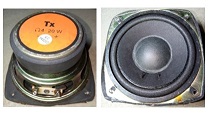
Since I found that the woofer was stuck like stone, I got a replacement for it.
The PCBs were all having hardened flux, which I cleaned thoroughly. Did a dry solder patch up. Applied power after reconnecting all the PCBs externally, and fed signal from my signal generator. In order to know which channel was not working, I connected only one speaker at a time to its outputs. Traced which was not working, and looked for the IC on the board and compared the voltages in the other ICs, and noticed that these were ok.
When I fed a signal at the input of this IC, nothing was coming out, whereas the ICs were ok. So, replaced this IC and also a few capacitors around it. Checked again and found it to be ok.
I am giving so many pictures of the PCB for those of you who may like to track the wires on the PCB. Whenever we handle such sets, the wires breaking off from the PCB is regular and we need to be cautious about it and should take as much snaps as possible from different angles.
This set uses TDA2030 in all the six outputs. Those of you who want to have a look at the datasheet, please click the following link:
http://www.alldatasheet.com/datasheet-pdf/pdf/25043/STMICROELECTRONICS/TDA2030.html
As you can see it is a 14W output IC, which can give around 12W output on a 4 Ohm load and will work from 12V to 14V, the maximum of which is 18V.
The set was tested thoroughly by keeping it outside, before I reassembled it back to its case. You can also see the components replaced.
Another satisfied work added to my lengthening list!
This article was prepared for you by Parasuraman Subramanian from India. He is 69 years old and has more than 30 years’ experience in handling antique equipment like Valve Radio, Amps, Reel Tape Recorders and currently studying latest tech-classes conducted by Kerala State Electronics Technicians’ Association. He has done graduation in BBA degree, private diploma in Radio Engineering and retired as MD of a USA company. Presently working as Consultant to Hospital and other institutions.
Please give a support by clicking on the social buttons below. Your feedback on the post is welcome. Please leave it in the comments.
P.S-If you enjoyed reading this, click here to subscribe to my blog (free subscription). That way, you’ll never miss a post. You can also forward this website link to your friends and colleagues-thanks!
You may check on his previous repair article below:
https://jestineyong.com/how-to-service-dp-30-led-emergency-lamp/
 (54)Dislikes
 (0)
(0)
4 Comments
Leave a Reply
Cancel reply


Robert Calk Jr.
July 26, 2018 at 4:38 pm
Thanks Parasuraman. Another device saved from the garbage.
Albert van Bemmelen
July 26, 2018 at 4:42 pm
Another tedious job you've done on a device with a lot of wires to be careful with! Only sorry to see some photos were a bit out of focus.
Parasuraman
July 27, 2018 at 8:24 am
Those pictures were focused only on certain portiobs. When close up snaps are taken, focusing only on one portion, the outer circle might become out!
James
July 30, 2018 at 2:35 pm
hmmm.... 🙂