
Transformer Problem In Espresso Machine
We have all been told about how to diagnose. The K.I.S. method – ‘Keep It Simple’ and also ‘Do Not Assume’. Well, in this repair, I managed to forget both!

A friend that I do some domestic electrical work for is a coffee fanatic. He has his own machine and grinds his own beans. His espresso machine had failed to work correctly and he was desperate for a decent coffee! He had a look at it himself, but was not keen on the electronic side of the machine. I was interested in repairing the machine to show my electronic skills that I had acquired as a hobbyist.
FAULT
The Bezzera BZ99S Espresso Machine would operate for up to ½ hour and then the operating light and boiler light would disappear. The power light would remain lit. You would have to wait a few hours before it would work again. Clearly it was temperature related.
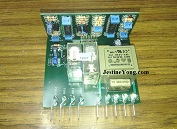
The system uses a combination of sensors and an electronic control unit.
DIAGNOSTIC PATH
As I had no schematic or voltage details, I had to check the basics. I decided to check the voltages at the control module before and after the unit failing to work. I was able to isolate the area where there was a voltage loss. After opening the unit, I checked for obvious signs of failure – burnt components, cold solder joints and damaged tracking. Everything seemed OK. Rather than doing further testing and thinking about how the system must work, I started to check various components. Mistake number 1!
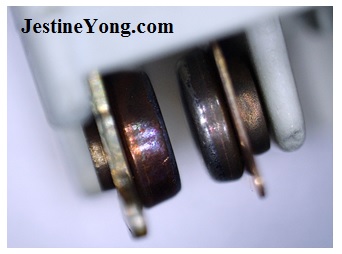
I checked the relay points as I reasoned that if they were burnt, they may create high resistance and cause the unit to fail. I examined them under my USB Digital Microscope (these are an excellent tool for finding cold solder joints and other faults)
Although there was some decolourisation, there were no pits that I expected to find. I used 1400 grit sandpaper to clean the surfaces.
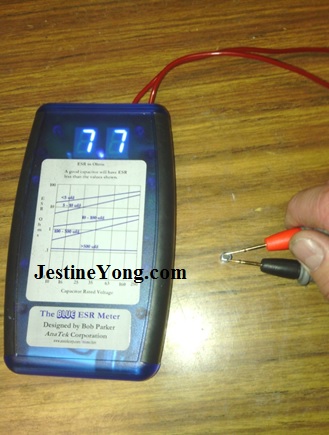
I did however find several capacitors that were far out of range after being checked with my Blue ESR meter. The capacitor shown is 63V 10uf and should have a reading of 2Ω, but shows a reading of 7.7Ω and was clearly faulty. I decided to replace all 3 electrolytic capacitors.
I tested the unit for 3 hours and felt confident that I had repaired the machine. My friend would be pleased that I had repaired his beloved espresso machine so quickly. I was feeling quite pleased with myself. The next day I reassembled the unit and decided to make myself a cappuccino, purely for testing purposes…….
The machine ran for ½ hour and then stopped. What had I missed? I pulled the unit down again and did what I should have done all along. Not assume that just because I found a few faulty components, that I had completed the repair. Also keep my diagnostic path simple. I had a close look at the control unit and tried to understand how it actually worked. Once I did that, the correct diagnosis became easier.
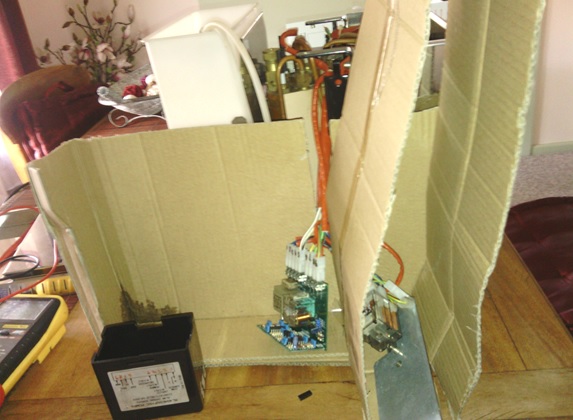
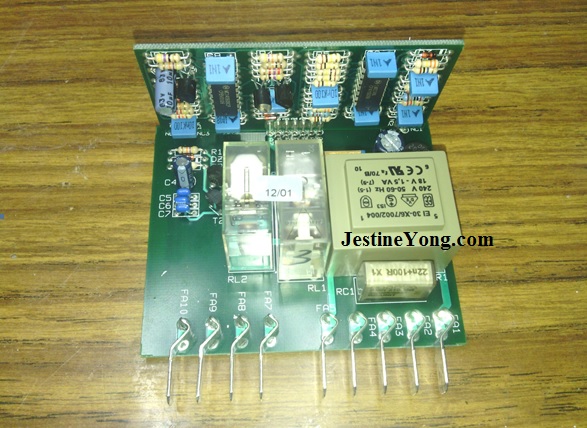
The transformer used has 240 Volts (here in Australia) on the primary side and 18 Volts on the secondary side. By running the unit open and carefully separated by cardboard, I was able to test these voltages while the unit was both operating and not operating. The fault became obvious. Now that I had kept the diagnostic path simple, understood how the system operated and not assume that it may only be one fault, I quickly arrived at the correct diagnosis. The transformer lost its 18 Volts on the secondary side and the unit would no longer operate.
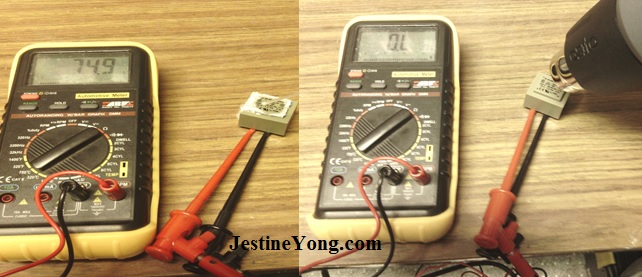
But………I had learned my lesson. I would remove the transformer and do further testing before I cried ‘Eureka!’ Since the fault was temperature related, I used both freeze spray and a heat gun to replicate the fault. The results were conclusive. When cold, I had continuity and when heated, the transformer open-circuited.
REPAIR
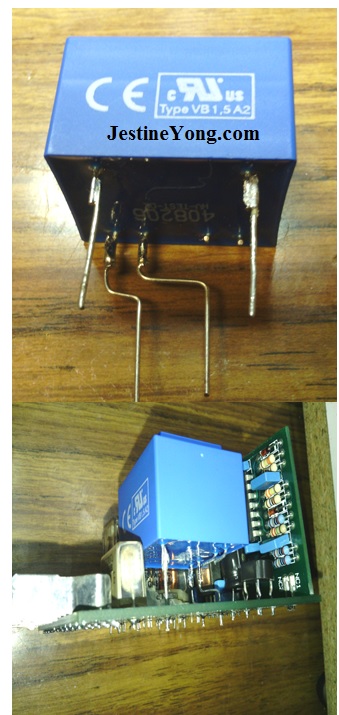
Unfortunately, I was unable to locate a transformer exactly the same as the one that needed to replace. I found one that had a different pin configuration and by soldering on extra ‘legs’, was able to fit this to the circuit board. (Excuse the soldering!)
By thoroughly testing the machine (and several coffees later) I felt very confident that I had repaired the unit. It helped me to create new diagnostic paths, start with the basics, realise that there may be more than one fault and modify components to adapt to control boards. My friend was more than happy and was keen to get his precious espresso machine back in action.
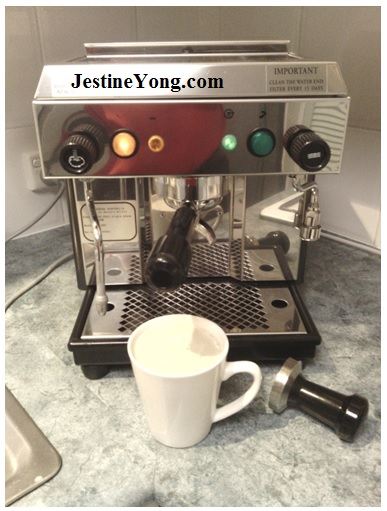
Cappuccino anyone?
This article was prepared for you by Mark Rabone from Australia.
Please give a support by clicking on the social buttons below. Your feedback on the post is welcome. Please leave it in the comments.
P.S- Do you know of any your friends who would benefit from this content that you are reading now? If so, forward this website to your friends or you can invite your friends to subscribe to my newsletter for free in this Link.
 (195)Dislikes
 (0)
(0)
21 Comments
Leave a Reply
Cancel reply


tim
January 26, 2015 at 10:55 pm
Excellent work! I have repaired several similar espresso controllers,(almost identical) and the components you replaced are the ones most likely to fail.
Hank Bordeaux
January 26, 2015 at 11:08 pm
Well written except for one exception --- NEVER ever use sand paper on relay contacts - a burnishing tool should be used --- sandpaper wears the contact surface and decreases the life of the relay --- beware of Air Conditioning personal using sandpaper on your A/C contactors as you can buy a new one either next season or the season after.
Mark
January 27, 2015 at 4:30 pm
Thanks Hank, I will keep that in mind for next time.
Dominic
September 24, 2016 at 6:55 am
Hi Mark!
I have the same issue on my machine and looking to get the replacement pet number for the transformer. Would you remember the one from the part you mofdified ?
Yogesh Panchal
January 26, 2015 at 11:12 pm
Mark,
Good experiment thanks for sharing.
Humberto
January 26, 2015 at 11:32 pm
Good repair, and good idea using sandpaper number 1400. Congratulations and keep up.
Wes
January 27, 2015 at 3:45 am
‘Keep It Simple’ and also ‘Do Not Assume’. Well, in this repair, i managed to forget both!
A common mistake i make all the time.
Nice article Mark, and very good on the photo's.
Start with the basics, also something i forget to do at times.
Jestine makes a point of starting with the basics, one of the reasons I like his books and this website. Nice article,, THANKS.
Andre Gopee
January 27, 2015 at 4:20 am
Hey Mark, Nice Job... I like the way you explain yourself and the way you think about trouble-shooting.. Keep up the good work.
Dan
January 27, 2015 at 7:33 am
"and decided to make myself a cappuccino, purely for testing purposes……"
The sign of a GOOD Technician! Good fix, thanks for sharing.
Henry Mayanja
January 27, 2015 at 7:44 pm
A good article, we need to be innovative when repairing especially when we cannot find the original spare part.
mohammed
January 28, 2015 at 12:14 am
thank you mr yong ,nice article Rabone,
mohammed from KSA.
Beranrd D'Costa
January 28, 2015 at 2:01 am
Hey Mark,... (and several coffees later) ha ha ha ,, when did you come down from yure caffeine High ?
cheers bernard/~
Mark
January 28, 2015 at 9:49 am
Hey Bernard,
Unfortunately my friend took his coffee machine back and so I am slowly coming down off my caffeine high. Hopefully someone else's machine will break down and give me a chance to 'repair it' (and test it thoroughly!)
Shakiru Musiliu
January 28, 2015 at 3:03 pm
A good repair article that state two fundamental repair principle that we should not always forget. The contribution from Hank should also be noted.
Thanks for the article.
Toni
January 28, 2015 at 6:30 pm
Yay! You fixed the coffee machine! Now can I have my Dining room table back PPPPLLLLEEEEAAASSSEE? just joking, great accomplishment my love. Now on to the next 4500+ pulled apart electrical items in your 'Electronics' room. Then I can vaccum more than the metre square in the door way. xx
Robert Calk
January 28, 2015 at 10:58 pm
Lol!! Sounds like my room. My sister came in a week or so ago and said, "Dang, there's not even enough room to walk around in here!!".
That's just the way I like it.
Mark
January 29, 2015 at 4:10 am
Another common mistake we can make is sharing what we have written with our wives! As hobbyists, it's good to get feedback from everyone - even the missus!
Amir Mukhtar
February 2, 2015 at 7:16 pm
Thanks you MR. Mark Rabone for sharing such a Learnable article.
Keep exptertise sharing with us.
thanks you
Amir Mukhtar Ashrafi
Sam Bagley, MD
March 11, 2017 at 6:45 am
I'm stuck with a similar problem! BZ99. GICAR RL40/4ESS/F. Pump won't shut off on boiler fill cycle when machine is cold. When able to heat up GICAR it worked normally for a while. Now it just overfills and runs water out of the popoff valve. I got "an original RL40/4ESS/F from England, but it won't initiate fill! ANybody got any advice? Other than trashing machine, that is. This guy is my buddy, and has been for years.
Steve
November 10, 2017 at 6:12 pm
The transformers should be a standard pin spacing.
Try searches for
Vigortronix PCB Transformer
Block PCB Transformer
Myrra PCB Transformer
Supplier in the UK include Farnell and Rapid Electronics.
Always check the rating and pin layout.
Dermot McD
April 29, 2019 at 8:01 pm
Thanks for this thread. I had a problem with a Bezzera 99S machine and with the help of this page, traced it to the transformer. I substituted a 15 volt output version to check and after a couple of cups of excellent coffee again, I tracked down an exact replacement from RS components. RS Stock No. 732-0354 Mfr. Part No. VB 1,5/1/18
Thanks to all!