
Attempts To Save Two Computer Monitors Failed – LG 16M35A-B & ACER P166HQL
Here are two sad cases, which I think is incumbent upon me to share with you all so that not only can one learn the troubles and methods used but also take necessary precautions.
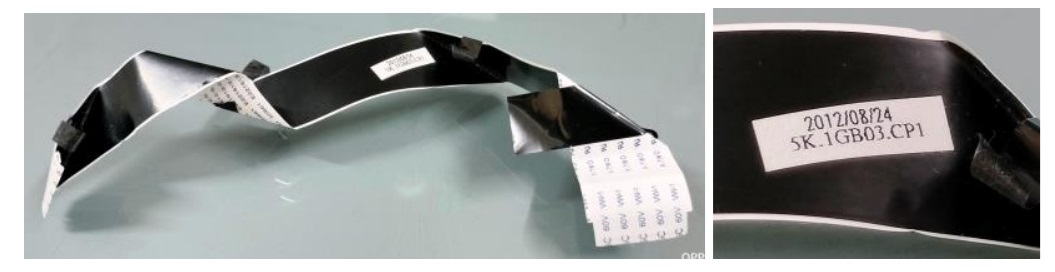
Case (1) LG MONITOR Model Number 16M35A-B : This belonged to the hospital where I worked and was brought to me with the complaint that the backlight was flickering, which was demonstrated to me there itself on my table. I brought it home, opened and cleaned it thoroughly and quickly dismantled it. We need to remove the metal frame and take out the panel and the reflector and diffusor sheets to get to the backlight. The places where the COFs were resting on the metal frame were rusted and I had to carefully remove them for fear of any tear or damage to the COF. Let us have a look at a few pictures before proceeding further:
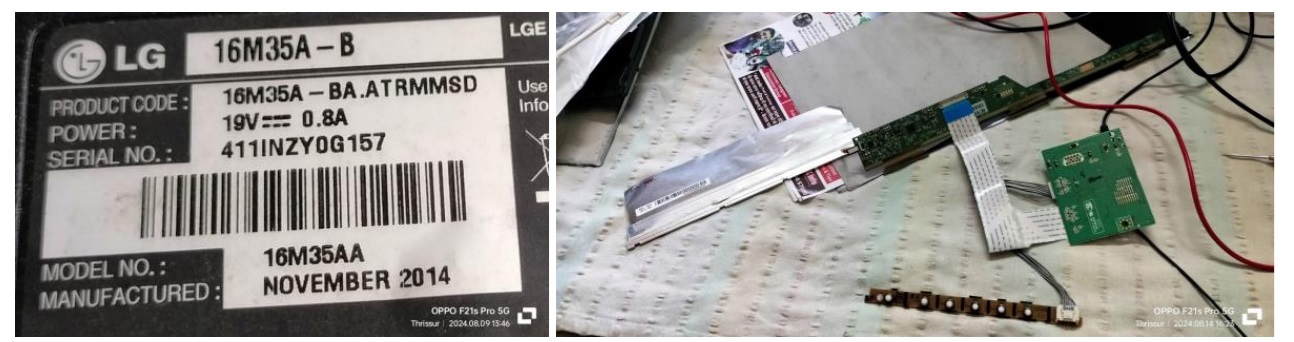
The supply to the backlight was from one side of the scalar board and on removal I found it was an edge LED strip with some numbers marked on the metal frame as well as the on the strip fit on the vertical side of the frame.
I checked it again applying the power and the entire strip was blinking and I saw a few of the LEDs were dull and strained. Evidently, the strip required replacement. So, I dismantled it:
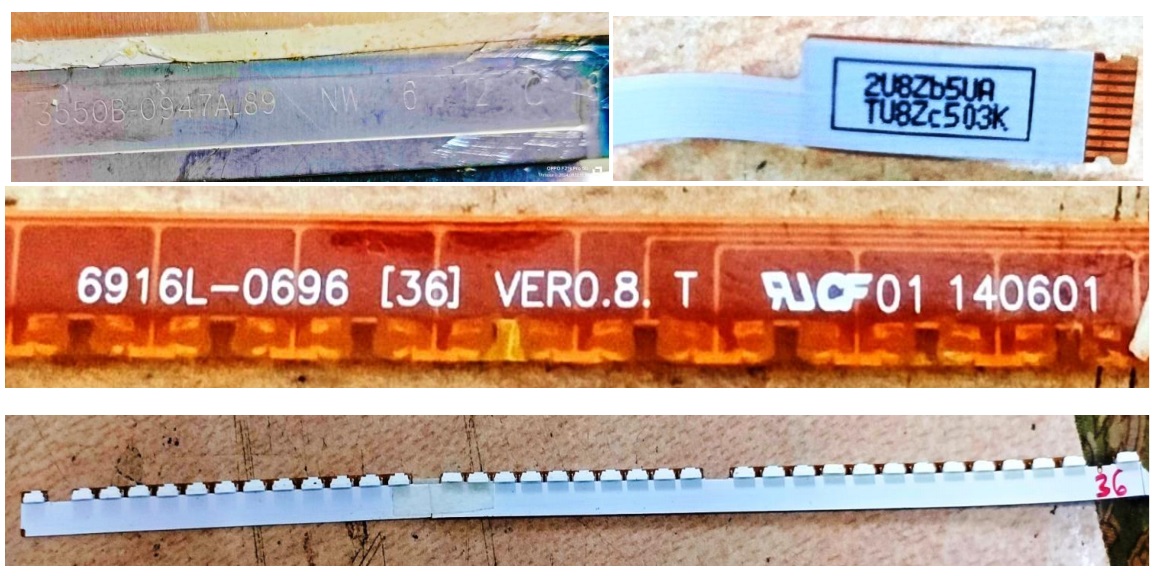
There were 36 LEDs arranged in a certain way to suit fitting inside the metal case. My search for replacement of the LED strip did not yield any result and none could supply this even after rigorous follow up for weeks. The side emitting type LEDs were also not available in the market. The tiger tenacity within me did not leave any stones unturned. I even hunted for old monitors in and around known circles and scrap yards. But attempts were futile. Then I wanted to do some innovative way of solving this issue. The problem was space and the tiny size of this LED. I ordered for 100 pieces of the tiny SMD LED and started joining them together one by one. As there were four negative controls coming out from the IC, with one common positive supply, a set of 9 LEDs was in series. I too attempted to do that, which you can see from the following pictures:
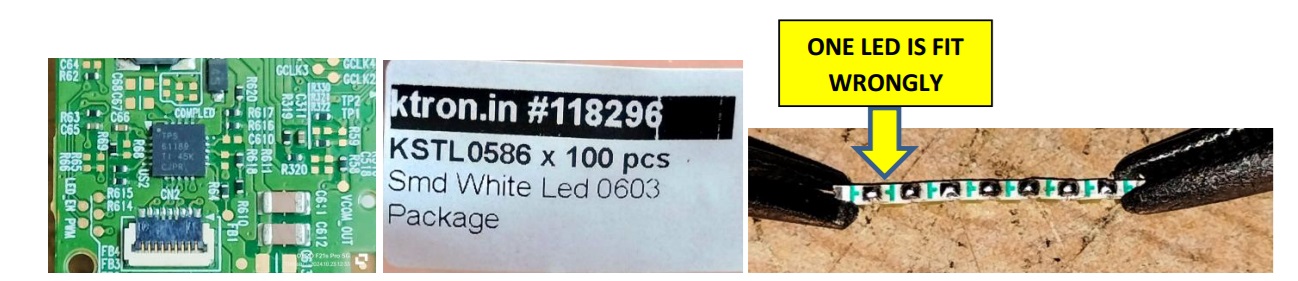
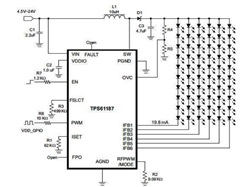
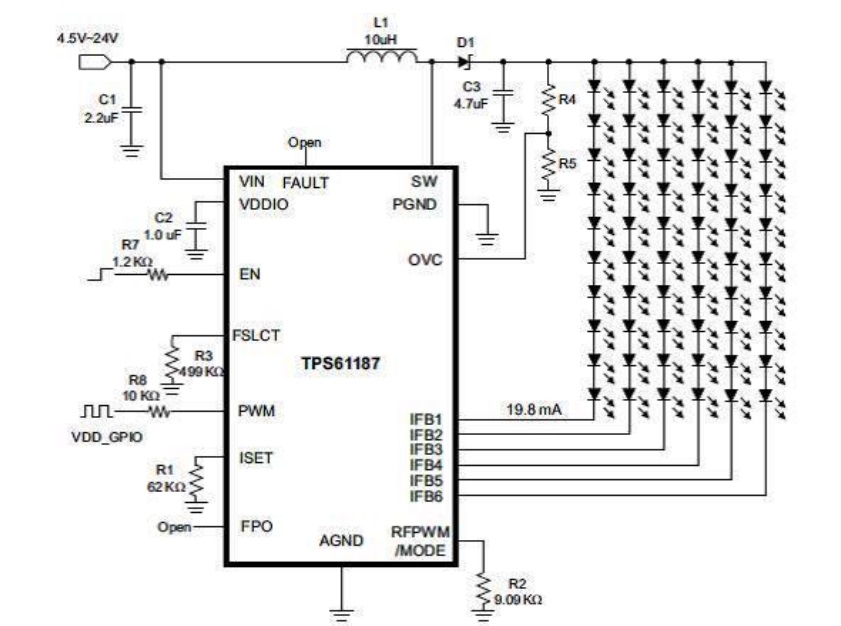
Like we join beads in a garland using thread, I added one by one using my micro tip battery soldering iron. I made mistakes because of the intricacies and precisions required and in the last picture above you would notice that cathode and anode of two adjascent LEDs were facing each other! Then I had to desolder and do it again. After finishing one set, when I checked up, the space utilized by the LEDs were much lesser than the original. When I searched for the data sheet of TPS61189, I got TPS61187 and saw the following circuit which indicated that it can take upto 10 LEDs.
But even then, the length could not be covered. I then decided to give a gap in the joints and continued my eye straining work for many days, doing only for a few mintues at a time. After assembling around two sets, when I tried its fitting inside the metal case, I noticed that it was not seating properly. The original LEDs were fit on its back, but emission of light was on the sides. But such an LED was not available in the market. That’s why I took up this improglio job, which was causing a lot of eye and brain strain. Thus, again this ‘none-else-will-do’ job turned out to be a waste.
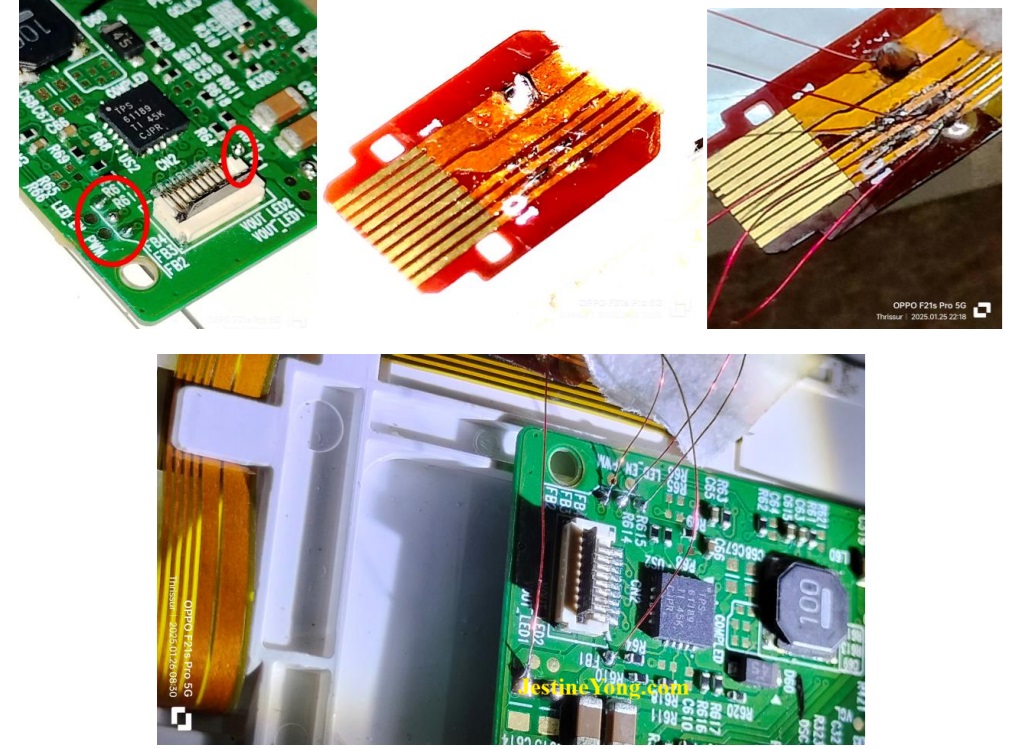
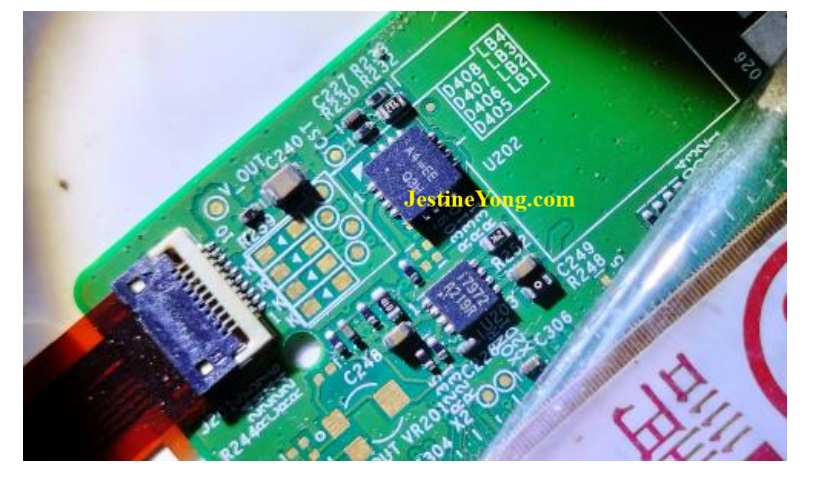
Then weeks passed without finding any solution, though I was combing every where. Then I stumbled upon a monitor, which was ACER make of same size. This monitor was working directly from AC mains whereas LG was working from a 12V adaptor. Nevertheless, I thought of giving this monitor as a free replacement to the hospital and that is why I brought it home for check up. However, this monitor was also having supply to the backlight through the scalar board, but was using a different driver IC. Unfortunately, the LVDS cable of the monitor was damaged and once again my attempts to get a replacement did not yield any result. Then I thought of using its base and backlight for fixing this LG monitor, as the panel was seating perfectly on top of that. For that sake, I placed solder points on the ACER strip as well as the FB1 to FB4 points near the driver IC in the LG. I was careful to select an area that was away from the tip so as to ensure that a reconnection to ACER was possible if attempts failed. Then joined the connections by wire. There were three tracks joined and rails passing parallelly to the LED Strip of Acer. There were independent four tracks and when I tested the LEDs using my LED tester (keeping positive on the common rail and negative on one of the four tracks) all the four sets were working very well drawing a total voltage of 26.5 V for each set, which indicated that there could be 9 LEDs of 3V rated in one set in this also. Let us have a look at the connected pictures to follow the narrations:
The idea was for using the panel of LG and its LED driver and driving the backlight of the Acer and use its base to fit the LG panel, and fit LG’s own board in that. A sort of grafting! After checking and re-checking that I did not make a mistake, I applied power and was glad to see the backlight lit up. Then I turned the other side and looked at the panel; picture of which is self explanatory:
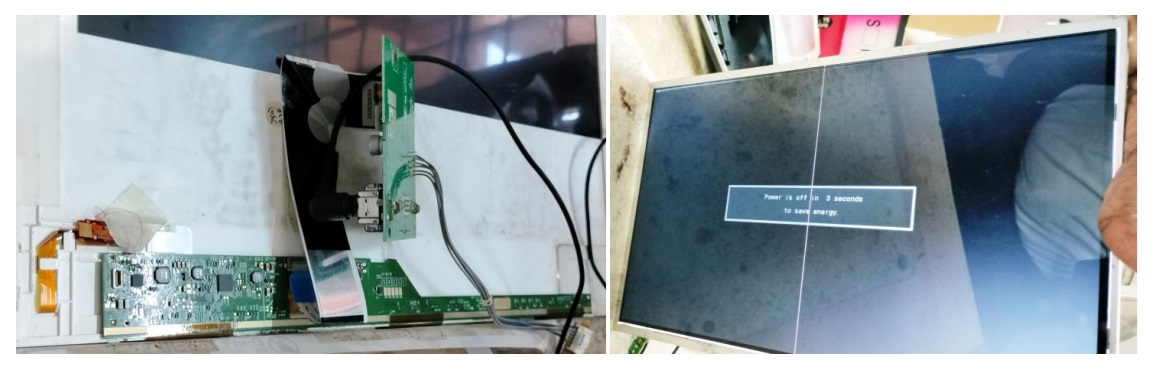
Alas, the panel had developed COF problem as suspected and it had a thick line in the centre. So, the entire innovative efforts went down the drain and I quickly dismantled the TV and put back everything in its original place and abandoned any more attempt to save this LG monitor and tried to fix the ACER by directly soldering one end of the LVDS cable, which is more described in Case (2) below. The monitor was returned by me to the hospital for moving it to the salvage yard.
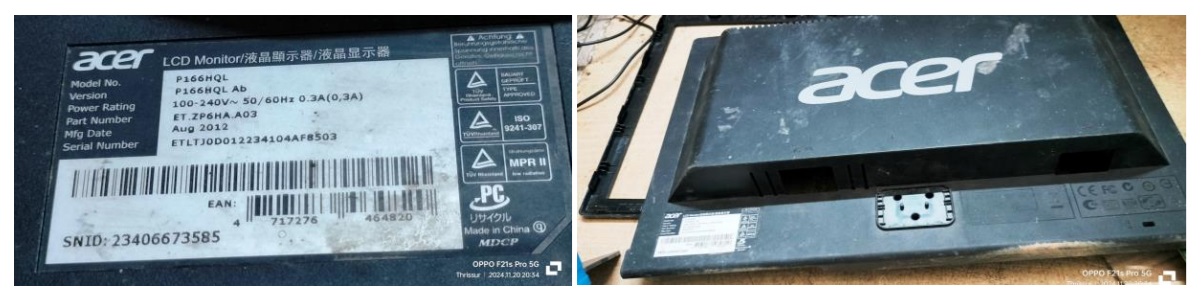
Case (2) ACER Monitor Model No.P166HQL : This was one among the two monitors that I picked up from my techie friend’s place during my visit, in as is where is condition.
On opening and cleaning the inside thoroughly, I noticed that the LVDS cable had got strained and spoiled.
I searched for a replacement of this cable once again like in Case (1) but did not succeed. The most difficult part of service for a techie is non-availability of spare parts and many times, our efforts go in vain along with our precious time and money. Anyhow, that is a part of our techincian’s life and we have to accept it. The strip connecting from the scalar board to the backlight attracted my attention and that is how I tried to revive the LG explained in the first case.
This monitor was also lying with me for weeks and might have got enough shock and vibration while in this dismantled condition, as shifting and readjusting for space when sets poured in was a regular event in my house. But This unfortunately proved costly. After coying with several ideas, I decided to solder the end to the scalar board and took up the panel for that purpose. I was shocked to see that the panel had suffered damage as the two layers in the middle of which the liquid crystal is filled, got split. On noticing this tear, I quickly pressed it back and left it as any spillage in my son’s bed would have adverse consequences. I put the panel inside a polythene cover and kept it away from living areas. In the hurry to discard it, I forgot to click the split layers, but I am sure you would have seen how top layer of the panel is removed for pasting it on another in place of polarizer film, which is covered by me in detail in yet another article. This panel is now preserved for such a reuse along with the PS and mother board.
Missions got abandoned, but a lot of innovative and bitter experiences got collected which permitted satisfactions in the form of solace to get entry into the collecton bag!

This article was prepared for you by Parasuraman Subramanian from India. He is 74 years old and has more than 30 years’ experience in handling antique equipment like Valve Radio, Amps, Reel Tape Recorders and currently studying latest tech-classes conducted by Kerala State Electronics Technicians’ Association. He has done graduation in BBA degree, private diploma in Radio Engineering and retired as MD of a USA company. Presently working as Consultant to Hospital and other institutions.
Please give a support by clicking on the social buttons below. Your feedback on the post is welcome. Please leave it in the comments.
P.S-If you enjoyed reading this, click here to subscribe to my blog (free subscription). That way, you’ll never miss a post. You can also forward this website link to your friends and colleagues-thanks!
You may check on his previous article on Restored A Tampered CD Player MICROMEGA CD-10 Silver
 (32)Dislikes
 (0)
(0)
9 Comments
Leave a Reply


Albert van Bemmelen
November 15, 2025 at 4:28 pm
Everything was clear Parasuraman until the part where you mentioned that the panel had suffered damage as the two layers in which the liquid crystal was filled, got split. After you quickly pressed it back and left it as any spillage in your son’s bed would have adverse consequences. By also putting the panel inside a polythene cover keeping it away from living areas for poison safety reasons. In the hurry to discard this panel you still preserved it for reuse? Which didn't make much sense to me?
Parasuraman S
November 15, 2025 at 7:47 pm
The glasses on both sides which have polarizer sheets in tact can be reused for serving as a polarizer. I have covered that in another article already published. So these two sides of the panele(top & bottom) can indeed be reused in place of a polarizer sheet. Kindly see this link to see how it was done. https://jestineyong.com/short-cut-method-used-for-polarizer-replacement-in-sony-lcd-tv-model-klv-22bx300/
Many thanks for your keen study and expert comments!
Albert van Bemmelen
November 16, 2025 at 8:49 pm
Sadly that previous article was not clear to me either Prarasuraman because the presented photos and the there given explanation were not helping to explain what you exactly did with that also broken screen. A video probably would be much clearer in showing that exact disassembling process?
Parasuraman S
November 17, 2025 at 4:41 pm
I can understand. Only those who handle panels regularly and involved in panel level repairs can follow these. Many thanks!
Albert van Bemmelen
November 16, 2025 at 8:54 pm
By the way - Fixing such a new needed polarizer sheet will be close to impossible in our countries anyway because repairs like these are unthinkable over here.
Muykit
November 17, 2025 at 6:33 pm
Agreeably, videos are in every respect a great learning tool. It may not be your concern that I belong to old school that firmly hangs onto written articles that I'm heavily dependent on. Its all the more reason I'm stuck on this Jestine Yong blog that has superb authors. So, please, Engineer Parasuraman, as you avail videos, spare a thought for my clear cry.
Parasuraman S
November 18, 2025 at 12:09 pm
Many thanks, dear Muykit!
Yogesh Panchal
November 17, 2025 at 6:57 pm
Sir,
it is very difficult to salvage & store this type of material where Monitor/Device models are not running models in our area neither logistic expense is affordable if we want to help someone.
Parasuraman S
November 18, 2025 at 12:10 pm
Yes, for business purpose, it is not economical. But what I am doing is a service to the Hospital and therefore it matters most! Many thanks for your comments, dear Yogesh Bai!