
Certified SMS EVGA 500w 80 Plus Repaired
This PC was brought to the Workshop because it was not powering on. First of all, the Power Supply was checked and it was not working.

The Power Supply was extracted from the cabinet.

It was an expensive SMPS, an 500w EVGA Certified Power Supply 80 Plus (white). Then it was necessary to be taken it into consideration and do the impossible to carry out the reparation. The effort would be valuable anyway.
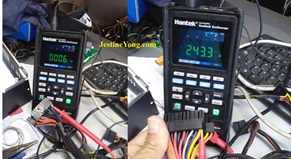
It was decided to apply a method very convenient in my own opinion when it comes to PC´s SMPS repair, and then the repair became easier as I thought. The Digital Multimeter was selected in Continuity scale to test all the v-outs. Some images are shown here.


As it can be seen, there was a short in the blue cable (-12v). It was time to disarm the SMPS and to do reverse engineering of this blue cable.
When it was done, know what? There was a Schottky Diode shorted, as it can be seen in the next image.

It was an SR 2100: SCHOTTKY BARRIER RECTIFIER VOLTAGE RANGE – 20 to 200 V CURRENT – 2 A. The Datasheet can be found by surfing in the web. It was substituted for a similar SB2100: 2.0A SCHOTTKY BARRIER DIODE.
Once it was connected in the PCB, the short had gone, as shown in the next photo.

Then the SMPS was tested with the Power Supply Tester and let´s see the final result.

The SMPS was inserted in its place and the PC started working fine, as it was expected.

This simple but valuable repair was satisfactory to me because another expensive device was saved.
The PC has been working fine for some months till now.

This article was prepared for you by Humberto Rodriguez, one of our ‘Master Authors’ from Cuba.
Please give a support by clicking on the social buttons below. Your feedback on the post is welcome. Please leave it in the comments.
P.S-If you enjoyed reading this, click here to subscribe to my blog (free subscription). That way, you’ll never miss a post. You can also forward this website link to your friends and colleagues-thanks!
You may check on his previous article on Repair of ASUS H81M-A 4th Generation
 (40)Dislikes
 (0)
(0)
15 Comments
Leave a Reply


Parasuraman S
May 17, 2025 at 12:24 pm
Good professional fix due to your expertise! Glad to see yet another useful article from you, dear Humberto! Hope you checked for any dry solder and patched it up!
Humberto
May 18, 2025 at 1:13 pm
Thanks for replying Parasuraman
Waleed Rishmawi
May 17, 2025 at 1:43 pm
good job on the repair. short and to the point..have a blessed day and thanks for sharing
Humberto
May 18, 2025 at 1:14 pm
Thanks, time is gold
Yogesh Panchal
May 17, 2025 at 2:56 pm
Good Job! Humberto
It proves "Expensive" does not always provide good quality.
Humberto
May 18, 2025 at 1:17 pm
Well Yogesh, that SMPS was broken, in my own opinión, by the severe and continuos black-outs in my country.
Albert van Bemmelen
May 17, 2025 at 3:12 pm
Interesting and quick ohmic testing method you used Humberto! And another well presented repair article too!
I see you use a good brand Hantek DMM from which I bought the DSO2D15 Dual- channel + AFG Digital Storage Oscilloscoop 150MHz 1GSa/s with Logic analyzer and Signal generator. Good to know is that after I bought it in 2024 that its price already dropped by at least 45 Euro/dollar!
Humberto
May 18, 2025 at 1:20 pm
Hantek is a leader in oscilloscope. This one has a Function Generator too.
Anwar Yunas Shiekh
May 17, 2025 at 8:43 pm
Looks like the same model as
https://jestineyong.com/power-supply-strengthening/
Humberto
May 18, 2025 at 1:26 pm
Yes Anwar, It looks like the same model.
Mark J
May 18, 2025 at 2:49 am
Humberto good job on the repair. I use that method as well to test the power rails on A PSU for shorts.
Humberto
May 18, 2025 at 1:21 pm
That's an efective method Mark
Anwar Yunas Shiekh
May 22, 2025 at 10:30 pm
Confused, when checking the diode, you seem to have the meter on the voltage setting.
Anwar Yunas Shiekh
May 23, 2025 at 10:53 pm
Definitely my bad, it should indeed be indicating a voltage.
Edd Whatley
May 25, 2025 at 12:22 pm
Humberto . . . . . . .
Magnifico !