
Gecko Got Fried In This Havells Cloth Iron
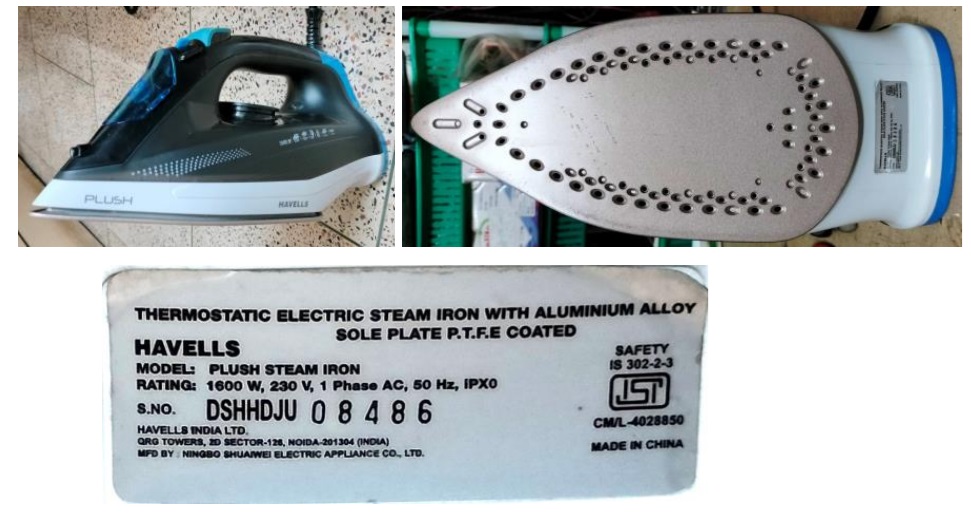
This cloth iron was brought to me by a new customer, recommended by one of my friends. He said that this was left unused for a long time and one day it did not switch on when he tried. I applied power and turned the thermal knob left and right vigoursly with the hope of cleaning any collected dust and still it did not get on.
One of my techie friends, who was an expert in repairing such irons, visited my house for some other purpose and I requested him whether he could help me open it. This iron has its own complexities and unless one has some experience in handling such types of irons, it is most likely to get damaged. He firstly removed the three screws of the rear cover holding the mains cord. Then asked me to check continuity of the cord, as he was of opinion that the major defects are caused by mains cord. But it was found ok. Then he forcefully lifted the temperature adjusting knob, upon which two screws holding top portion were visible. These were long screws to reach the bottom metal plate. Two screws inside the mains cord compartment were also removed. There was one more in the front, concealed by a plastic bush. It was in front of the jet and this bush was to prevent water leaking in and causing rust of the screw. But the top portion did not budge. So, he forcefully removed the two jet spray and steam spray control knobs and also pulled the water duct. (You will be able to follow all these better after you see the pictures provided below). When the top cover was removed, one more screw was found underneath it. After removing that screw, the top black portion came off.
We spotted almost dried up carcass of a gecko, which evidently had got electrocuted long back. Now let us look at the pictures:
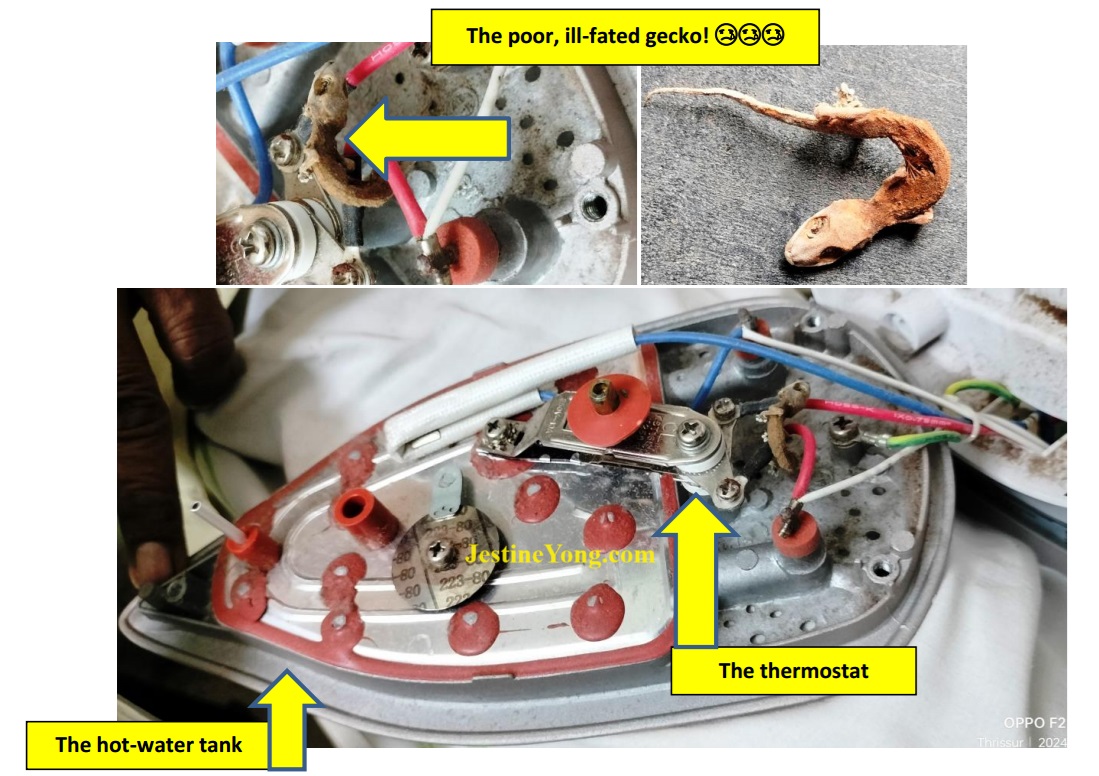
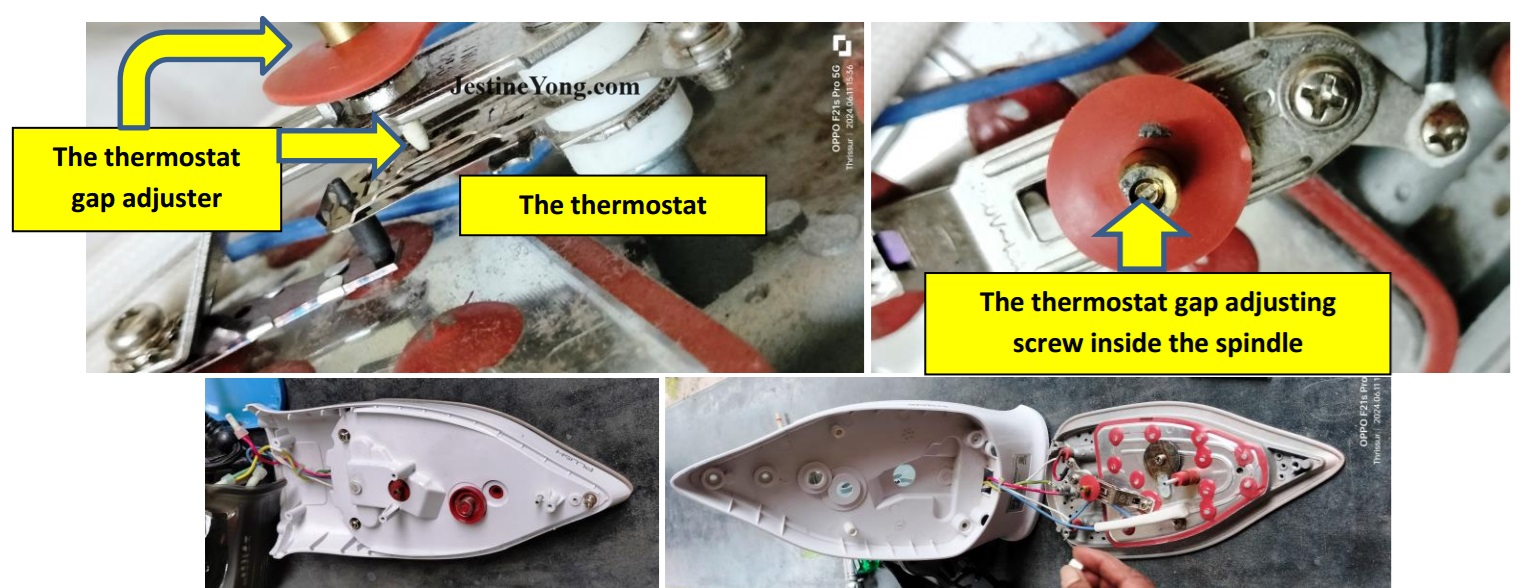
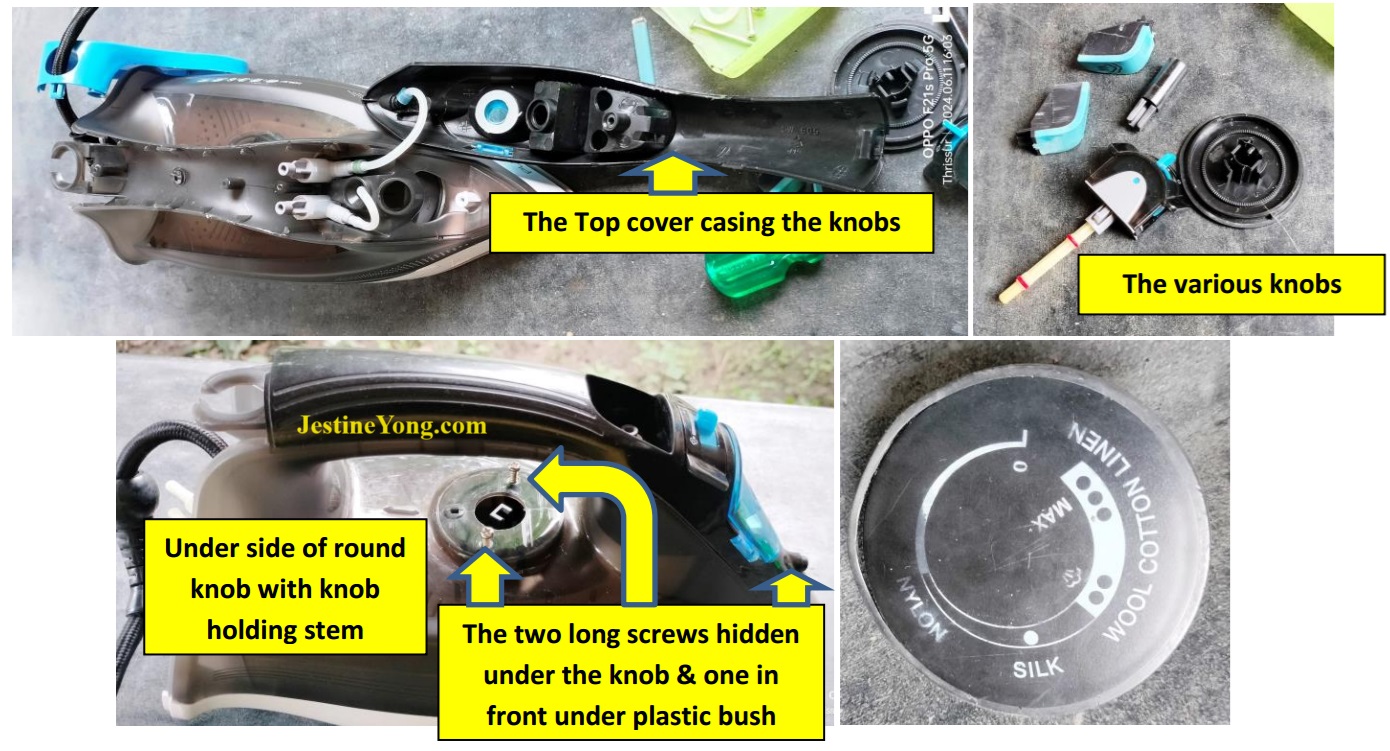
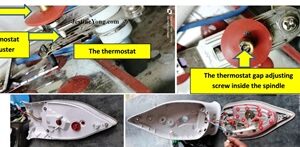
To those who are novices like me, I shall explain step by step how to open this iron. (1) Remove the three screws from the rear cover that hold the power cord. (2) Pull out round knob using a little force as it has locks inside. Then pull out its stem. (3) Remove the two steam/water spray controls by pulling it out sideways. (4) Open the water pouring lid and pull out the water control knob. (5) Then unscrew two screws inside the power cord compartment that holds the top cover, and other two screws (one inside the knob cover and another at the front under a plastic bush). Then the top portion will come off. Then we can see the thermostat with its gap adjusting mechanism. Caution has to be ensured so as not to tear off the water carrying tubes. There is a tube from the tank to the bottom for heating up the water and another to the jet which carries the steam. The top portion of the metal housing has the hot water tank.
Then my friend asked me to check the continuity of the coil, which was found ok. Then he asked me to hold the multimeter probes on the two connectors of the thermostat, with multimeter position turned to X1 position. There was no continuity even after turning the control spindle fully. Then he cleaned the contacts using WD40 and cotton. Even then it did not show any continuity. So he adjusted the gap by turning the small screw inside the metal spindle, upon which there was contact. He said that over a period, this adjustment has to be done because of wear and tear, especially due to heat.
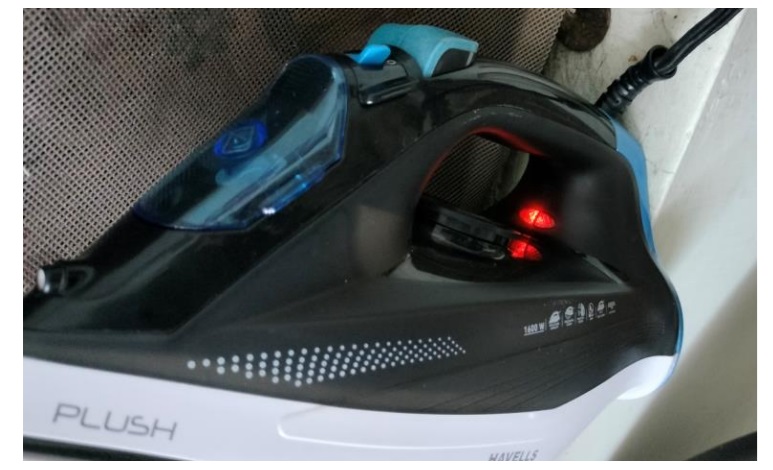
Then I powered the unit and found that the heater was working very well and the indicator lamp was also on. When the thermostat was adjusted to its minimum, the iron got cut off after a few minutes heat. So, it was functioning very well. After this test and allowing the iron to cool off, he himself fixed everything back and powered it up to recheck that everything was ok. I was only taking photographs now and then to share this useful info to the techie-friends across the globe through this dedicated forum of our great Jestine Yong! Caution: Be sure of putting back washers and bushes in the appropriate places, lest it would come out loose while fixing it back. We had to re-open the top cover as one of the bushes got loose and fell inside, making noises while moving the iron.
The study mission got accomplished and double satisfaction, i.e., one that of learning and another that of result achievement, got collected in the bag!

This article was prepared for you by Parasuraman Subramanian from India. He is 74 years old and has more than 30 years’ experience in handling antique equipment like Valve Radio, Amps, Reel Tape Recorders and currently studying latest tech-classes conducted by Kerala State Electronics Technicians’ Association. He has done graduation in BBA degree, private diploma in Radio Engineering and retired as MD of a USA company. Presently working as Consultant to Hospital and other institutions.
Please give a support by clicking on the social buttons below. Your feedback on the post is welcome. Please leave it in the comments.
P.S-If you enjoyed reading this, click here to subscribe to my blog (free subscription). That way, you’ll never miss a post. You can also forward this website link to your friends and colleagues-thanks!
You may check on his previous article on SAREGAMA CARAVAN SC-04 USB/FM Music Player Survived Floods!
 (35)Dislikes
 (0)
(0)
10 Comments
Leave a Reply


Yogesh Panchal
August 10, 2024 at 10:31 pm
Good Fix! Sir
Parasuraman S
August 11, 2024 at 5:18 pm
Many thanks, dear Yogesh!
Albert van Bemmelen
August 10, 2024 at 10:37 pm
Indeed opening and fixing these kind of devices takes a lot of time!
I once preceeded you in such a similar event from years back. Which also took a lot of examining to find and fix the problem in this old repair: https://jestineyong.com/braun-carestyle-3-steamgenerator-iron-repair/
Parasuraman S
August 11, 2024 at 5:20 pm
Yah! It is very time consuming and irksome too because of the complexities involved in fixing it back! Many thanks for your expert comments and the link, dear Albert!
Mark J
August 11, 2024 at 2:59 am
That is something you do not see everyday. I wonder how the gecko got in to the iron in the first place. Good job on the repair.
Parasuraman S
August 11, 2024 at 5:21 pm
There is a gap under the wire connecting part. Many thanks, dear Mark!
Imoudu.O
August 11, 2024 at 4:43 am
l have repaired quit a number of this cloth pressing iron,including laundry iron whish has seperate water tank.The area were one has to be careful when reassembling it, is to put various screws sizes in the right places.Thanks for sharing
Question sir: In the use of tv 3 wires power module install on universal tv board and the minimum voltage out put at secondary diode is 20V instead of 12V, what component should i suspect? help pls.
Parasuraman S
August 11, 2024 at 5:23 pm
If the module has a potentiometer, just adjust it to deliver 12V. If not check all the feedback circuits, especially the resistor values. If any resistor has increased its resistance, this can happen. All the very best!
Waleed Rishmawi
August 13, 2024 at 2:20 pm
I used to work on these kind of irones for my mom but they are not being used any more in my home town due to the fact that there are shops in my area who clean, iron clothes and you get them ready in less than one hour or two. I understand the complications in taking these devices apart but once it was done for the first time it gets easier. thanks for sharing and have a blessed day
Parasuraman S
August 13, 2024 at 8:27 pm
Yes, you are right! First time is very difficult and it becomes easier as we get exposed to it many times! Thanks for your comments, dear friend!