
Portronics Dash 12 Portable Speakers Repaired- Part 2
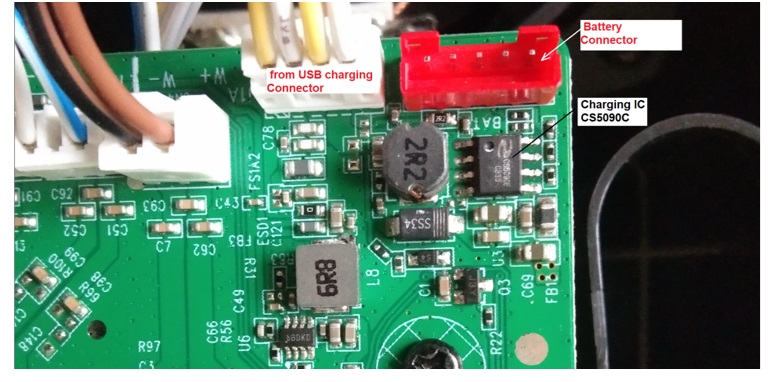
Checked Voltages ON Charging IC here also voltages are fluctuating.
I found battery out voltage on pin no.5 is fluctuating between 1.8v to 4.8v. so I suspected Charging IC Here. But what about Battery Voltages, is battery OK & not charging because of Bad Charging IC?
Again I checked with another Working charger adapter still same symptom.
I searched in my parts storage to see if there was any chance I could find the charging IC, but I couldn’t find it. I put everything aside because I just can’t think of anything. Because for troubleshooting we need some working spares with us. I contacted some of my part suppliers but they also not sure about this IC because they also not having any enquiry for this IC till the date.
Now I just diverted my mind from Charging IC to the battery let’s check what is in side.
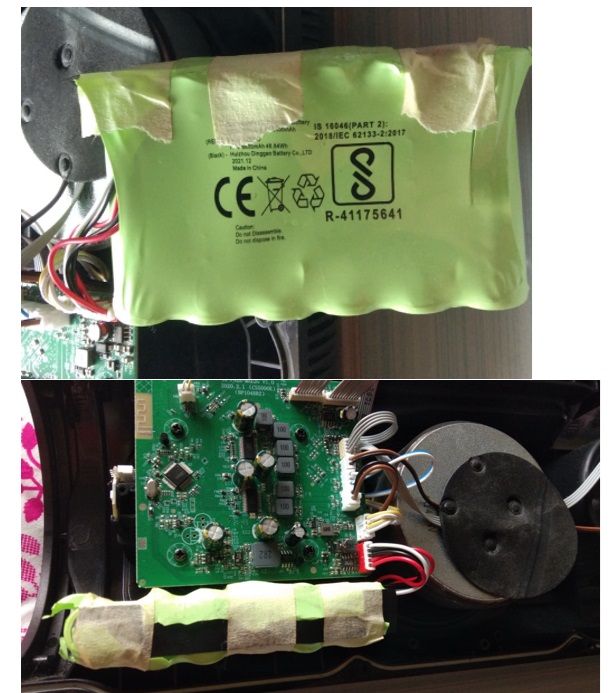
I removed Plastic Cover from the battery, I found 9 Li-ion Battery cells LR18655 with one BMS Circuit.
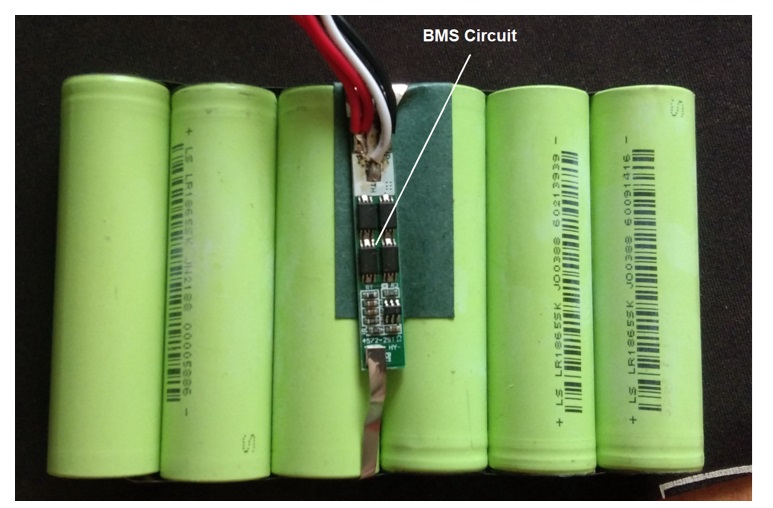
For curiosity I decide to check each Cell voltages. these batteries are divided in two different bank. One bank is showing 3.5v & another bank is showing 2.3v.
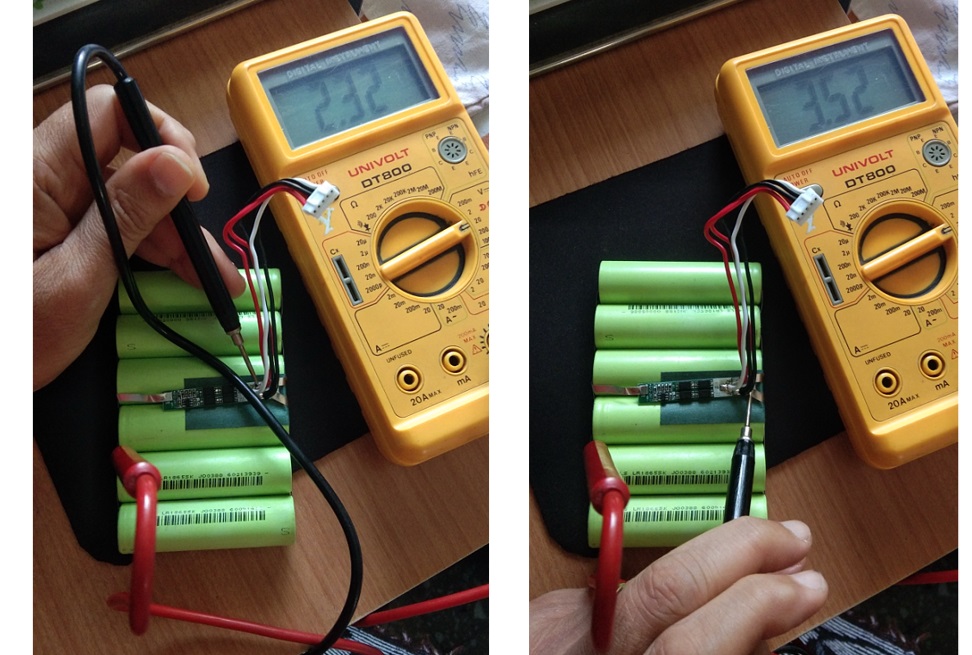
3.5v showing healthy Battery bank but another bank showing 2.3v is degraded. So I removed cells one by one from 2.3v side batteries for testing again.
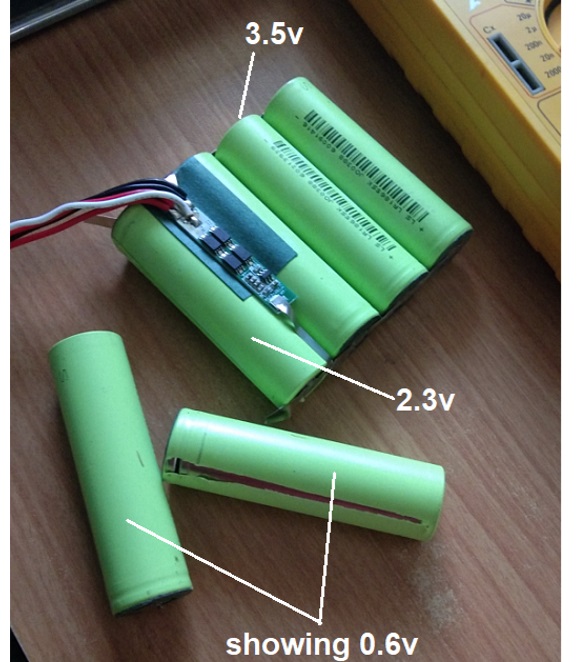
After removing 2.3v Bank cells two cells found totally out of range, showing 0.6v. & remaining one shows 2.3v. two banks 3 cells connected Parallel hence all Batteries showing same voltage. Here photos of original battery connection.
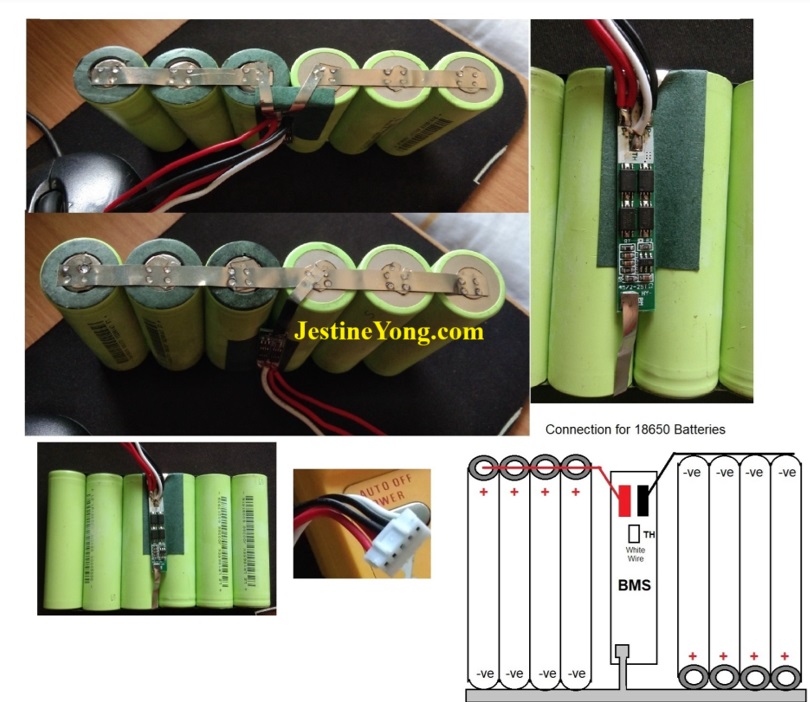
I took out 3 Laptop Battery Cells 18650 from my salvage storage. (Different model also works but matter of size, these 18650 are of same size as LR18655) By taking thick Copper wire I soldered battery points as follows.
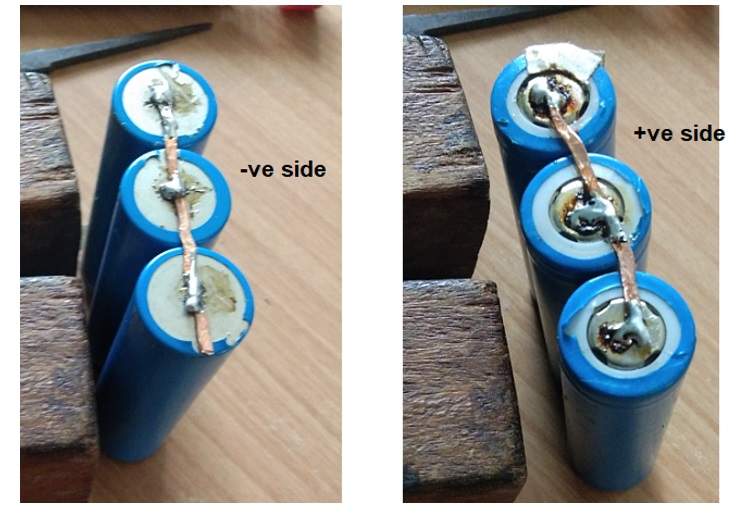
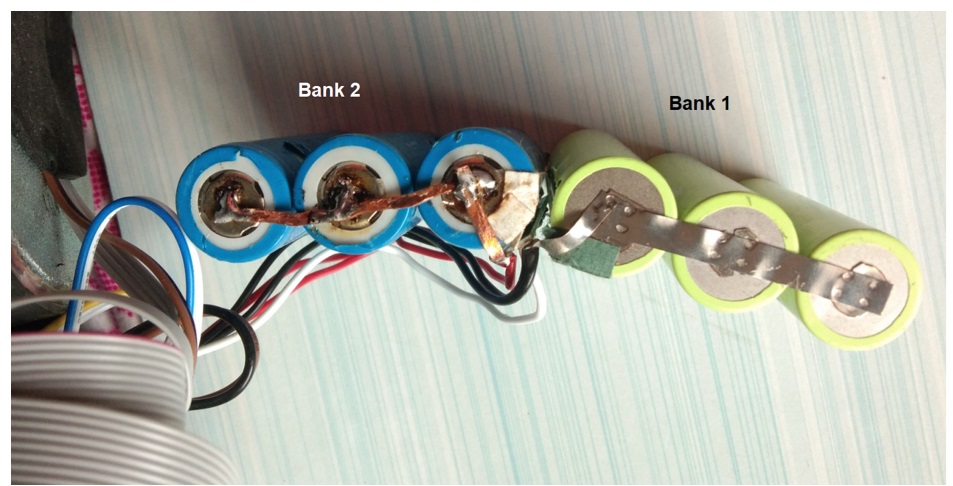
And for testing, Soldered batteries back as per original pack pattern.
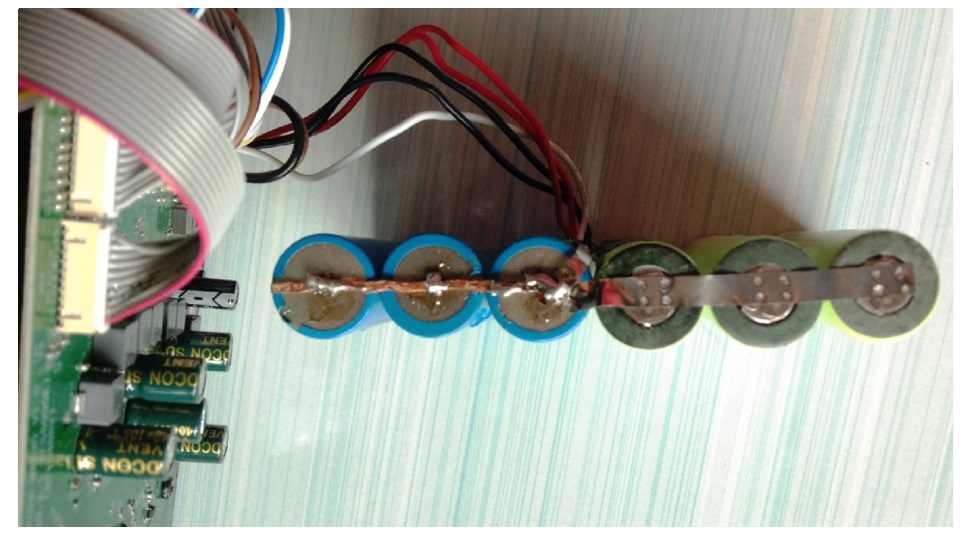
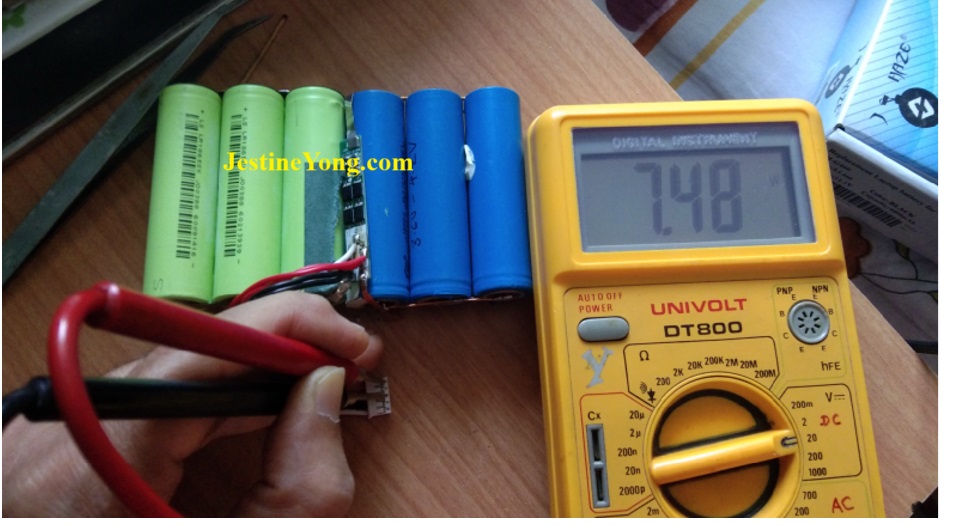
After connecting battery pack I checked voltages. It shows 7.4V as per original specification.
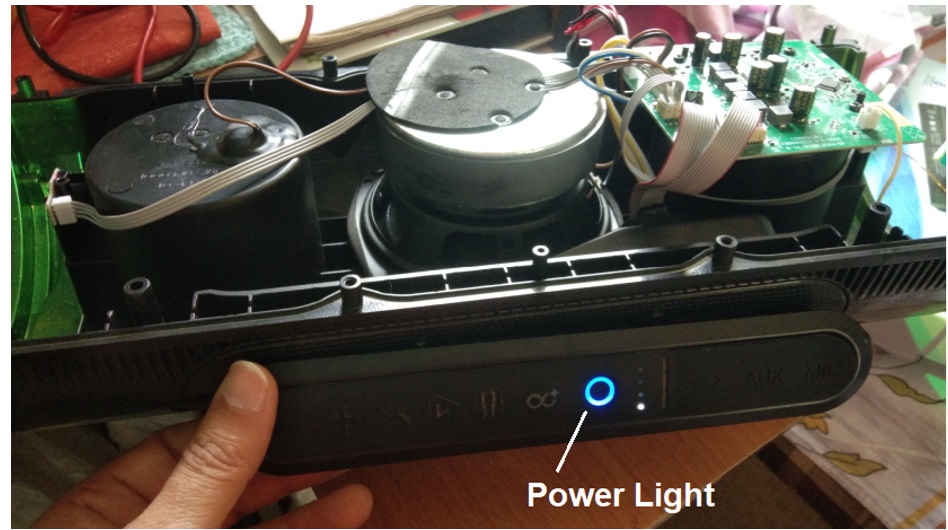
Now connected these battery pack to the circuit & pushed Power Switch & unit is turned on with audio of Bluetooth Pairing.
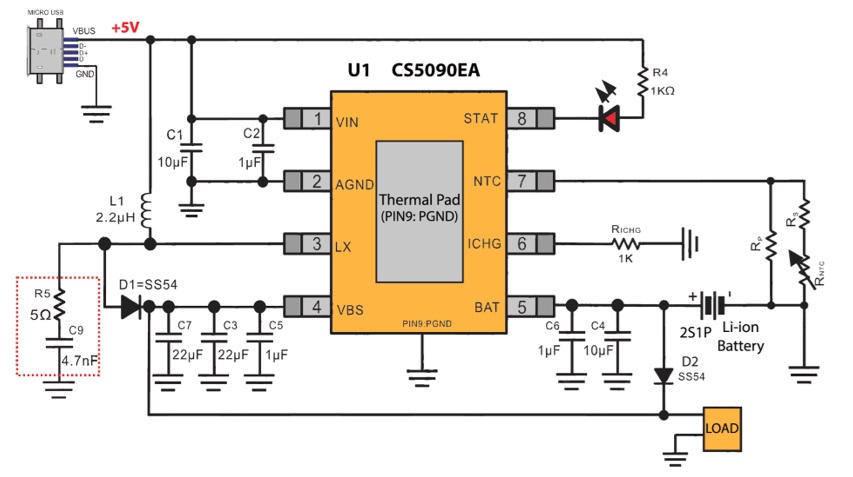
Paired Speakers to my mobile Bluetooth & played some songs for one hour it works fine without problem. Now checked voltage on Charging IC pin no.5 in charging mode it shows 8.6v & no more Voltage Fluctuation. Now question is why voltages are fluctuating without Battery & Unit is not turning ON, on adaptor?
Every charging IC circuits having Protection criteria as per the design by the manufacturer. This circuit protects the battery against common dangers, such as overcharge, over discharge, short circuit/over current, over voltage and temperature. Protected batteries are safer to use in our devices.
Also rechargeable Batteries using BMS Circuit. Which Monitor over voltage /Current conditions, to avert the battery voltage from increasing, the BMS can disconnect the charging circuit or decrease the charging current. To adjust the charging profile dynamically, some modern BMSs can also interact with the charger & protect battery as well the Circuit.
Voltage fluctuation is also one of the reason. It’s normal. Chargers/power-supplies / voltage-regulators and their ilk usually rely on voltage fed back from their output to compare with a fixed reference. It is possible when Load is Connected. Here in charging circuit Rechargeable Battery is Load, when it not detects load or O/p voltage are below the working range the feedback circuit act accordingly hence voltage starts Fluctuating.
In most of portable audio system charger adapter is used only for Battery charging, because high power Speakers need high current feed to amplifier circuit which is not possible using charging adapter. Yes, possible if designed by the Manufacturer originally.
Now printer is ready for assembling. (I asked customer if he need new battery pack, will take long time to arrive, he told me just make it in running condition till the new battery pack is arrive and he will pay accordingly for old & new Batteries).
Wrapped back the Battery pack using its original cover & applying paper tape on it & installed back in its place.
Now unit is assembled and ready to pick up.
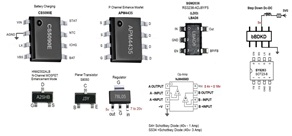
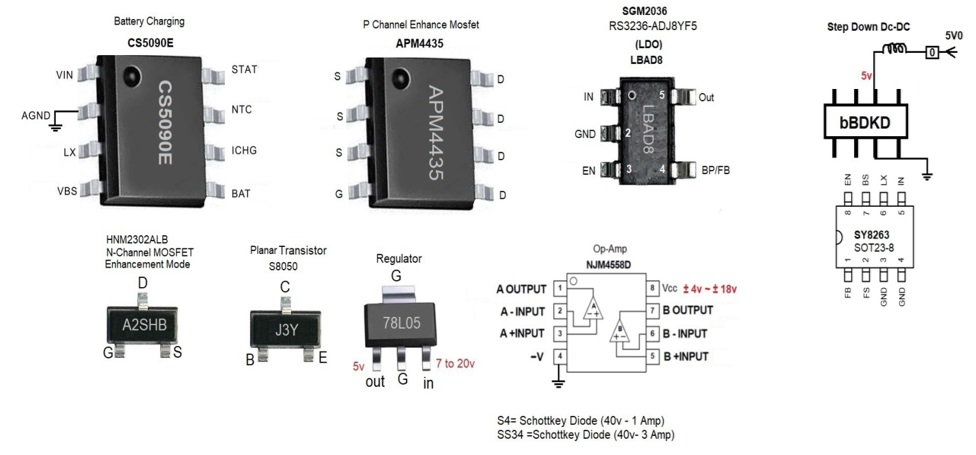
Some SMD Parts Code used in this PCB

This article was prepared for you by Yogesh Panchal who works as a Computer Hardware Engineer in Mumbai India.
P.S- Do you know of any your friends who would benefit from this content that you are reading now? If so, forward this website to your friends or you can invite your friends to subscribe to my newsletter for free in this Link.
Note: You can check his previous repair articles on Philips MMS 430 Volume Control Unit Modification Wiring Details
 (40)Dislikes
 (0)
(0)
17 Comments
Leave a Reply


Mark
April 6, 2025 at 4:36 pm
Well done Yogesh on your good logical, diagnostic thinking.
Yogesh Panchal
April 7, 2025 at 11:05 pm
Thank you! Mark
Albert van Bemmelen
April 6, 2025 at 5:10 pm
Good fix Yogesh! Never heard about any 18655 lithium ion batteries though? Only about the larger 21700 cells.
Yogesh Panchal
April 7, 2025 at 11:06 pm
Thank you! Albert
Parasuraman S
April 6, 2025 at 6:29 pm
Excellent articles providing a lot of information and technical stuff to be grasped! Very useful indeed! Many thanks for sharing, dear Yogesh Bai!
Yogesh Panchal
April 8, 2025 at 6:01 pm
Thank you! Sir
Mark J
April 7, 2025 at 12:15 am
Yogesh very good article. Good troubleshooting. Thank you for sharing.
Yogesh Panchal
April 7, 2025 at 11:06 pm
Thanks! Mark J
Waleed Rishmawi
April 7, 2025 at 3:43 pm
well done my friend. I had a problem with BMS for a drill battery that was not charging and I could relate to your situation. I found two bad batteries and that was stopping the whole battery from charging up the way it should be. I am glad it is fixed and thank you for the detailed article. have a blessed day
muykit
April 7, 2025 at 8:37 pm
Thanks Yogesh. If this is of any intererest to any reader, well and good. If you want to test the cells of your car battery that has cell covers that can be removed, first place the +ve probe of a multimeter on the batteries +ve post. Then take a metal rod long and thln enough to pass through the cells opening right into the electrolyte. With the meters -ve probe firmly held against the metal, 0 V should be indicated on the meter. Now, while the meters +ve probe remains held onto the batterys +ve post, the metal rod is dipped into the following cell. the meters readinig should be around 4.5V. As you proceed further to the next cell by moving only the metal with the -ve probe held onto it, the voltage increase should always be 2V or slightly more. If the votage increase will be say, 1.5V or less, that will meam that the particular cell is faulty and that indicates the the battery is almost becoming faulty since the cells are connected in series. Also when recharging, the bad cell bubbles alot and overheats.
Yogesh Panchal
April 8, 2025 at 6:06 pm
you're welcome! Muykit
Thanks for sharing tips to check car battery.
Yogesh Panchal
April 7, 2025 at 11:07 pm
Thank You! Waleed
Iwelin Iwanow
April 13, 2025 at 10:03 pm
The IC is combined as the first part from pin 1 to 4 is a BOOST DC-DC converter that raises the voltage from 5V to 8.6V and from pin 5 to 8 is the charging part. Since one section is damaged and has a lower voltage, the charging current exceeded the maximum and the built-in protection stopped charging and that is why you had fluctuations for pin 5. After eliminating the problem, the charging current does not exceed the maximum and charging starts and everything is fine.
Yogesh Panchal
April 15, 2025 at 3:44 pm
Iwelin Iwanow,
Thanks! for clear the doubt.
Ivelin Ivanov
April 13, 2025 at 10:07 pm
As for the opening, I really congratulate you. You have seen yourself in a miracle with so many and hidden screws
Yogesh Panchal
April 15, 2025 at 3:50 pm
yes... Evelin Ivanov, it is very tedious to open this type of device and secondly it has to be kept open and safe until you order the parts and it till it arrive
Ivelin Ivanov
April 21, 2025 at 11:07 pm
I have this problem too when I order and sometimes it takes more than 20 days and when the part finally arrives I wonder what that part was for.