
Surprise Help By Techie Friend For Replacement Of Backlight In ONIDA LED TV Model LE050FNAB2
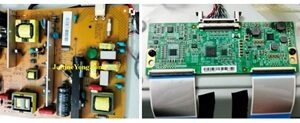
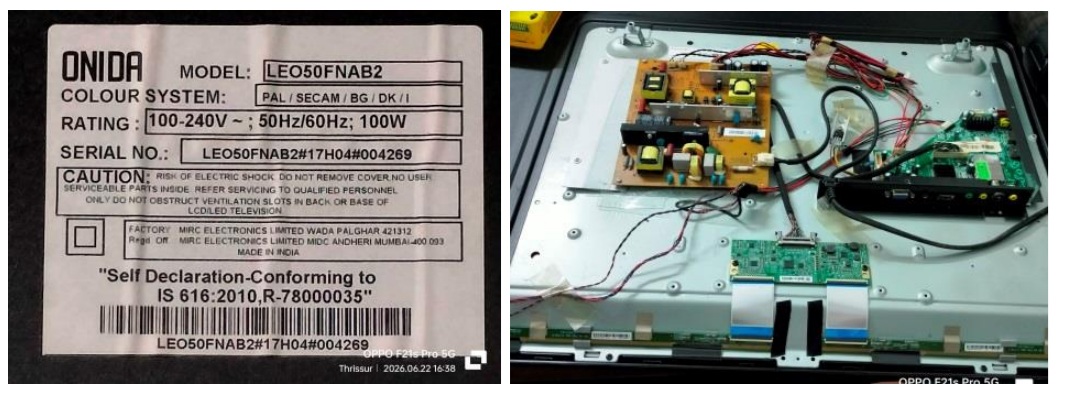
This TV belonged to a close neighbor and childhood friend. (He and his wife have supported me and my wife quite often during the time she suffered a stroke.) The complaint was ‘no display’ when switched on in the morning. I went to his home to study the nature of defect. The TV was getting on and responding to RC for release from standby. To a question whether sound was ok at that time, he could not confirm, as the TV was in mute mode, having the input audio diverted to his external amplifier. No display with sound generally indicates backlight failure, whereas with sound also going off, it could be a slave power supply or mother board related problem. I looked for the presence of backlight by gently tapping the panel at several places. As no flash of light was seen, it was presumed a case of backlight failure. He dismantled the connections and moved it to a make shift arrangement for keeping the TV face down so as to open the back cover for further inspection.
Though he told that this TV was working for about ten years without any problem and no work was done before, I pointed out to him that the TV indeed had been opened before. Firstly, the tamper proof ‘warranty void if opened’ sticker was missing. Secondly, there was a modification done in the mother board with a regulator wired and fixed outside on the metal body. The Power Supply board had an odd size insulator sheet underneath, which generally should match the PCB size. All these indications were news to the customer and he expressed his worry and concern and wondered whether the shop which sold the TV had cheated him. I explained to him that it was sheer luck that I opened the TV in front of him, lest doubts would fall on me if another tech happen to open the TV in future for any service. After cleaning the inside using my cordless vacuum cleaner, I applied power from the nearest outlet and checked for voltage generation at the LED backlight. I could get a reading of around 200V.
There were two connectors with two separate pair of wires going in to the BL. I used the LED tester to check the BLs and found that one set was ok, but the other did not light up. So, he moved the 50” TV to my home for further investigation, as it required total dismantling of the TV. Since handling of a 50” panel was a risky job and required a helping hand, I called a few of my techie friends, all of whom were busy with pending works and could not give me an immediate appointment. Then I was planning to take it in my car to my usual places, as and when one of them got free.
Throwing a pleasant surprise, one of my such techie friends called me up to inform that he was coming to fix the TV of my another neighbor next day, which also happened to be my off day. That was a CRT TV case and I only had referred the customer to him, since I stopped doing CRT TV service. As this techiefriend was an expert in handling panel level services and had done many jobs for me in the past, I was glad and told him to attend to this TV also, which he consented though he had very busy schedule. The planning was that he comes to my home directly the next day, remove the backlight and give a sample to me and proceed to the other neighbor’s, in the meantime of which, I would go to the electronic shop and fetch the replacement, if available or place order for the same.
I got up very early in the morning next day and did a thorough retouch of the power supply board, including hundreds of SMD components, as it had dry solders in many places. Then cleaned the board thoroughly using IPA, connected two separate 10K resistors from the 12V to the power on and backlight on, and checked & confirmed the presence of Voltages. My techiefriend arrived later in the morning and dismantled the TV to take out the backlight. He also used my tester and isolated the defective strip. There were 10 strips of 3V each with a length of 482mm. These technical details were recorded by him to add it to his data bank. Here are a couple of pictures of the inside:
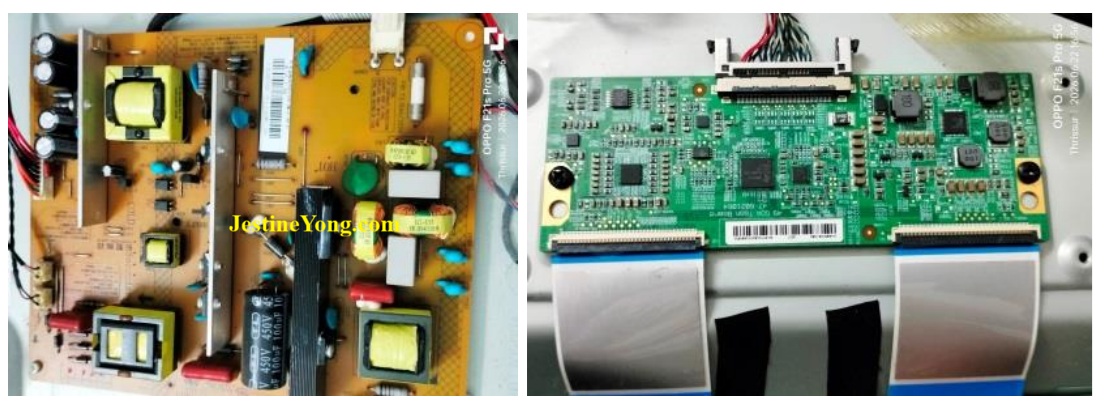
After giving the sample strip to me, he went to the other house and I proceeded to the shop and luckily was able to fetch exact replacement set of ten strips. Though only one strip was defective, it is not at all advisable to replace only that as a mismatch in current would cause failure of the others one by one sooner or later, which might call for total dismantling of the TVs again and again. The reflector sheet was also thoroughly to clear the dark marks and dust. The insides of the removed frames were also cleaned. Following are the pictures covering the backlight replacement:
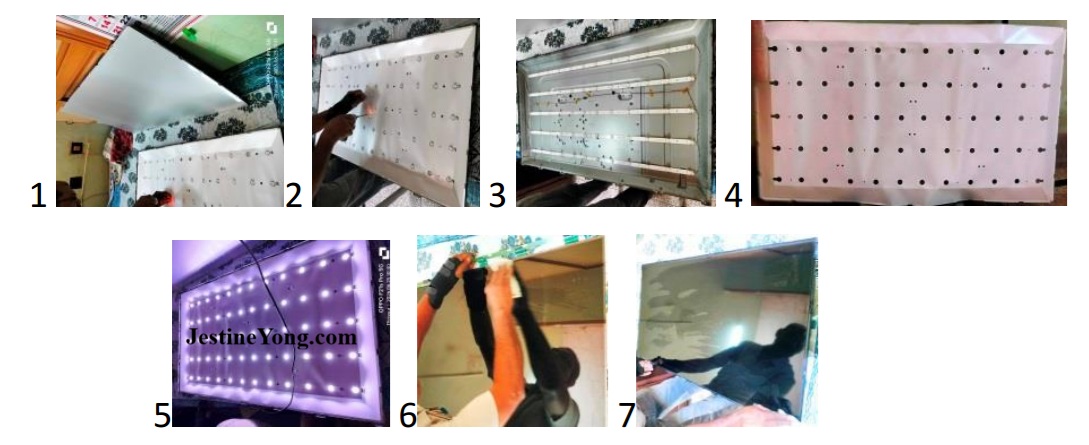
The process flow for removal of the backlight goes like this: (1) Use a thin but strong plastic card and run it under the outer frame on all four sides of the panel to detach it from the frame. In this TV it was free. Then remove the outer frame from its screws and locks going all around using appropriate tools. (2) Disconnect LVDS cable to the scaler board.
(3) Peel off the scaler board carefully and gently from its bottom sticker taking care not to tear or damage the COFs. (4) Remove the grounding stickers from the scaler board leaving the other side on the metal body. (5) Ensure that the scalar board is free from its holdings and gently turn it to the panel side and stick it with paper tapes. (6) Insert a plastic card under one corner of the panel and run it all around the four sides and ensure that the panel is detached from its holding bed. Caution: Take care not to tear off the side COFs, if they are present. (There was none in this TV) (7) Insert a strong plastic card to gently lift the panel on a side and insert your fingers and bring it to a balanced position from both sides and gently lift your side of the panel up, resting the other side on the frame and hold it gently and lift it vertically. (8) Keep it gently in slanting position at the wall (Picture 1) (9) Remove the frame of the panel seat from all sides from its screws and locks. (10) Mark position and number on the diffuser sheets at bottom right corner with sketch pen to put it back in same order. (11) Remove the diffuser sheets and keep it on the panel in slanting position. (Picture 1) (12)
Remove screws/locks from the reflector sheet and gently take it out and keep it in slanting position on the wall (Picture 4) In some TVs this will be affixed to the frame. We need to peel it off gently without causing any damage or tear. (13) Study the backlight arrangement and understand its series or parallel connections. (Picture 3) (14) Use LED tester and find out which strip is faulty. (15) Remove the strips one by one from its connectors and check the numbers and markings on it. There will be A/B markings and we too should buy exactly matching strips. In this TV all were A types.
(15) Check voltage of any one of the strips that are ok or any one of the LEDs to know the voltage. In this it was 3V. (16) Replace all the strips and fix them as how they were fit originally. (17) Use the tester and find out whether the connections are ok and all lights are coming on. (18) Refit reflector sheet on its screws and locks which also handles the job of keeping the diffuser sheets at appropriate height without heaving in. (19) Apply power and check whether all the LEDs are lit evenly. (Picture 5) (20) Fix diffuser sheets as how they were. (21) Fix the panel-holding frame back and ensure that all screws and locks are in place and the surface of the panel seats is even. This is a very crucial step. (22) Keep away the TV and lay the panel on a smooth surface like a bed or thermocol sheet. (23) Use glass cleaner spray taking care not to exceed and keep it away from the COF/Scalar area. First do the cleaning inside of the panel. (Picture 6). Then gently turn the panel over and do the same on the front. (Picture 7) (24) Once again keep the panel in slanting position on the wall. Bring back the TV and keep it in position to place the panel on top. (25) Hold the panel gently on both palms and fingers vertically in centrally balanced positions, place the other side gently on the panel frame ensuring that it is within the frame and gently lower your side and keep it on the frame. (26) Look at all sides and run your fingers gently to ensure that the panel is seated properly and evenly. (27) Fix the outer frame in its locks and screws. (28) Keep the TV face down and fix the scaler board back, gently removing the paper tape. (29) Fix all the grounding and holding tapes back and ensure that they are in its original place. (30) Clean and connect the LVDS Cable. (31) Apply power and check that the backlight gets on and the display is normal. (32) Measure the voltages that go to the LED and ensure that these are within the loaded limits. In this TV five strips at each side were connected in series and both these connections were again in series. This meant that with 6 LEDs in each strips x 5 strips, the voltage required was 30×3= 90V. The measurement was around 90, which showed a healthy drive and load! In case this is more, we need to adjust the drive by removing current/voltage adjusting resistors on the LED driver Mosfet. (Use of the word ‘gently’ repeatedly was to stress and drive home the importance of it.)
Now I think the readers who are new to this, can understand how extremely difficult it is to change the backlight of an LED TV, especially when they are of large sizes. The total work is very intricate, time consuming and tedious. It requires a lot of focus, attention and concentration. One small mistake can cause damage resulting in heavy loss. That’s the reason, why many technicians do not undertake works that requires panel removal. But my techiefriend was an experienced and expert in handling such works. It was a sheer luck that this customer got him to do the job on the TV.
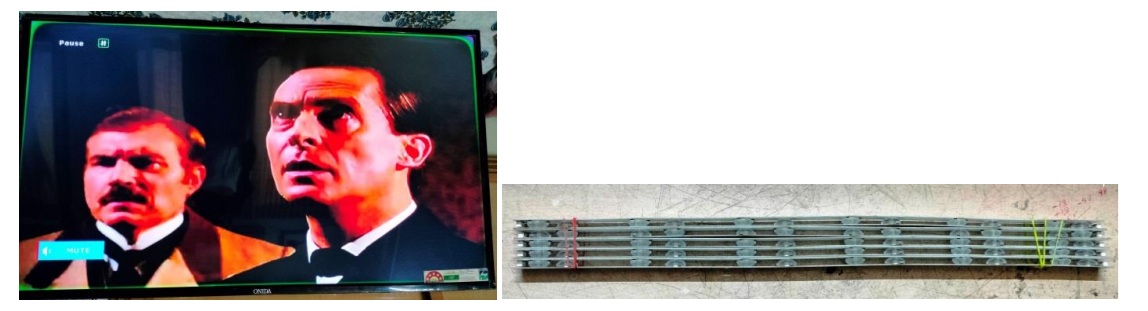
After finishing all the work, the TV was left in on condition with my usual Sherlock Holmes movies for many hours. My techie friend was given a good cup of tea and snacks as a token of appreciation. I called the customer and introduced my techiefriend and showed him the TV in working condition. My techie friend went for attending to his next job, taking only a nominal charge from me as this was not an exclusive visit, the benefit of which was passed on to my customer who also was a family-friend. Here is the picture of the working TV and that of the discarded LED strips that were handed over to the customer.
The back cover was fit after ensuring proper working of the TV and my customer friend took it to his home.
Replacement of the speakers was not done, though the cone papers had suffered cracks, as the user had connected the sound input to his audio system, as already mentioned by me in the beginning of this article. He also settled my bill promptly, thanking me for the service done. Mission accomplished with a lot of vigor, enthusiasm and three pronged satisfaction which got a warm welcome by the collection bag and its inmates!

This article was prepared for you by Parasuraman Subramanian from India. He is 76 years old and has more than 30 years’ experience in handling antique equipment like Valve Radio, Amps, Reel Tape Recorders and currently studying latest tech-classes conducted by Kerala State Electronics Technicians’ Association. He has done graduation in BBA degree, private diploma in Radio Engineering and retired as MD of a USA company. Presently working as Consultant to Hospital and other institutions.
Please give a support by clicking on the social buttons below. Your feedback on the post is welcome. Please leave it in the comments.
P.S-If you enjoyed reading this, click here to subscribe to my blog (free subscription). That way, you’ll never miss a post. You can also forward this website link to your friends and colleagues-thanks!
You may check on his previous article on Self-Sacrifice Of A SONY LED TV Adaptor Model VGP-AC19V32 To Save Its Master From Lightning
 (16)Dislikes
 (0)
(0)
6 Comments
Leave a Reply





Albert van Bemmelen
September 19, 2026 at 11:48 pm
Another professionally carried out large 50 inch tv repair with an also in length large detailed explanation! Of which I therefore skipped reading most of it as it sadly only motivates me not undertake such risky tv repairs in the near future any time soon. And my guess is that these poor serviceable television sets soon will all be replaced by much better designed and constructed sets without these led backlight troubled sets. And probably just as fast as all previous 3D televisions now have completely disappeared from the stores.
Parasuraman S
September 20, 2026 at 11:16 am
That is a sort of suicide thinking! Ha! Ha! We all will be jobless then! We want troubles to be there to get fed! I can understand your feeling as you had a bitter experience trying to handle one of your brother's set! Many thanks for your comments, dear Albert!
Mark J
September 20, 2026 at 3:02 am
Great article Parasuraman very informative great job. Thank you for sharing these articles.
Parasuraman S
September 20, 2026 at 11:17 am
Many thanks for your comments, dear Mark!
Jim
September 20, 2026 at 3:17 am
Great Repair!, You are right this is a very delicate repair being careful not to Crack the panel and very tedious changing leds and led strips .. This type repair will make you more neverous then a long tall cat in a room full of rocking chairs!
Parasuraman S
September 20, 2026 at 11:18 am
Ha! Ha! What a comparison! Many thanks for your hilarious comments!