Repair Of Two Washing Machines
This two washing machines were sent to me for repairs by my sister in-law from far distance with complaints of not powering ON. One machine is plastic manual type, while the other is lg inverter automatic washing machine (frontloader).
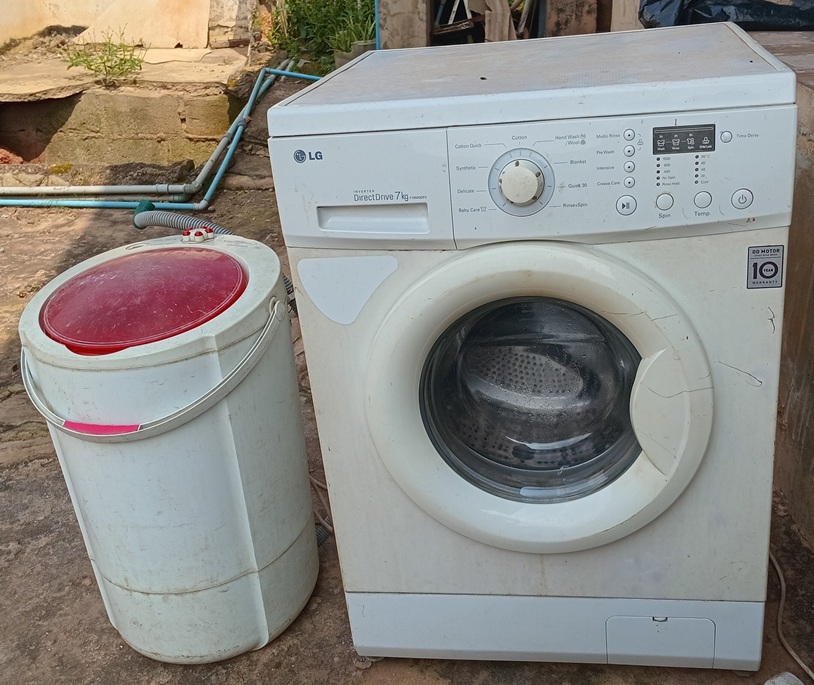
Putting the two to test,I did confirm the complaints.
Since I find it very easy to repair the plastic one, I started on it first.On troubleshooting it I discovered the a/c cord is strained with many black taps on it, and drain pipe is also leaking. I replaced the two items, when tested machine again,it works well, I even wash some of my clothes with it.
Now to the more complicated automatic washing type…in troubleshooting this type, you have to diagnose whether fault is mechanical or electronically/electrically. Electronically,this has to do with the two electronic boards ( mainboard and display panel board).
This machine is also ‘direct drive’ type….meaning it does not use motor to drive the drum with the use of motor belt, rather it’s coil is directly attached to bottom of drum which makes it direct drive, being driven by signals from mainboard to ‘hall sensor’ at different speeds rates.
So if you want to know if problem is coming from mainboard or board fried or not,all you have to do is, just unplug machine from main socket, open machine door and hand turn drum clockwise,….if there is beep sounds,it means board is not fried,but if no sound…meaning board is mostly fried.Let me explain more, you may wonder where the power is coming from to beep, when DD coil is rotating, it generates its little voltage/current in operation, so when hand is use to rotate drum fast enough, it generates little power to give beep…easy test, isn’t it.
So in my case, machine didn’t give bleep…meaning there’s problem with mainboard, so dismounted top cover, remove board to my workbench, then separate mainboard from display panel board. I also check on the emi small board which is separated from mainboard completely(standalone), which it’s fuse is found to be open,remove emi and replaced it with a working one.
One side of mainboard is covered with strong white plastic which I have to cut open to have access to other side of board.
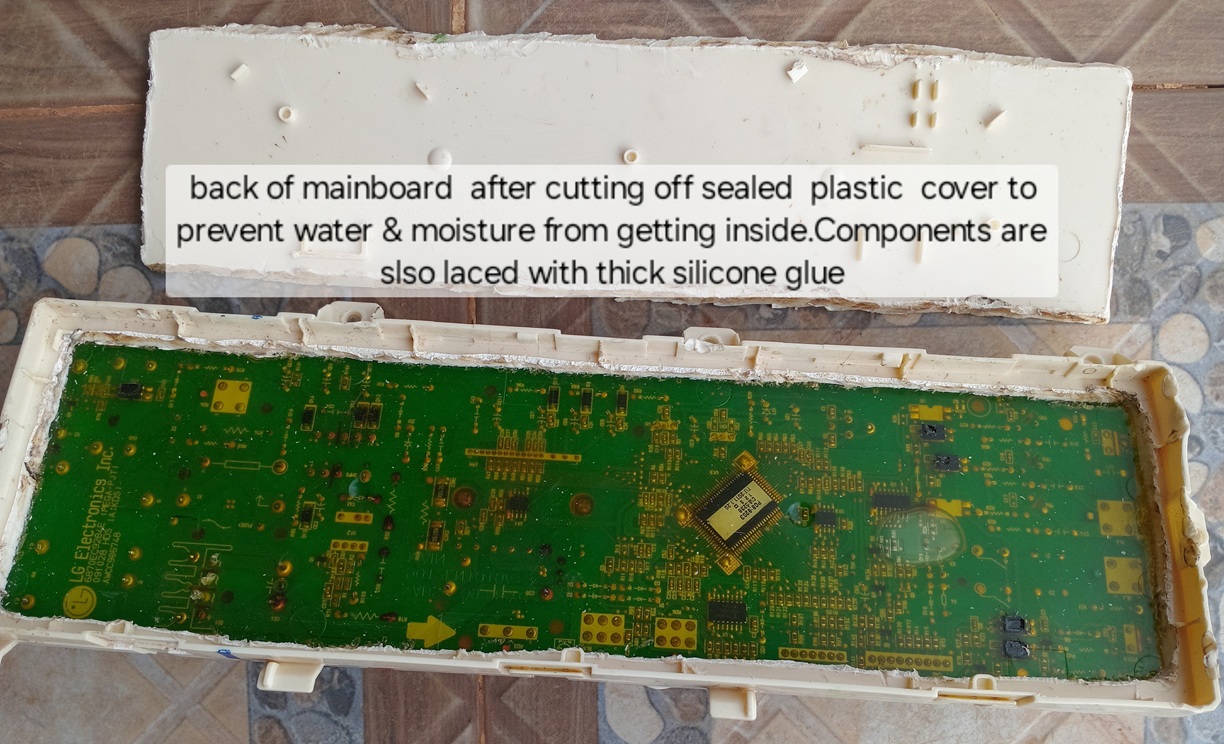
Under this white plastic are sets of components covered and sealed up with silicone coating.

Click here to check out Washing Machine Repair Ebook
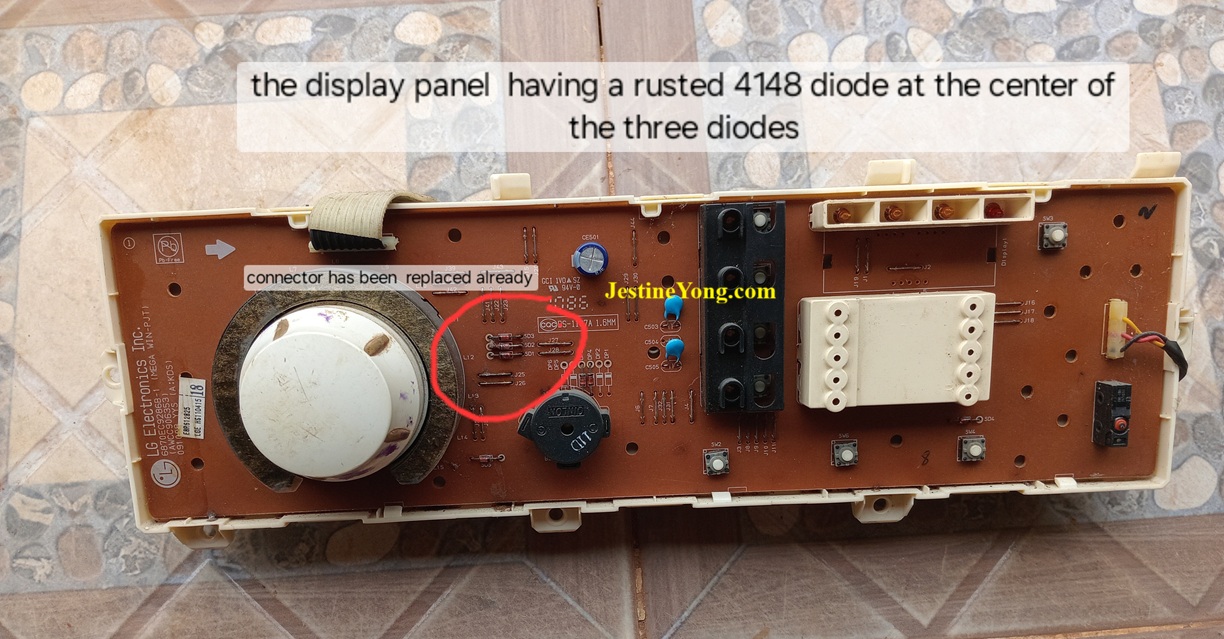
Mainboard components are covered with thick transparent silicone at both sides. So I decided to start with display panel, on observing panel,I found a 4148 diode that has rusted with no contact to solder pad which I then replaced, also connector from panel to mainboard has strained which i replaced, these are only faults with display panel.
Then move on to scrutinise mainboard,there are many smds and few through hole components on this board, on observation, there are 5 optoisolators with no makings on them,
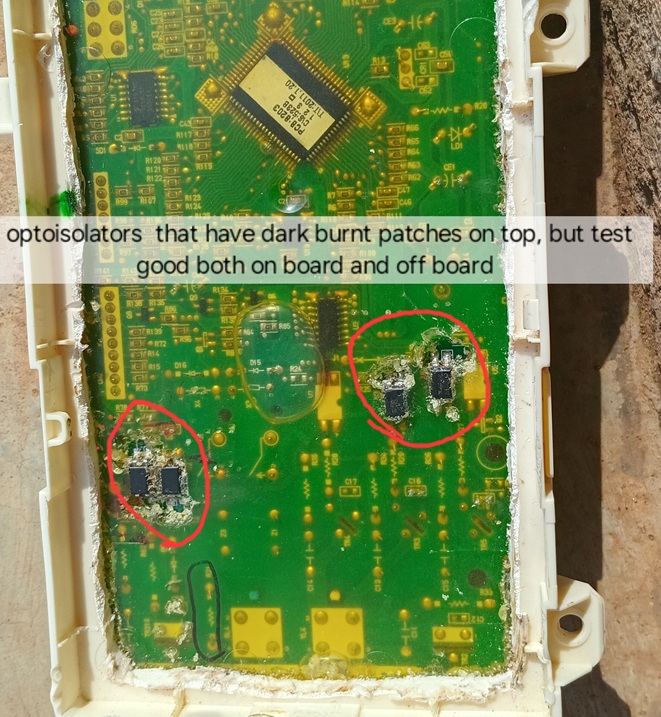
but I know what they are, still then I ask Google AI about this to be sure, which was confirmed is 817 optoisolators, these ic have burnt dark patches on silicone,so scrap silicone on them off, to be able test them, they pass test, but I still soldered 2 off board and replaced them because these have more dark patches on them more than others.
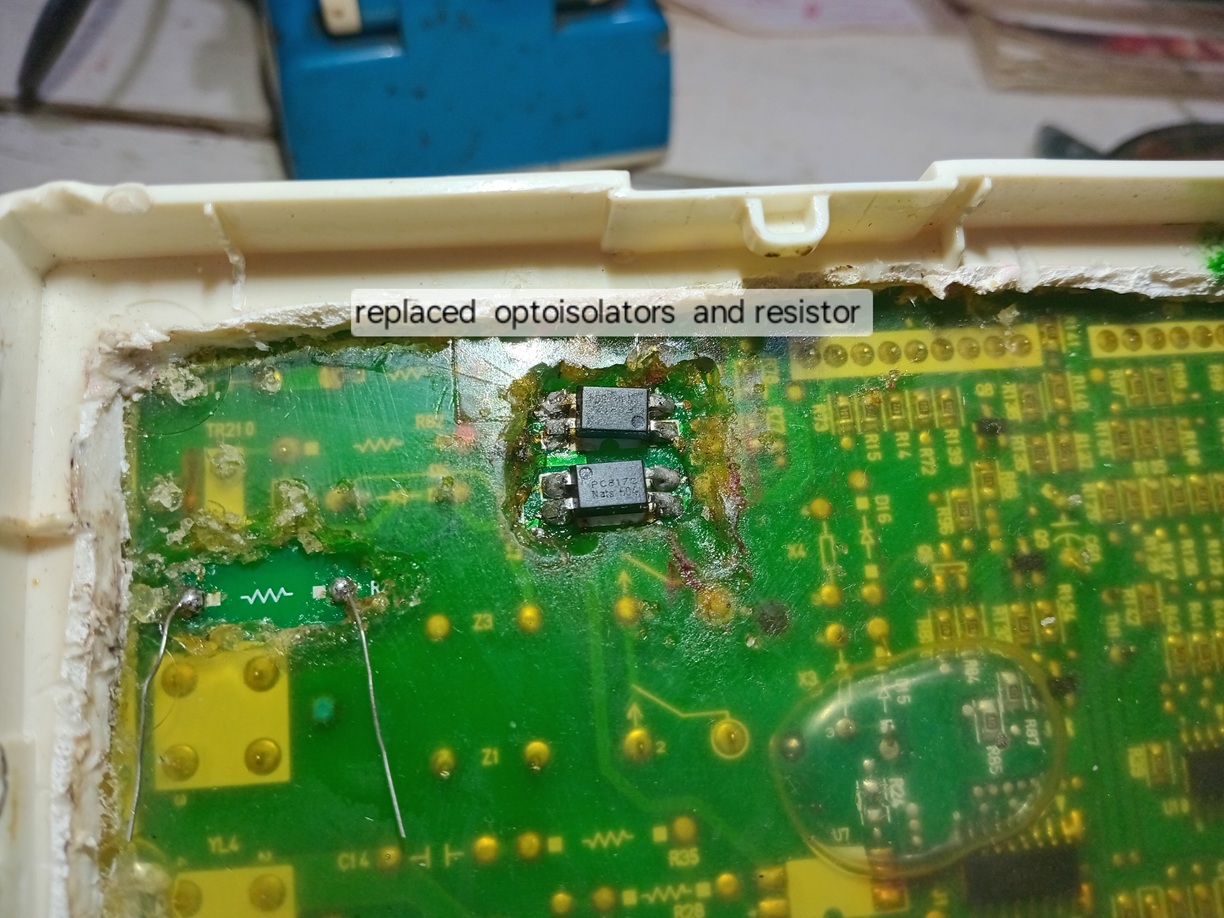
What causes these optoisolators to be heated up, I don’t understand, but the owner complaints of regular power outages in her area.
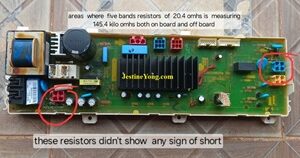
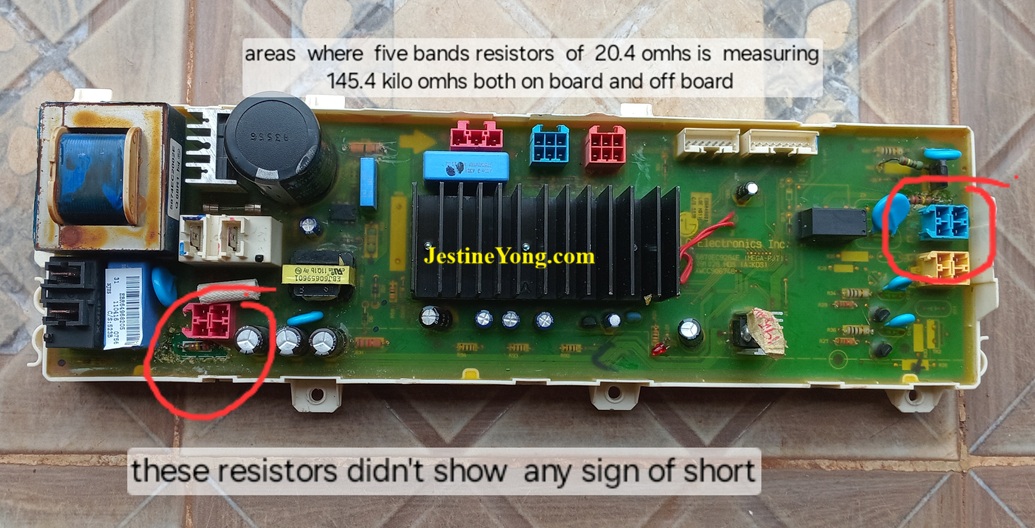
I kept on testing components on this board and I came across two separate resistors of 20.4 ohms in value, having 5 color bands:red,black,yellow, gold,green,but on measuring them both on board and off board, gives 145.4 kilo ohms,so I did replaced them thinking they have increased in values,so as I continue troubleshooting,I came across another resistor of value 20 ohms: red,black,black,gold,when I checked it with metre,it’s 20 ohms,this gives me a puzzle!!, then I ask myself why would the manufacturer use a 5 color band which on normal resistor color band chart is 20.4 ohms,but it’s giving 145.4kilo ohms, on two different places on the mainboard and they are not shorted.This calls for investigation I suppose…..is this not to deceive technician who wants to repair such board as I have been deceived I guess,
Now follow me with this logic, 145.4 kilo ohms resistor is to allow certain amount of current to pass through it, base on its resistance value, going by the on board value of 5 band resistors,now that I have replaced these 145.4 kilo ohms resistors with 20 ohms resistors, having been misled by its 5 colors band, if I power ON,this replaced new resistors will certainly allow higher current more than normal to pass through the circuit which will certainly burn the board. Certainly these 5 color bands resistors are 145.4 kilo ohms, not 20.4 ohms.
So having arrived at this conclusions, I removed the replaced 20 ohms resistors and returned back the original ones.
Having done this,I decided to power mainboard on workbench, having connected it to display panel, when switched On while on workbench, it came to live again
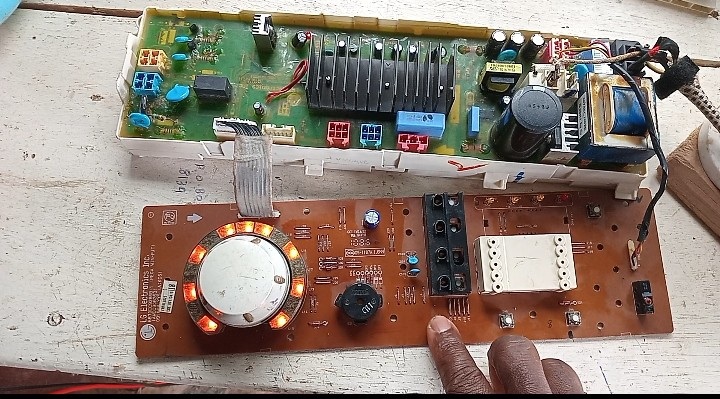
but it was ONing and OFFing intermittently meaning there still problem, infact it got to a point it was not ONing again while standby remain lit on the green board. If stdby stay lit, it means green board is ok, but 5V or 12V is not getting to display panel. Separate display panel again, comb through it again, noting to suspect of, then I decided to run solder patching all over all solder pads on this display panel, then assembled both boards together again,power it on bench work, it beeps, infact all press buttons work fine.
Mount boards unit to front panel of main washing machine body to see if machine will work. Now to do this, i have to first carry out self test by putting machine on ‘self test mode’. This mode helps you to check or test if all functions are working and machine can complete a washing cycle, infact it checks if drum rotates at various different speeds, hall sensor, if water in-let valves are good, pressure sensor, drain pump, temperature operation(heat element) and will tell you if any of these is faulty or not. When it was confirmed all these functions are working except the heat element which has got burned
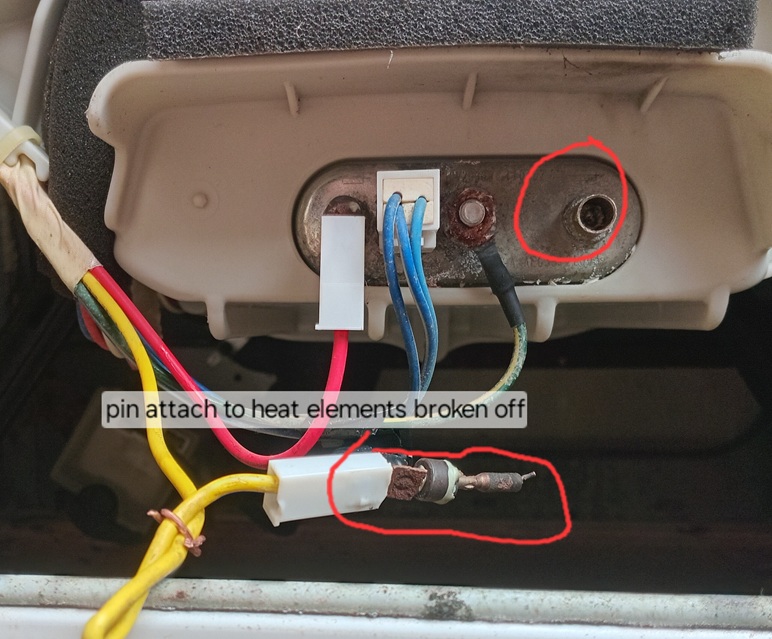
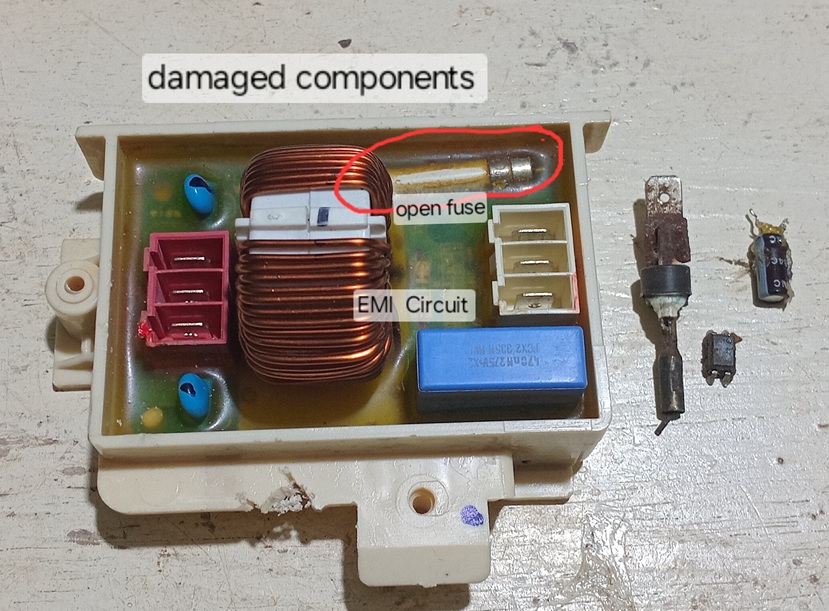
and the owner was not ready to replace it. Then l put some clothes into drum and set washer on a normal complete washing cycle(pre- wash..30mins), see extra pictures below:
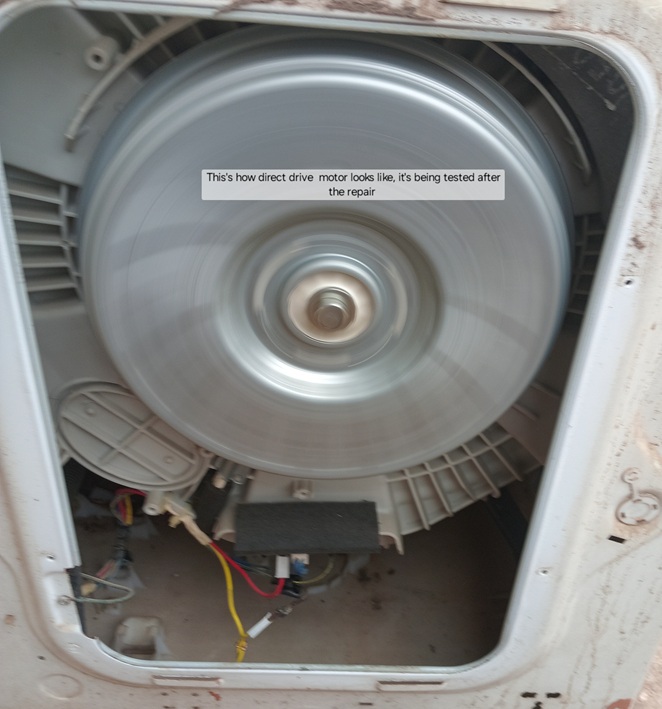
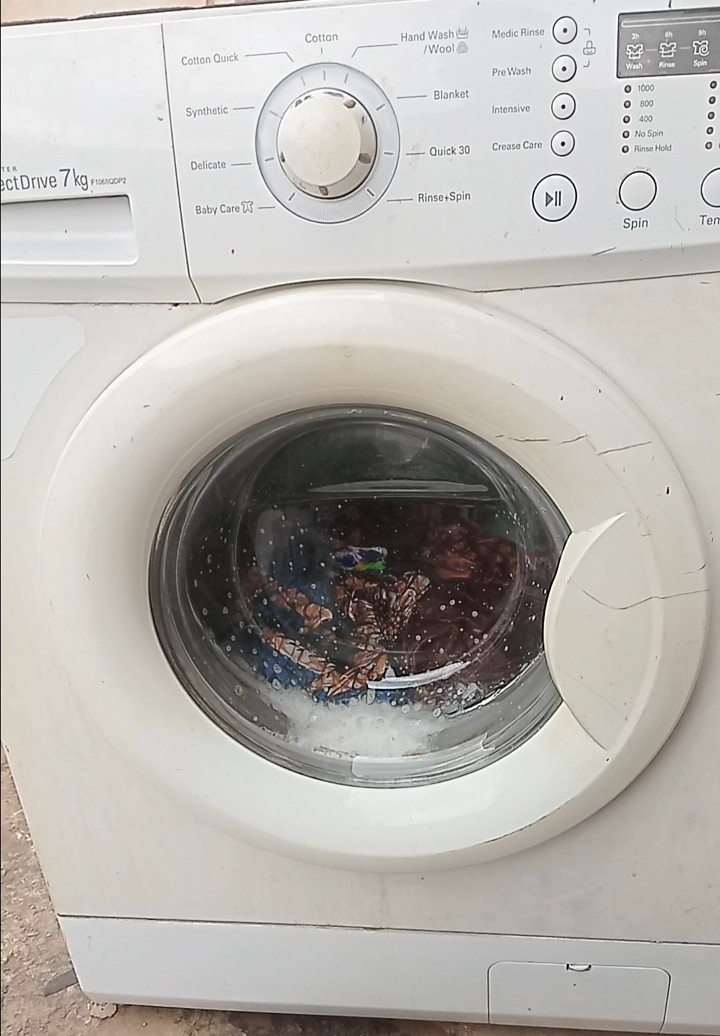
Washer at washing stage. I then call my sister in-law for collection of the two washers, infact she and my wife were both very happy. This’s the finished repair work.

This article was prepared for you by Imoudu Onwumah from Nigeria. He is 62 years old and has just 3 years experience in electronics repairs. I started career in hotel industry as a chef, but then I was doing repairs only in electrical repairs as a hobbyist. In 2018, I decided to learn about electronics which through Jestine’s electronics e-books and holding my hand, am an electronics techie today.
P.S- If you enjoyed reading this, click here to subscribe to my blog (free subscription). That way, you’ll never miss a post. You can also forward this website link to your friends and colleagues-thanks!
Note: You can read his previous article on Hand Fan Repair
 (1)Dislikes
 (0)
(0)