
Roborock H6 Stick Vacuum Roller Brush Not Working
This Roborock H6 Stick Vacuum cleaner seemed to have a mind of its own. One minute the power head was not working, next minute it was working constantly.

Also, when the brush head was operating, the main vacuum motor would not switch off and it was only by refitting the entire unit back onto its charging station, that it would turn off and start charging. One of the features of this vacuum is that the software can ‘sense’ when the brush head is attached and then raises the motor speed to compensate for the extra load.
I had to diagnose if it was the brush head that was faulty or whether the software was not detecting the brush as a load. After testing all the wiring and the brush head motor for continuity, I decided to substitute the brush with an equivalent load and therefore if the main motor worked correctly, it would be a brush head fault.
Using Watts Law, Ohms Law and the specifications on the side of the vacuum, I was able to determine that the current draw would be 3 Amps.

I substituted the brush head with a tail light globe from a car. This draws 1.78 Amps and would not stress the hardware.

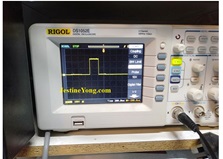
Using this load also allowed the main vacuum motor to operate correctly. After connecting my oscilloscope, I wanted to see the software operating the system.
With only my oscilloscope probes attached, the circuit would send a pulse down to the brush head, then voltage would drop to zero. This proved that a load was required to operate the software and increase the main motor speed.

OK, now it was determined that the brush head was at fault, it was time to diagnose the brush head circuitry.
I was surprised how simple it was. Only a few capacitors and resistors with a Mosfet at the centre.

Testing was easy and the Mosfet was found to be shorted.

Upon closer inspection, the circuit board appeared to be darkened around the Mosfet.

I tried to buy a cheaper 7R504PL Mosfet, however, I could not find one on the usual sites. I ended up paying $1.50 per Mosfet, yet the shipping was $24.00! You can understand why some choose not to get their appliances repaired, but rather get a replacement item.

After removing the faulty component, I found a metallic material over the base of the Mosfet pad. I thought this might be liquid metal, which I was not familiar with. After some attempts to remove the remains and further research, I decided to just use solder as the base on the thermal pad. If I had to do this repair again, I might use a different method. There are many opinions on how to remove liquid metal that has gone hard. Using a heat gun, the Mosfet was replaced. I checked that the readings were correct before carrying out a ‘road test’.
This was done quietly in my electronics lab, so my wife didn’t ask me to vacuum the entire house……..I have been caught before!
With the vacuum restored to working order and tested, it could now be placed back on the charging station.
If you are interested in this repair, you can see a video on my channel following the link below:

This article was prepared for you by Mark Rabone from Australia.
Please give a support by clicking on the social buttons below. Your feedback on the post is welcome. Please leave it in the comments.
P.S- Do you know of any your friends who would benefit from this content that you are reading now? If so, forward this website to your friends or you can invite your friends to subscribe to my newsletter for free in this Link.
Note: You can check out his previous repair article on Squealing Noise In Graphic Card Repaired
 (33)Dislikes
 (0)
(0)
13 Comments
Leave a Reply


Tree
September 20, 2025 at 10:28 am
Good job sir
Mark
September 20, 2025 at 3:00 pm
Thank you very much.
Parasuraman S
September 20, 2025 at 11:09 am
That was fantastic repair work done by you, dear Mark! Only professionals like you can do such systematic troubleshooting and make remedies! I liked your joke about your wife very much and had an uncontrolled laugh! Wives are universally same all over! (LOL) Many, many thanks for sharing this experience!
Waleed Rishmawi
September 20, 2025 at 2:30 pm
what is the specs of the mosfet? I searhed it online and I could not find any information about it but it looks like the mosfets i use in laptops and it should be available off any laptop boards. thanks for sharing and have a blessed day
Yogesh Panchal
September 20, 2025 at 2:43 pm
Good Job!Mark,
If one wants to work in the technical repair field, he has to stock the relevant filed junk PCBs for replacement parts, As it is very difficult to get new parts and if the parts have to be obtained then the price is becomes very high due to logistics cost.
I also agree with Parasuraman Sir's comment about universally deportment wives....Ha Ha ha.....
Mark
September 20, 2025 at 3:03 pm
Thanks Parasuraman,
It's important that we don't let our wives know otherwise we will be doing all the housework! That being said, it is good to do things together.
Glad you got my sense of humour.
Albert van Bemmelen
September 20, 2025 at 6:49 pm
Although the shipping costs were extremely high you still must have had a very good supplier being able to find the exact same mosfet Mark! Since even searching for a datasheet of this 7R540PL failed completely. The only ones I was able to find online were IRF540 mosfets and equivalents. But seeing the pcb tracks it possibly was a special dual mosfet like a IRF9952PBF?
Yogesh Panchal
September 20, 2025 at 7:48 pm
it is Toshiba N-Channel MOSFET & Datasheet link is
https://toshiba.semicon-storage.com/ap-en/semiconductor/product/mosfets/12v-300v-mosfets/detail.TPN7R504PL.html
Albert van Bemmelen
September 21, 2025 at 3:18 am
Good find Yogesh, Thanks for the link!
Mark J
September 21, 2025 at 7:39 am
I remember when vacuum cleaners were simple. Good job on the repair mark.
Gus
September 22, 2025 at 1:16 am
Great repair and great explanation, thanks for share
Anton
September 30, 2025 at 5:55 pm
Funny, mine has TM504P150LS12 and I have double the components.
Found one datasheet but it is confusing, as it should be N-channel (by measurements), but datasheet states that it is P-channel
https://surgecomponents.com/america/pdf/SWTM504P150LS-HAF.pdf
Aurélien
October 14, 2025 at 8:35 pm
Hi, any option to repair it without heat gun ? 😀 with a basic soldering iron ? Thanks , great post!