
Shorted Backlight LED Drained Battery In LUVLAP Breast Feed Pump
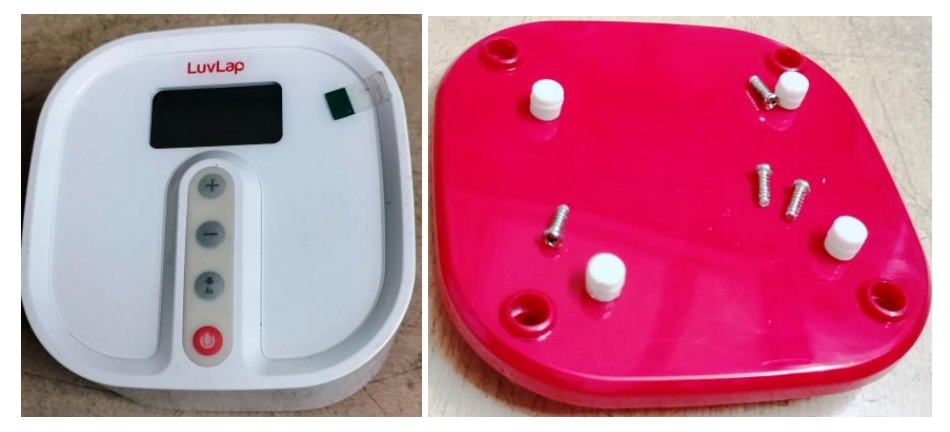
This breast pump was brought to me by one of my hospital colleagues stating that the battery was not getting charged. I opened the bottom by removing four screws underneath which is covered by the fiber bushes which serve as legs. Let us now look at the inside of this lovely machine:

I found that the battery was totally dead (fully drained)! I applied 3.7V from an external power supply and checked whether the display was getting on. It was not! Then I checked the backlight and found it to be showing very low ohms with different readings when we change the polarity using an Analogue Multimeter in X1 mode. First I thought it was a bulb but suspected it to be an LED when the readings were different in both ways. If it was a bulb, it should have shown same. The voltage was not reaching the legs indicating that it was dropped. In order to make sure, I removed the legs and checked it again. It showed different low ohms in both ways. Removing the backlight was not that easy, as it was fixed with glue. So, I removed one side of the pins of the LCD screen, by applying solder and repeatedly touching them while inserting a paper knife underneath and slightly pushing it out. I did that on the other sides also so as to balance the pull out in order not to cause a crack of the glass holding the leads. Then gently pushed the backlight unit out.
Pealed open the black tape covered and using a nose plier gently plucked the LED out. Now, let us have a look:
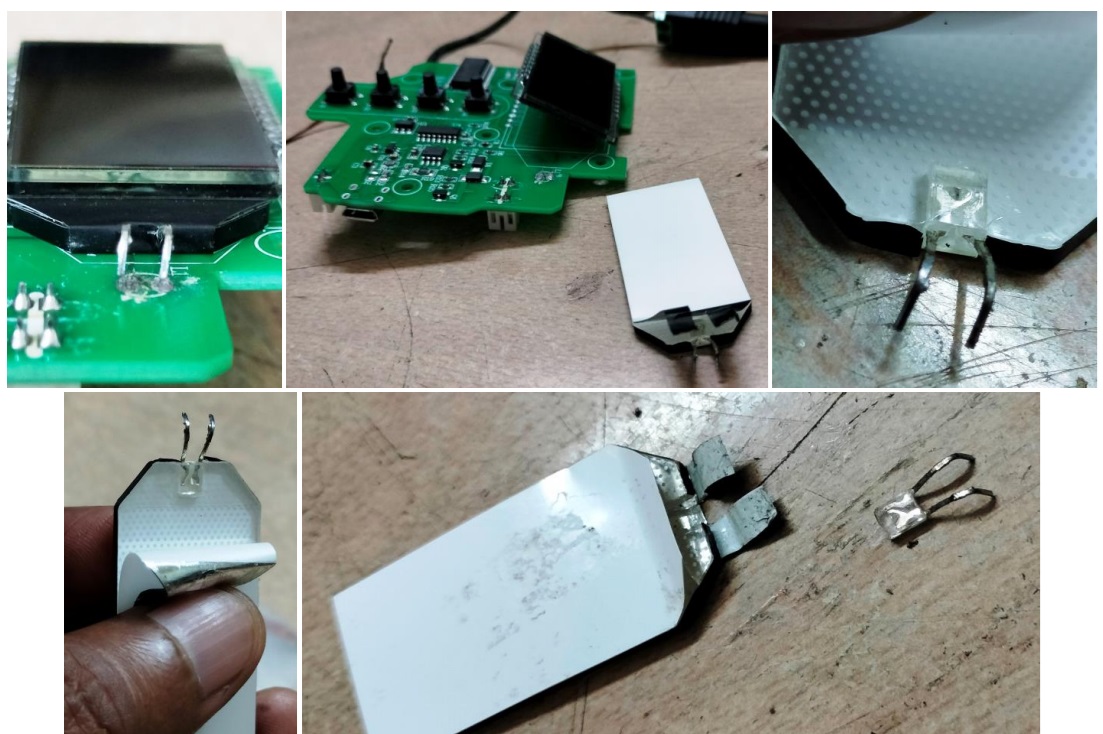
I forgot to mention that I had sought the help of my techie friends to know whether the backlight was a bulb or LED and a couple of them confirmed that it should be a 3mm LED, which was found correct after removing. Getting a replacement of this tiny flat LED was difficult and therefore I used a round green LED instead and inserted it and closed the tape and held it in place.
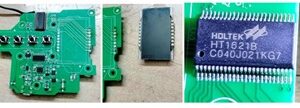
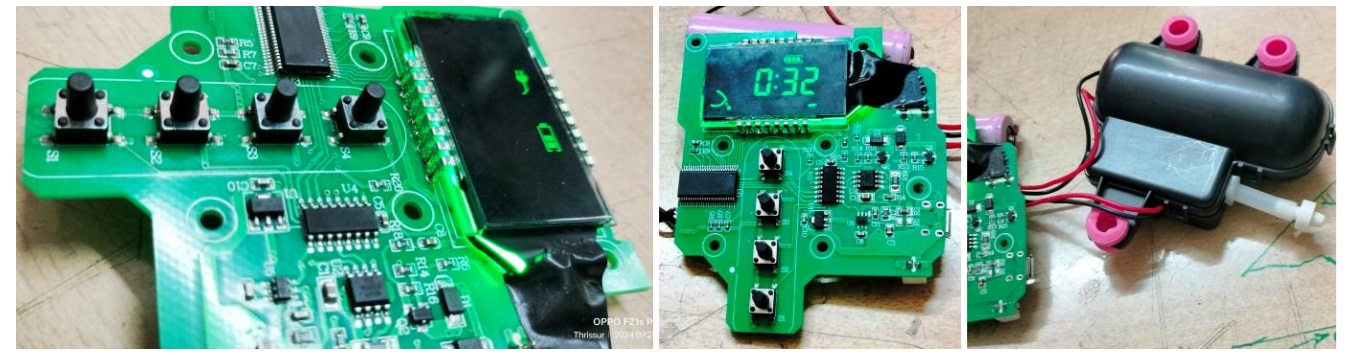
I removed the rest of the pins of the LCD in order to take a clear snap of the bottom for any future use and for the sake of the readers of this article. Let us have a look at the bare PCB.
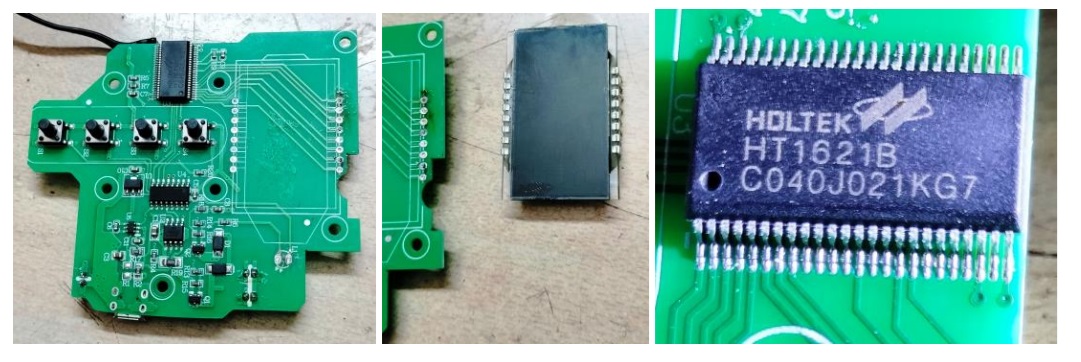
The number of the µController (U4) was found missing on the top and perhaps it is printed on the bottom; a typical Chinese trick! As the board was found working when I applied power without the LCD screen, I did not bother to remove the IC. But I did check up all the components on the board for any short or leak. The charging voltage was also reaching the pins when I connected an external Mobile Adapter to the charging port on the PCB. Then cleaned the holes of the pins of LCD screen and placed the backlight unit in its marked place. I did not solder the two pins of the LED, until I fixed the LCD Screen tightly on top and adjusting the backlight unit to perfectly align with the top. I had also checked the polarity of the two pins on the board in order to ensure that the new LED gets proper supply when fixed.
Then soldered the pins of the LCD screen and that of the LED. Applied power again and found that the display was good enough. Since I did not know the color of the LED, I just used a bright green LED as mentioned by me earlier, as I did not have a white LED of small type. Then used the various buttons and found that the display was showing the selections, with full bloom at switch on and off. Then connected the motor-cum-pump unit to the connectors marked on the PCB and tried it on a 3.7V Li-ion battery. It was found working very well on all modes.
Since the colleague was coming from a faraway town, which had several electronic shops, I advised him to get replacement of the battery himself, for which I gave the unit without putting the bottom screws. The biomedical technician in our Hospital agreed to fetch the replacement and try out after putting the battery. Mission accomplished with satisfaction getting collected to the bag unhesitatingly.
I gave a caution to the Biomed to ensure that the replacement battery (which should have its own charge control circuit) has the same polarity like the original battery and should it be different, he has to interchange the pins failing which it would cause another failure.

This article was prepared for you by Parasuraman Subramanian from India. He is 74 years old and has more than 30 years’ experience in handling antique equipment like Valve Radio, Amps, Reel Tape Recorders and currently studying latest tech-classes conducted by Kerala State Electronics Technicians’ Association. He has done graduation in BBA degree, private diploma in Radio Engineering and retired as MD of a USA company. Presently working as Consultant to Hospital and other institutions.
Please give a support by clicking on the social buttons below. Your feedback on the post is welcome. Please leave it in the comments.
P.S-If you enjoyed reading this, click here to subscribe to my blog (free subscription). That way, you’ll never miss a post. You can also forward this website link to your friends and colleagues-thanks!
You may check on his previous article on Unfruitful Attempt To Service A 55 Inch SuperGeneral LED TV Model SGLED55AUST2
 (31)Dislikes
 (0)
(0)
8 Comments
Leave a Reply


Albert van Bemmelen
March 22, 2025 at 2:59 pm
Your Medical hospital repairs are real lifesavers for the community. It only leaves us waiting for the moment that you also start working on fixing the 'Remote control' contraceptive chip that apparently is available since 2018.(lol)
Parasuraman S
March 22, 2025 at 4:21 pm
Ha! Ha! Many thanks for your hilarious comments and encouragement, dear Albert!
Waleed Rishmawi
March 22, 2025 at 3:29 pm
very impressive work my dear friend. keep up the good work and thanks for sharing. have a blessed day
Parasuraman S
March 22, 2025 at 4:22 pm
Many thanks, dear friend!
Yogesh Panchal
March 22, 2025 at 3:49 pm
Good Job!Sir,
Difficult task when we don't have reference of old bad parts type.
Parasuraman S
March 22, 2025 at 4:22 pm
Yes, very true! Many thanks!
Mark J
March 23, 2025 at 2:52 am
Parasuraman it seems like you come across all kinds of things to repair. Well done on the fix.
Parasuraman S
March 23, 2025 at 12:31 pm
Yes, I used to recall that a lot of vaiety things have come to me for service, which are not very common! Many thanks for your keen observation and comments, dear Mark!