
My niece’s iron went back to life
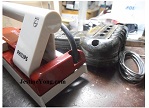
My older niece came to me very desperate because she and her little son had to travel and her travelling iron was broken, the complaint was it had a burnt smell when you plugged it to the wall outlet.
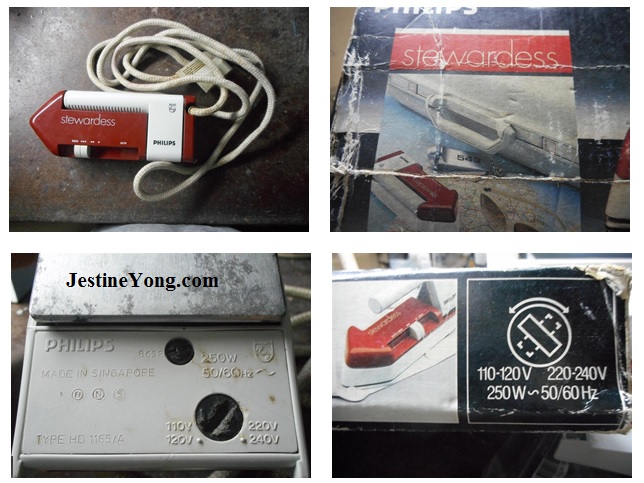
This appliance brand was PHILIPS (Made in Singapore) and type HD 1165/A
The electrical features of this device are :
- Voltage selection: 110/120 volts and 220/240 volts.
- Power: 250 watts.
- Frequency: 50/60 Hz.
With all these data the duty began. The iron was opened.
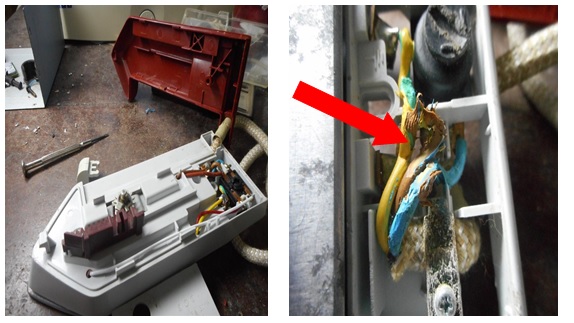
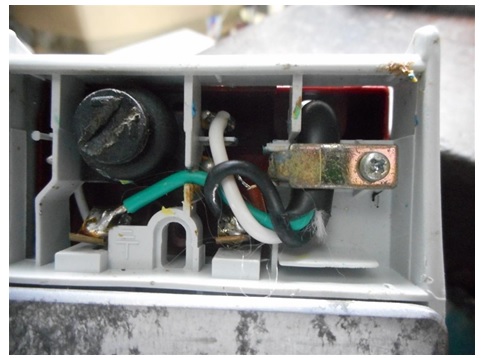
As you can see in one of the photos above the isolation of the 3 wires of the AC mains was in very bad conditions (melted).
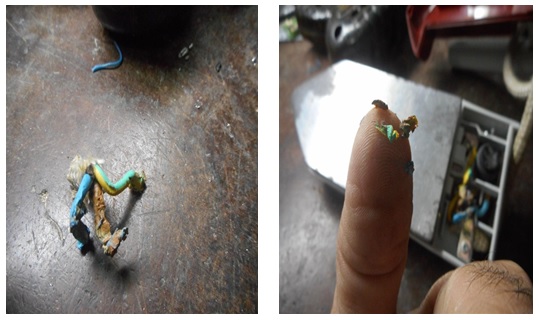
This bad section of the wires was cut to look for another new section but it was still melted look at the photo below.

It was then necessary to substitute it for another cable in good conditions, but taking into consideration the specifications of the manufacturer, let’s see:
P=V*I
V=110 Volts (in my country)
P= 250 watts (manufacturer specification)
I=P/V = 250w/110V = 2.27 Amp
Now I know I have to look for a cable that must be able to support at least 2.3 Amp. I chose the following cable (a new one):
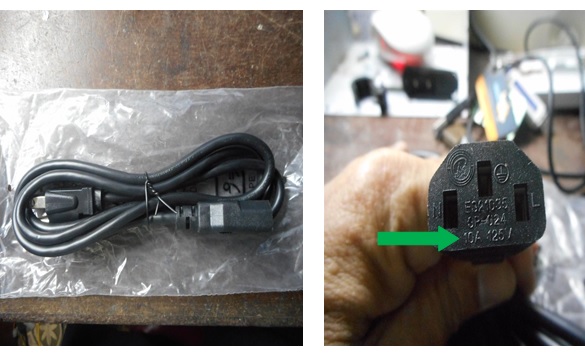
As you can see the selected cable could support until 10 Amps. Therefore one of its ends was cut and the wires were scratched with a blade, and the copper points were tinned.
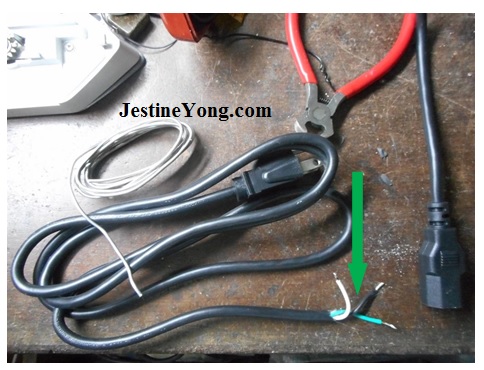
These three points were re-soldered in the iron, taken into consideration the Ground terminal (green colored in this case).
When the iron was armed and plugged into the AC mains, it worked perfectly, there was no burnt smell. My niece is happy now.

This article was prepared for you by Humberto Rodriguez, one of our ‘Master Authors’ from Cuba.
Please give a support by clicking on the social buttons below. Your feedback on the post is welcome. Please leave it in the comments.
P.S- If you enjoyed reading this, click here to subscribe to my blog (free subscription). That way, you’ll never miss a post. You can also forward this website link to your friends and colleagues-thanks!
 (91)Dislikes
 (4)
(4)
24 Comments
Leave a Reply


jason
March 30, 2015 at 9:06 pm
Nice repair.. but you never mention what cause the wire to melt??
Humberto
March 31, 2015 at 11:58 pm
Hi jason, I suppose the cables were melted due to life spam, because they were that way from the begining to the end, that's why I had to change it.
Andrew F. Ali
March 30, 2015 at 9:12 pm
I enjoyed reading the electric iron brought back to life by the cord repair. I really appreciate all the features that are posted by members to assist others in learning.
Humberto
April 2, 2015 at 12:07 am
Ok Andrew, you are welcome
BHUPENDRA THAKUR
March 30, 2015 at 9:55 pm
It was a good read and really appreciate for sharing.
Regards.
BHUPENDRA
Humberto
April 2, 2015 at 12:08 am
Thanks BHUPENDRA THAKUR
Yogesh Panchal
March 30, 2015 at 10:46 pm
I hope your niece will definitely provide you some more stuff for your experiments!!!. just one question for syringe needle for desoldering purpose what size no. of needle you are using and are they sharp or Blunt??
Humberto
April 2, 2015 at 12:15 am
Hi Yogesh Panchal the number of the needle is 21, I'll check at home today the real number and let you know later. I'm preparing a video to post it here in this blog.
Humberto
April 2, 2015 at 11:52 pm
Hi again Yogesh, I saw the syringe needle as I promised you, and it's a number 20. The tip must be blunt.
Yogesh Panchal
April 3, 2015 at 12:43 pm
Thanks Humberto for sharing tips.
Waleed Rishmawi
March 31, 2015 at 12:37 am
glad to see that you are up to the task and still doing great repair jobs. keep up the good work.
Humberto
April 2, 2015 at 12:24 am
Hi Waleed, how are you? I'm repairing not only PCs but domestic appliances too. What do you think about it?
Robert Calk
March 31, 2015 at 1:34 am
Good job Humberto.
Humberto
April 1, 2015 at 12:21 am
Thanks Robert
Mark Tembo
March 31, 2015 at 2:47 pm
Great job. However, why didn't you use the heat resistant cable as this one will simply melt when accidentally exposed to the hot iron?
Humberto
April 2, 2015 at 12:32 am
Well Mark I used a cable with could support more current consumption that the specified for the manufacturer, see the calculations above. Nevertheless, this new wire was the only available at that moment and the iron is working perfectly. I told my niece about give (right her) a opinion of how is her iron working right now, because she took it to Ecuador, she's traveling nowadays.
Rashwan Shaban
April 29, 2015 at 5:44 pm
good work man ,
the heat resistant cable also able to warp with out damage which I thank its suitable?
cheers.
Andre Gopee
April 1, 2015 at 8:54 am
Good Job. Keep up the good work.
Humberto
April 2, 2015 at 12:30 am
Well Mark I used a cable with could support more current consumption that the specified for the manufacturer, see the calculations above. Nevertheless, this new wire was the only available at that moment and the iron is working perfectly. I told my niece about give (right her) a opinion of how is her iron working right now, because she took it to Ecuador, she's traveling nowadays.
Humberto
April 2, 2015 at 12:44 am
Thanks Andre
Daniel Rudin
November 21, 2016 at 7:17 am
Hi.
And thank you for the detail post off the repair.
One question: What year is that Philips 1165/A manufactured?
Many thanks.
Daniel
abdallah sadallah
November 29, 2016 at 9:17 pm
of coz i had enjoy much bt i need to know how
can i troubleshoot my iron due to the cutting off and not produce heat
er
March 26, 2018 at 2:17 pm
Need advise to repair mine. May I know how do you remove the top part of the iron?
Martin van der Poel
May 29, 2019 at 7:59 pm
You should use heat resistant cloth covered cord for electric irons, not the standard pvc