
SAREGAMA CARVAAN MINI Radio Intermittent Power On & OFF
SAREGAMA CARVAAN MINI Radio Revisited for the Repair stating problem Automatically Power On & OFF

This radio has come to me for repairs several times for various reasons. I turned the radio on to diagnose the problem, but it didn’t work. I was also doing some other work on the computer, so I decided to check the computer first and look at the device later. A few minutes later, the radio suddenly started making a hissing sound; it had turned itself on.
After finishing my work on the computer, I turned the device back on; sometimes it would start up immediately, while at other times it would take a while.
Disassembled the Radio for further inspection, for disassembling process please refer my old article
https://jestineyong.com/mini-usb-bluetooth-fm-radio-receiver-repaired/
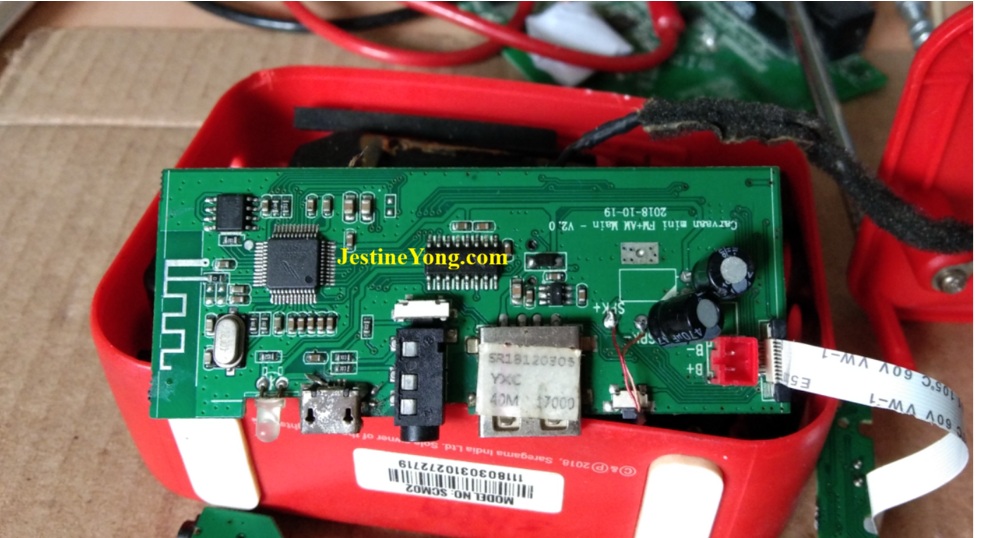
Everything looks clean inside; there is no dust or rust anywhere. I checked the battery first, and it showed 3.6V, which is within the proper operating range. To confirm, I installed a battery known to be working, but the problem persisted. So doubt on the battery is eliminated.
I removed everything and took out the PCB—the control panel where the switches are mounted.
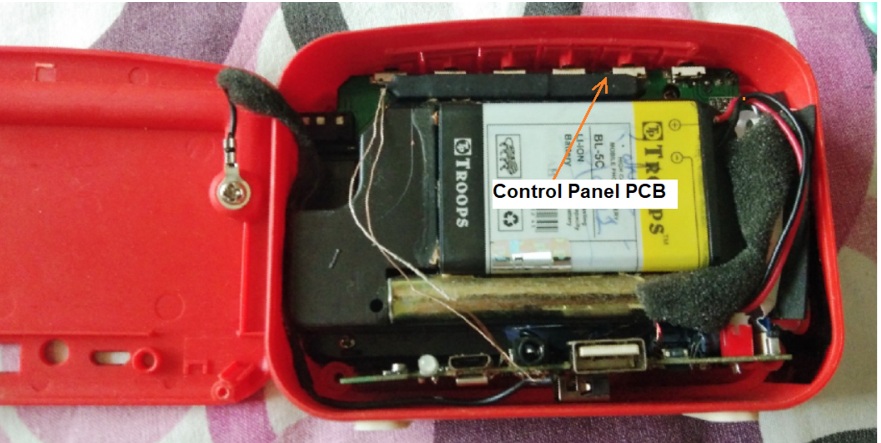
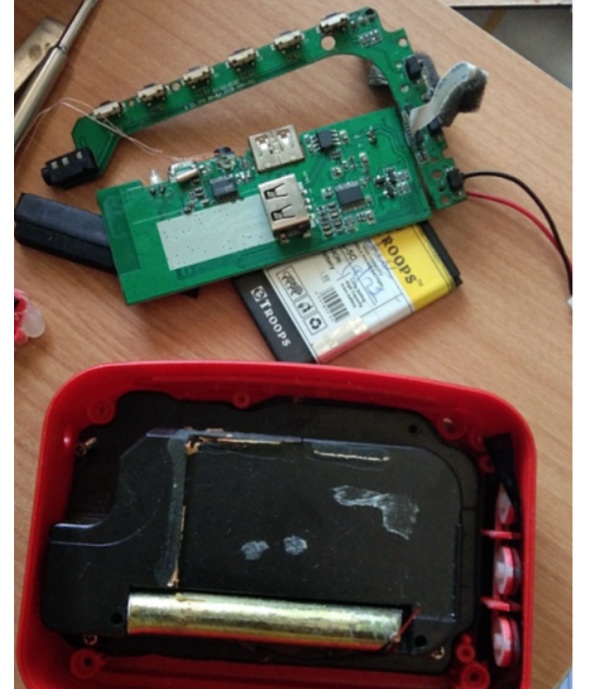
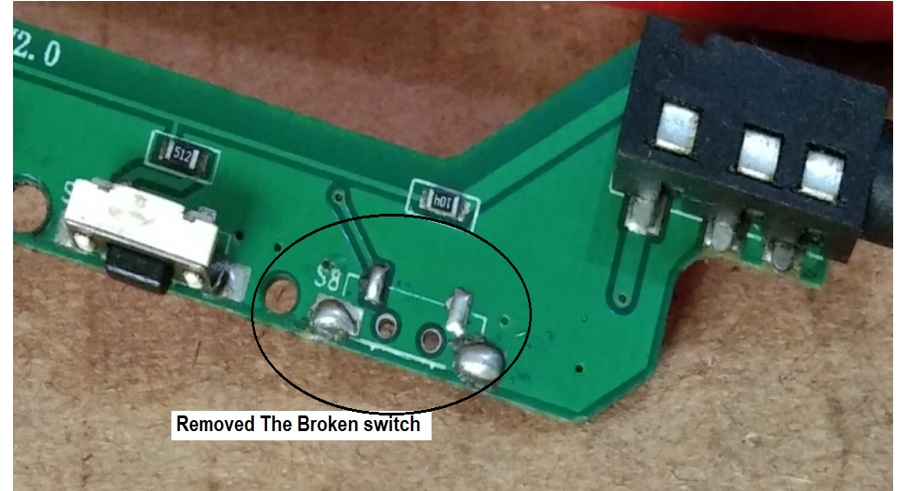
Under the magnifier glass I found the culprit. Found On/Off switch Broken.
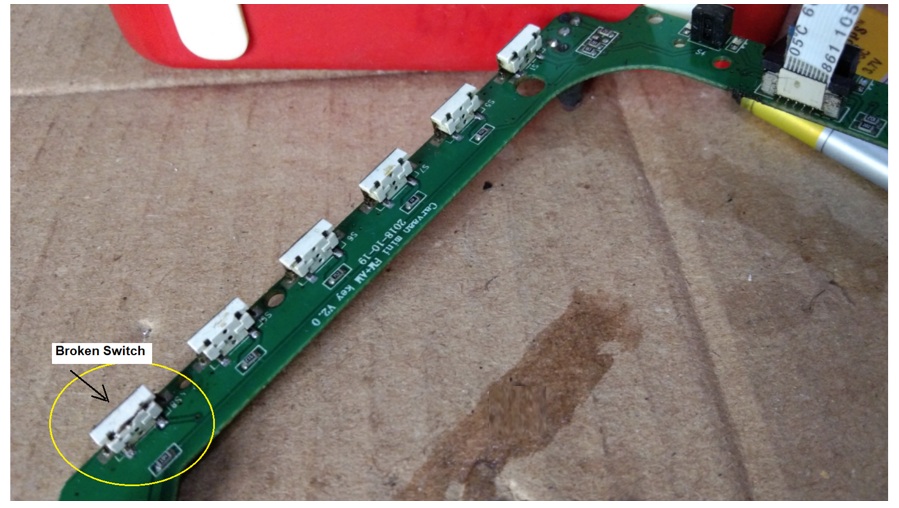
These switches are very small; for some people, it becomes difficult to focus on them without a magnifying glass after the age of 50.
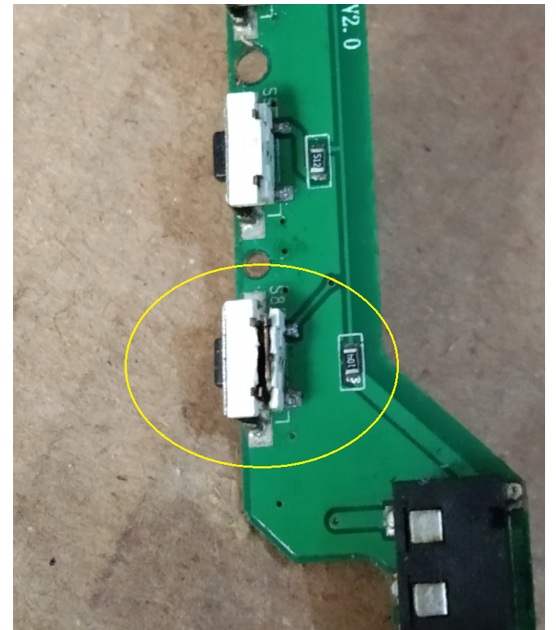
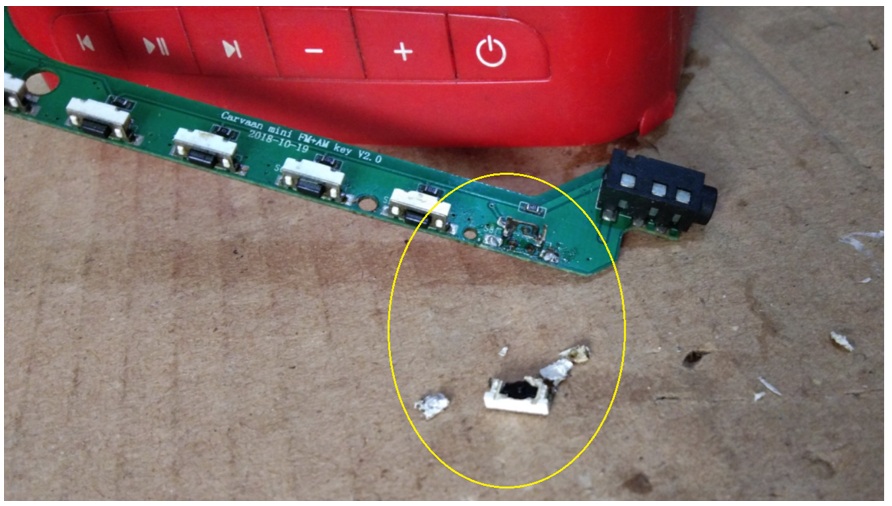
Holding the switch with tweezers for desoldering, I simply lift the plastic, and it crumbles into pieces.
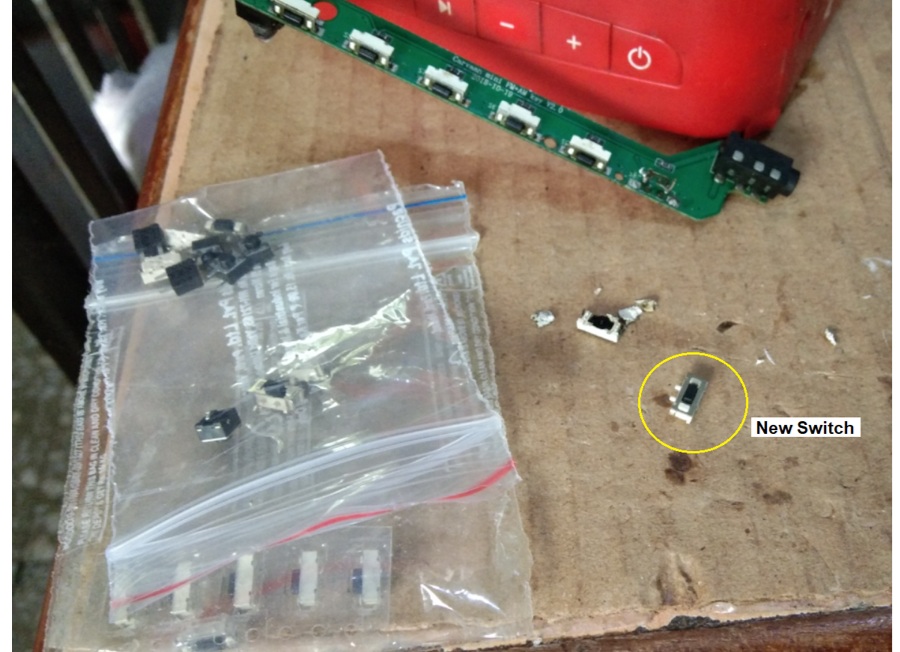
Arranged new switch from my collection of the parts
Removed Broken switch using micro soldering Pen (Do not use normal Soldering Iron it will Damage micro Traces)
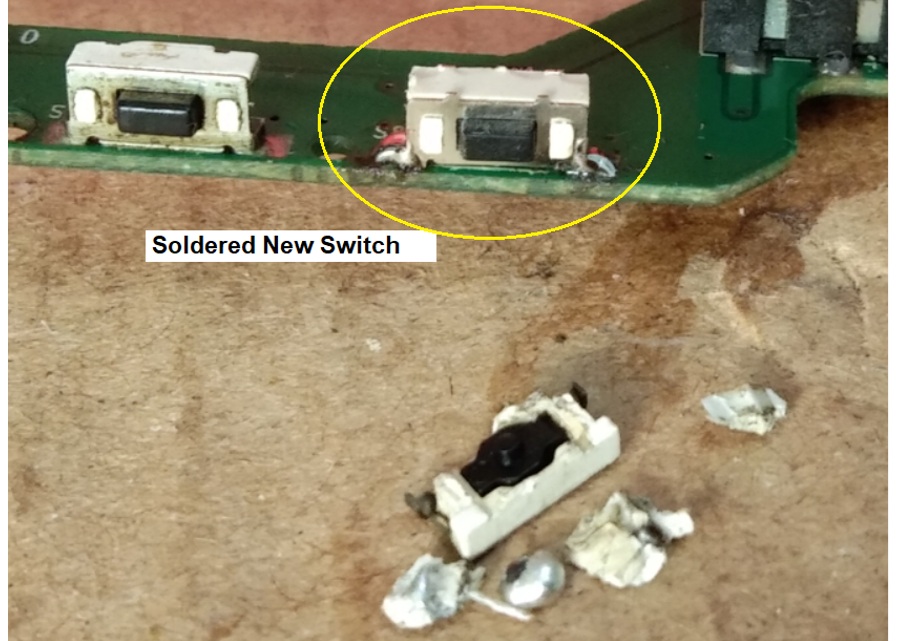
Confirmed the proper soldering under the magnifier glass, & found it is properly soldered.
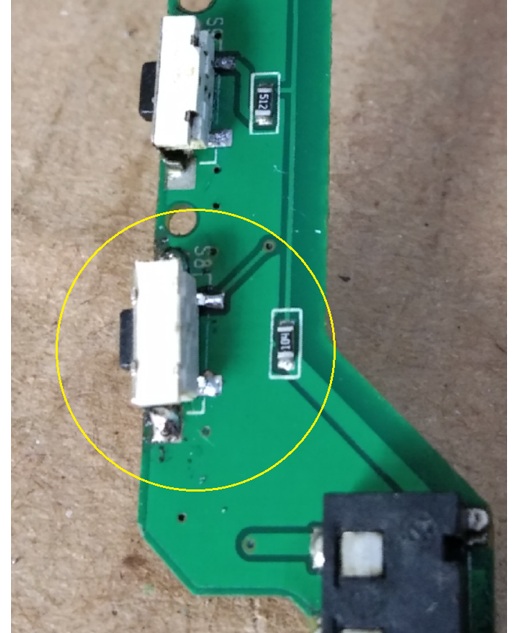
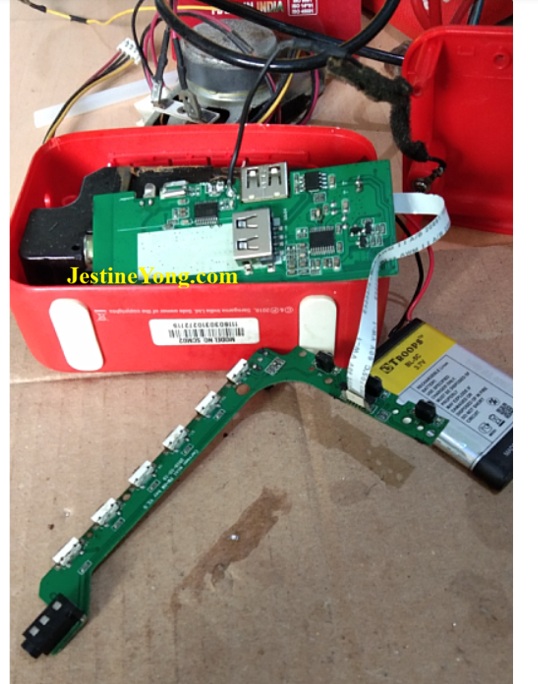
Re attached everything Back for testing & Pressed the On/Off switch & instantly unit turned ON.
Checked several times it works proper now, after final packing the unit now ready for the pickup.

This article was prepared for you by Yogesh Panchal who works as a Computer Hardware Engineer in Mumbai India.
P.S- Do you know of any your friends who would benefit from this content that you are reading now? If so, forward this website to your friends or you can invite your friends to subscribe to my newsletter for free in this Link.
Note: You can check his previous repair articles on AVG F3 – Black Portable Bluetooth Speaker
 (32)Dislikes
 (0)
(0)
12 Comments
Leave a Reply





Albert van Bemmelen
September 5, 2026 at 8:13 pm
Always nice to have spare parts at hand like needed in this repair.
About damaging the micro traces when using a normal Soldering Iron I guess it mostly depends on the temperature that is used to prevent melting the plastic switch or the copper tracks. I often rather use a wider solder iron tip instead of a pointy one which makes soldering often a lot easier. Even when I solder ATmega328 , or large QFP ic's on boards it is very easy to solder all pin rows with a lot of solder and easily remove the bridging solder instantly by letting gravity drop the plenty applied hot solder by simply tapping the board with a bit of force onto the table with my silicon high temperature resistance placemat. And that instantly removes all solder inbetween all pins. Because the protecting mask that is used on most boards also prevents any left bridging sticking solder. And gives a perfect professional solder result!
Yogesh Panchal
September 5, 2026 at 11:03 pm
Thanks! Albert for your comment,
Using a soldering iron depends on practice and experience. I have seen many technicians successfully using the older type of soldering iron, but a single wrong move can ruin the job.
Investing in a good micro-soldering workstation is always beneficial. Due to various limitations, such repair work is now typically performed within the workshop, and using high-quality solder paste yields excellent results.
Parasuraman S
September 5, 2026 at 9:08 pm
This is a very delicate and intricate job but handled by an all-time professional! Many thanks for sharing!
Yogesh Panchal
September 5, 2026 at 11:12 pm
Thank you! Sir,
It is by observing the way you and other technicians work, as well as your approach to handling tasks, that I have learned to take on a role like this. All this enthusiasm stems from that.
Mark J
September 6, 2026 at 3:33 am
Good professional job Yogesh.
Yogesh Panchal
September 6, 2026 at 4:05 pm
Thank You! Mark J
Imoud.O
September 6, 2026 at 5:02 am
Yes you may be right about using regular soldering iron on this kind of switch replacement,however since I don't have pen soldering iron, I once used regular soldering iron with pointed iron tip,but to be honest it was not a clean soldering, plastic part of switch melted a bit,succeeded at last,thanks for sharing sir
Yogesh Panchal
September 6, 2026 at 4:54 pm
Imoud.O
High-quality flux is always useful, and practice is essential; however, I have seen technicians perform SMD soldering using a standard 60W soldering iron with a chisel tip. Perfection in the work comes only through practice. Nevertheless, I would advise technicians to upgrade their tools in line with job requirements and technological advancements, as this is a one-time investment that brings job satisfaction and peace of mind.
I am sharing a link that shows how technicians use a 60W soldering iron with a wide tip.
https://www.youtube.com/watch?v=3PiCK-4ZBXk
Mark J
September 7, 2026 at 3:17 am
Yogesh that was a good video and youtube page. He has some good lcd tv repair tips.
Yogesh Panchal
September 8, 2026 at 3:46 pm
Yes MarkJ
for TV Repair he is having right practical approach for troubleshooting.
Waleed Rishmawi
September 7, 2026 at 1:56 pm
I recently bought alot of microw switches, different shapes and sizes and I am glad I did because there is a lot of demand for this kind of/on switches. I am glad it worked out for you. thanks for sharing and have a blessed day
Yogesh Panchal
September 8, 2026 at 3:52 pm
Hi Waleed,
It’s been a long time since we heard from you; I hope everything is well at your end.
Instead of waiting for materials, it is wise to keep a stock of commonly used, essential parts; this makes the work proceed quickly and makes the job enjoyable.