
Emergency Light Modified From Fluorescent Lamp To LED – BPL MODEL RL-F60

This is a double tube type Emergency Lantern. This belongs to my classmate, who is no more. His family brought it to me saying that it was not working. The battery was found down. The sticker indicated that it was replaced in April 2019. My record showed that I had changed the battery of this Lantern in August, 2014.
So, the battery lasts for five years! Since the tubes are no longer available in the market, I modified the connections to suit LED Light instead of Tubes. Unfortunately I forgot to click the lamp with the tubes inside. However, let us have a look at the boards and inside of the light:
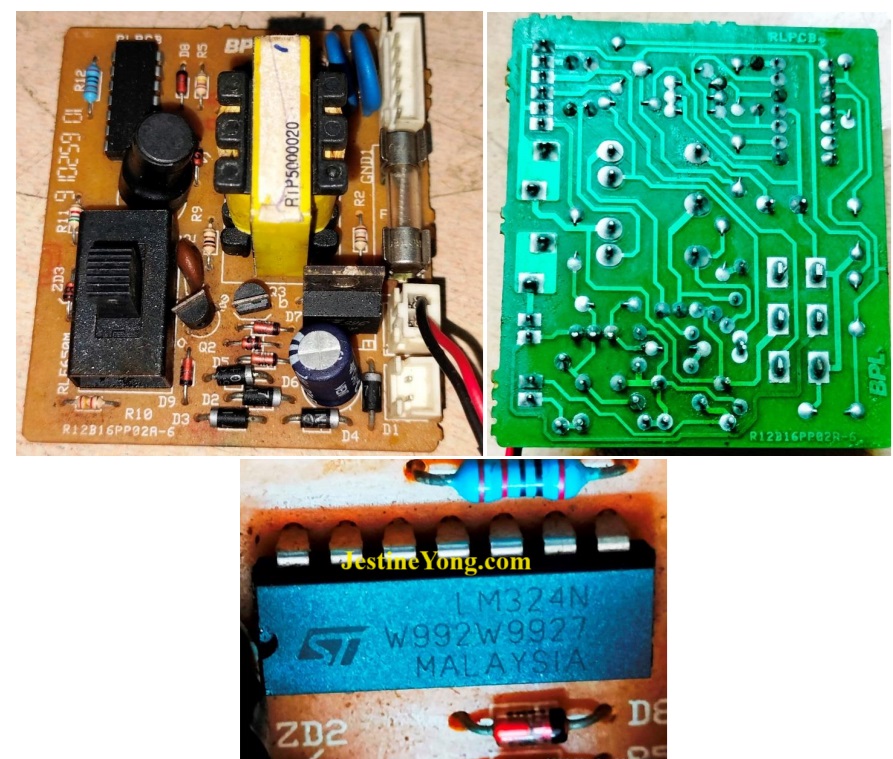
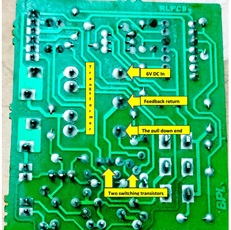
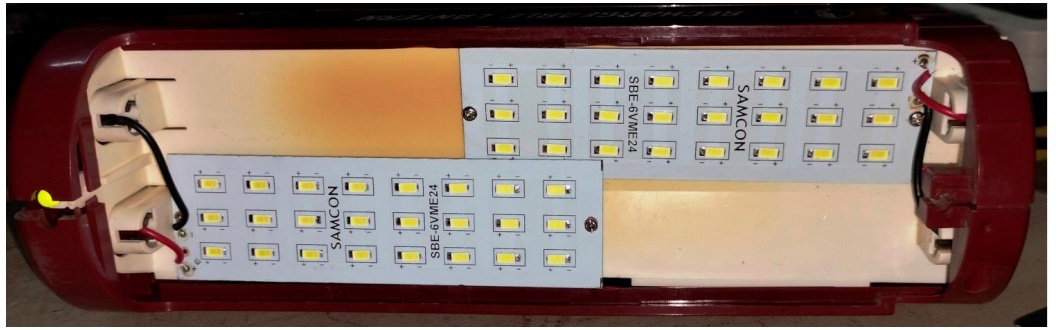
In the above pictures you could notice that the board has a transformer that drives the lights. 6V from the battery reaches its primary section, the other end of which is connected to the emitter of a transistor. This transistor conducts when the AC input is absent by switching to the ground. The centre point of the transformer is fed to another transistor as feedback to correct the switching frequency. This switching induces high voltages on the secondary to drive the lamps. My plan was to connect two strips of LED lights that work on 6V.
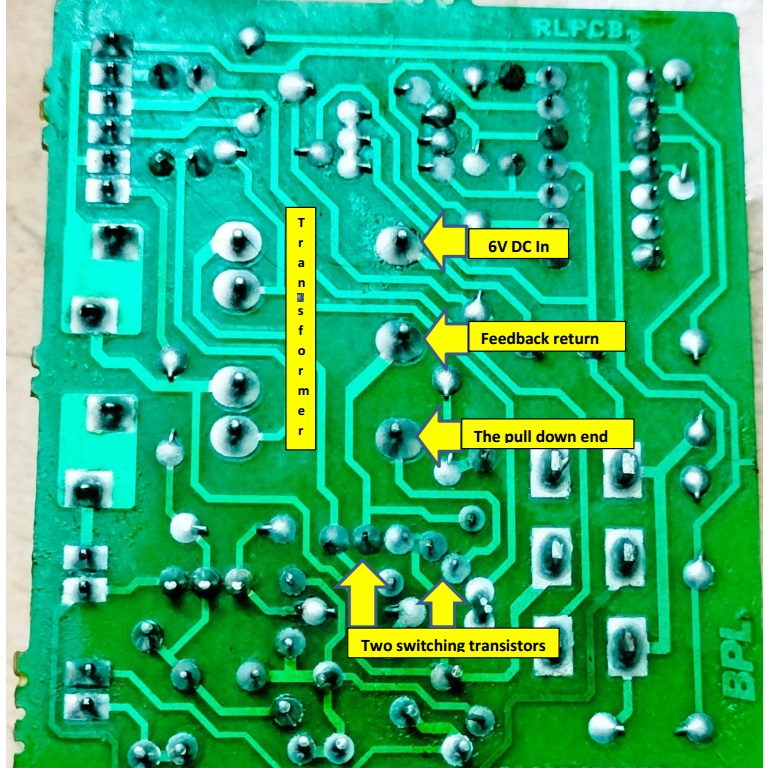
So, I removed the transformer. The positive was given from the 6V in point and the negative was given to the other end of the transformer. As the switching takes place at very high speed, the negative potential for the LED is sufficient. It proved to be so, when I tested it keeping it outside. (I am providing a picture below with necessary markings so that the readers can be with me in my narration.
I drilled holes on the front side where the Lamps were housed on its holders. In order to ensure that the lamps are well within the free area available, I closed the outer covers, and kept it together by rubber bands. Then placed the LED strips on the top and marked to drill holes. If we do not take care of this aspect, the outer cover would not fit in.
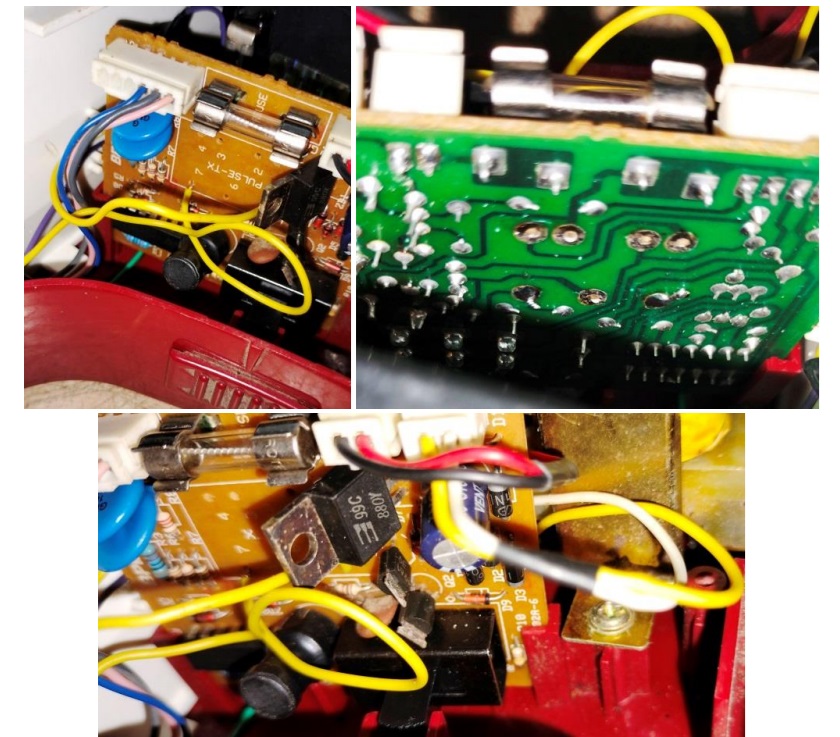
Following pictures would show you how I have connected the wires and the LED strips.
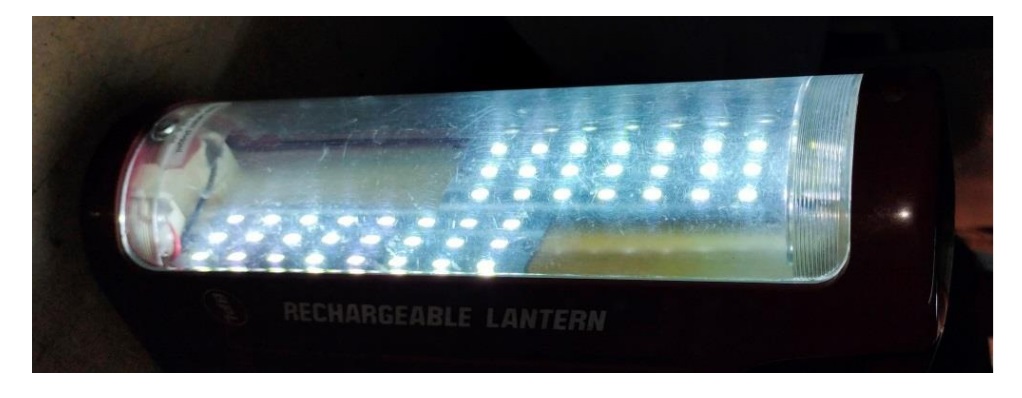
After fitting all these, I powered it on and allowed the battery to be fully charged. Then when I tried the lamp, it was working very well, bringing an exciting satisfaction to get added to the collection.
The customer was very happy to get back their very old lamp with new bright lights. Forgot to mention that the strips were connected in parallel. Here you can have a look at the lantern when finished, which might lighten up your eyes (LOL):

This article was prepared for you by Parasuraman Subramanian from India. He is 74 years old and has more than 30 years’ experience in handling antique equipment like Valve Radio, Amps, Reel Tape Recorders and currently studying latest tech-classes conducted by Kerala State Electronics Technicians’ Association. He has done graduation in BBA degree, private diploma in Radio Engineering and retired as MD of a USA company. Presently working as Consultant to Hospital and other institutions.
Please give a support by clicking on the social buttons below. Your feedback on the post is welcome. Please leave it in the comments.
P.S-If you enjoyed reading this, click here to subscribe to my blog (free subscription). That way, you’ll never miss a post. You can also forward this website link to your friends and colleagues-thanks!
You may check on his previous article on IGBT Found Blown In This PRESTIGE Induction Cooker Model PIC 29.0
 (47)Dislikes
 (0)
(0)
16 Comments
Leave a Reply


Albert van Bemmelen
August 17, 2024 at 3:31 pm
The negative was obviously the marked as "pull down end" pin of the transformer.
Do you also have some info on those 6V led modules in parallel you have used? What leds they were and in what way they were switched on those modules?
Parasuraman S
August 17, 2024 at 5:26 pm
The push pull type two transistors switch at high speed to pull down that end of the transformer to cause a pulse which would reach the secondary of the transformer as high voltage to ignite the fluroscent lamps. I had removed this switching transformer. The pull down to negative through the conductance of the transistor is at such a speed that it would provide the negative potential to the LED. I did it only after practically connecting it and seeing before fixing it. Unfortunately, I did not study the data or label on the LEDs. These are commonly available with a 6V driver board. I did not use that board here in order to sustain the auto switch on when the power goes off. Hope I am clear enough. Many thanks for your keen observation and comments!
Albert van Bemmelen
August 18, 2024 at 4:49 pm
Thanks Parasuraman. I only wondered after counting the amount of leds being 21 leds (7 times 3) each module how they were used. Because normally two leds at 3V make one 6V led. And that can't be done here leaving one led extra unconnected then? But maybe they were 2V leds which would make sense?
Parasuraman S
August 18, 2024 at 11:20 pm
Thanks, dear Albert! I think you have missed one line. There are eight rows into 3 each, making it 24. Just see the picture below. A portion of the top one is covered by the external fitting. Both are 24 LEDs each.
Yogesh Panchal
August 17, 2024 at 4:14 pm
Good Modification!Sir
Parasuraman S
August 17, 2024 at 5:26 pm
Many thanks, dear Yogesh!
LLOYD BOND
August 18, 2024 at 1:16 am
VERY GOOD
Parasuraman S
August 18, 2024 at 11:21 pm
Many thanks!
Mark J
August 18, 2024 at 1:48 am
Good job on the repair.
Parasuraman S
August 18, 2024 at 11:21 pm
Many thanks!
Imoudu.O
August 18, 2024 at 5:05 am
Good ccfl modifications,however i will have to read it over again to understand it better
Parasuraman S
August 18, 2024 at 11:22 pm
Kindly do so and if possible, keep one lamp in hand to follow it better! Many thanks, dear Imoudu!
Waleed Rishmawi
August 19, 2024 at 5:05 pm
very good modification and great repair success. thanks for sharing and have a blessed day.
Parasuraman S
August 23, 2024 at 1:25 pm
Many thanks, dear friend!
Corrie
August 19, 2024 at 7:25 pm
Wonderful job sir. Always a blessing to hear of good work.
Parasuraman S
August 23, 2024 at 1:26 pm
Many thanks for your encouraging comments!