
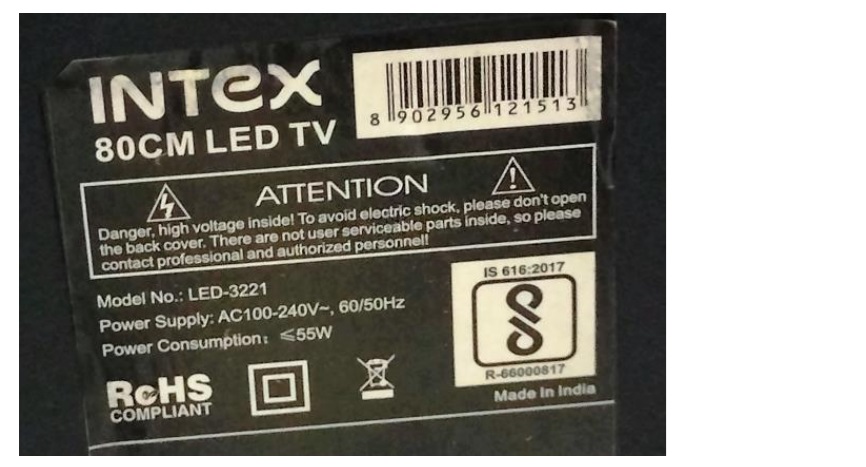
Freezing Problems Solved In INTEX LED TV Model LED 3221
This TV was brought by one of my loyal customers with the complaint that the menu display was freezing and volume up/down did not work or went down by itself automatically. I opened the TV and subjected it to a thorough cleaning as usual and looked for any defects that could be detected visually such as a bulgy capacitor. I did not find any. Such complaints usually come due to improper filtering of capacitors and I therefore checked the ESRs of all caps. The small value capacitors such as 100uF/16V especially were showing erratic readings. As these are used in the power supply for the µController, it could cause such a problem.
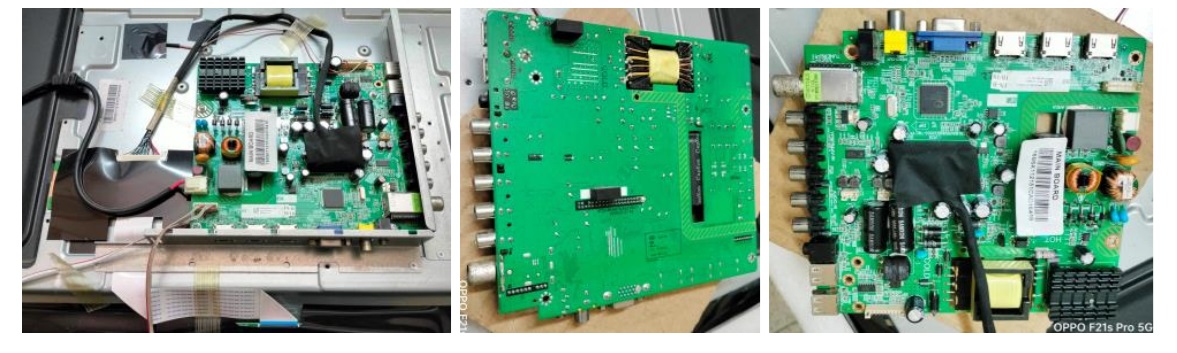
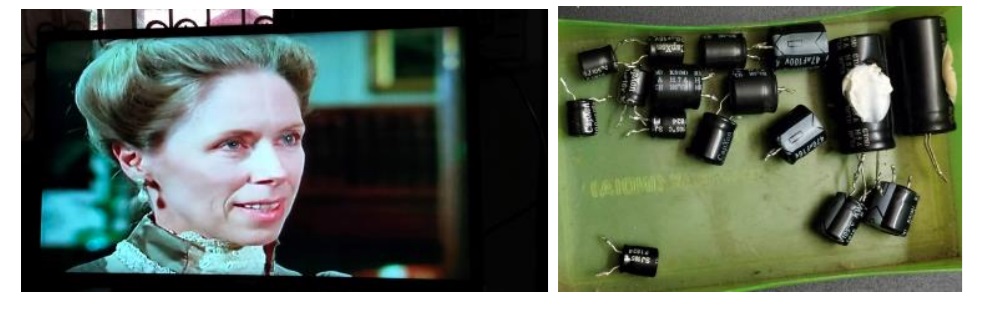
Though I initially thought of replacing only those which showed abnormal readings, I changed my mind and replaced all the 16 electrolytic capacitors except the tank capacitor (82uF/500V). The tank capacitor was very good and showing correct readings. Let us have a look at the inside of the TV and the single combo board:
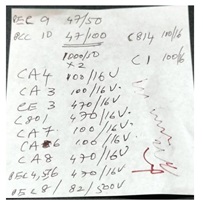
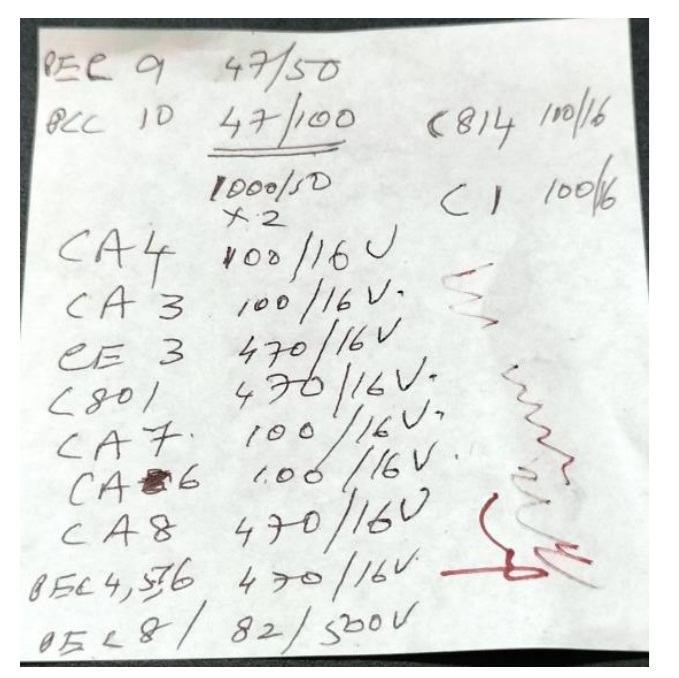
Since the process of removing the capacitors from the board would be better if done at a stretch, I noted down the value and voltage of the capacitors and the corresponding numbers given on the board and double checked it while removing each and every one of them:
But I made one mistake! You could perhaps notice from the second picture out of three given above that all the leads of these capacitors were soldered at the rear side bending the tips to one side.
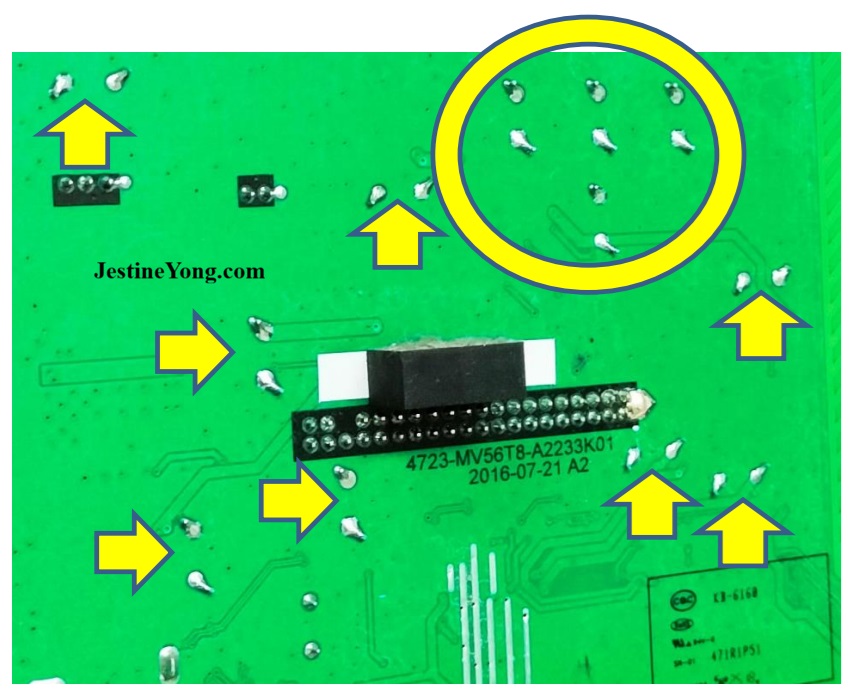
The mistake done by me was pulling out the caps by applying heat at the solder joints. Since these were bents, a few of the caps tore out the interconnecting inner layers while forcefully removing the caps from the other side. Though the heat applied was 400 degree, which was sufficient to melt the solder on this double sided PCB, the forceful straightening of the leads caused the damage!

Click here to check out Humphrey’s ebook on LED TV Panel Repair
My usual practice was plucking the cap out of its legs from the top using a plier rotating it continuously until it came off. Then I used to desolder the legs and pull it out from the bottom, which wouldnot cause damage lik e this. Fortunately, most of these caps were not soldered at both sides and those were such did not tear out the inner layer! So, I got saved from a major setback that would have necessitated a board replacement!
Anyhow, hard lessons learnt!
After clearing the holes with my newly acquired pneumatic desoldering gun, I inserted the new caps a bit elevated on the top to expose the leads, observing and rechecking polarity. Why this elevation? That is to prevent overflow and spread of the solder at the bottom of the capacitor causing a short and to see whether the solder has reached the other end properly or not. After replacing all the caps and filling up the solder holes with additional solder and heat ensuring that the joints are proper at both sides of the PCB, I cut the leads and cleaned the PCB thoroughly using IPA and mild metal brush. Then checked the solder joints on the bottom side for any shorts to the adjacent tracks, cleaned and resized it using the soldering iron so as to ensure that there were no shorts or points close enough to cause an arcing.
Whenever it was a lump, I used the cutter and removed the excess solder. All these exercises took pretty long time and I really paid a price for the wrong method used to remove the caps. After rechecking that all connections were proper, I refit the PCB and put back all the connectors in its place and just put two screws to hold the PCB in place. The TV came on when power was applied and I breathed a sigh of relief! I allowed my favourite Sherlock Holmes to be played for a few hours continuously to do the soak testing. Then closed the back cover and informed the customer to come and collect the TV.
Mission accomplished with satisfaction topped with lessons got collected by the bag!

This article was prepared for you by Parasuraman Subramanian from India. He is 76 years old and has more than 30 years’ experience in handling antique equipment like Valve Radio, Amps, Reel Tape Recorders and currently studying latest tech-classes conducted by Kerala State Electronics Technicians’ Association. He has done graduation in BBA degree, private diploma in Radio Engineering and retired as MD of a USA company. Presently working as Consultant to Hospital and other institutions.
Please give a support by clicking on the social buttons below. Your feedback on the post is welcome. Please leave it in the comments.
P.S-If you enjoyed reading this, click here to subscribe to my blog (free subscription). That way, you’ll never miss a post. You can also forward this website link to your friends and colleagues-thanks!
You may check on his previous article on Failed SMPS Switching IC Bypassed In PANASONIC LED TV Model TH-23A403DX
 (43)Dislikes
 (0)
(0)
16 Comments
Leave a Reply


Waleed Rishmawi
February 21, 2026 at 5:21 pm
the joy of replacing all capacitors...LOL. well, mistakes happen, we are not perfect my friend. thanks for sharing and be blessed today
Parasuraman S
February 22, 2026 at 3:31 pm
Yes, I do agree, but I am concerned when the sets belong to a third person! That's what nags me! Many thanks for your comments, dear friend! Glad to read your comments!
Yogesh Panchal
February 21, 2026 at 5:46 pm
Good Job! Sir
Bent pins are make job difficult on tight places with thin traces nearby,can be damage any time by applying force to upright the pins.
Parasuraman S
February 22, 2026 at 3:33 pm
Yes, by bending the leads of large components the manufacturers ensure tight fitting for a wave soldering. But for technicians like us, it makes things scary! Many thanks for your comments, dear Yogeh Bai!
Albert van Bemmelen
February 21, 2026 at 5:58 pm
The damage you mentioned caused by plucking the caps forcefully out of their bent to one side leads was not entirely clear to me, and the given photos made it not visible either. But I understood that removing the leads caused damage to one of the internal copper layers. Which seems hard to fix when that happens.
But in the end you fixed it no doubt.
Parasuraman S
February 22, 2026 at 3:39 pm
While populating the board for wave soldering by the manufacturers, they insert the through hole components and bend the leads on the other side so that these sit tightly as the boards pass through belts to various processes such as trimming the extra length of leads etc., before getting a dip on molten lead. But such a bend can tear off the hole if we try to pull out such components forcibly, by applying adequate heat at the solder side. Hope it is clear now. Many thanks for your keen observations and expert comments, dear Albert!
Erik
February 21, 2026 at 11:52 pm
Better desoldering with vacuum pump desoldering hollow tip solderstation.
Parasuraman S
February 22, 2026 at 3:41 pm
Yes, but even then, a bent lead can damage when we pull it out. Many thanks for your comments!
Mark J
February 22, 2026 at 3:14 am
Parasuraman everyone makes mistakes sometimes. Good job on the repair.
Parasuraman S
February 22, 2026 at 3:42 pm
We have no right to make mistakes, when the set belongs to third parties! Let us be conscious of it! Many thanks for your comments, dear Mark!
Andy Shiekh
February 22, 2026 at 11:52 pm
I admire your honesty
Parasuraman S
February 23, 2026 at 3:10 pm
Many thanks!
MP
February 23, 2026 at 12:12 am
I'm sorry if there is something that I clearly dont understand about the bended capacitor-pin ends. I'm imagining that if the pins are really small, then, for a relatively easier capacitor pull-out, I would straighten up the sharply curved pin-ends with a sewing needles' pointed end so as to get it off the holes shoulder, as I use a magnifying glass to enlargen the view.
Parasuraman S
February 23, 2026 at 3:12 pm
You can do that when only a few are there. But when we do mass replacement, plucking the cap on a two-sided board is an easier method! Many thanks for your comments and suggestions!
Tito Kanshulu
March 3, 2026 at 2:28 am
Well articulated repair story and excellent results Sir. I personally like how you do a step by step explanation of repairs. Thanks.
Parasuraman S
March 3, 2026 at 6:02 pm
Many thanks!