
Burst Caps And Burnt Resistors Found In This Unisound UB75E PA Amplifier
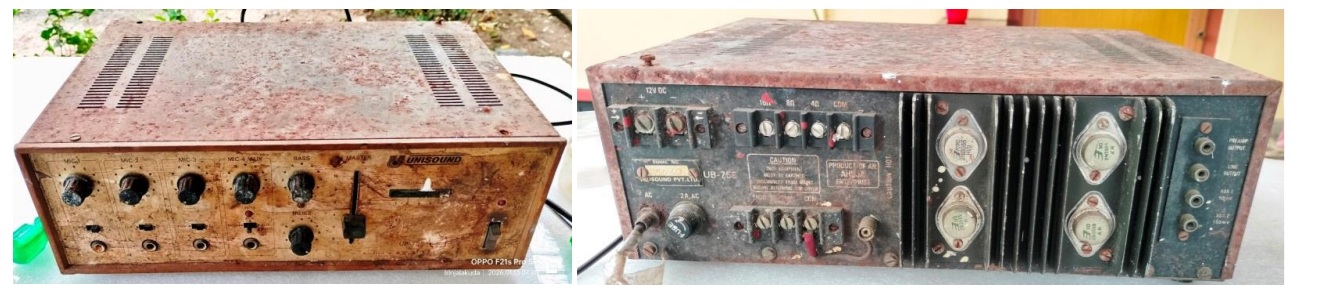
This was brought by a new customer with a request for an emergency restoration as there was a function in a nearby temple and this PA System was required. As you can see, the set was in bad shape with rusts and dirt all over the cabinet and one look at it might give a guess what would be inside! I opened the cabinet and cleaned the inside to the extent possible. Let us have a look of the inside:
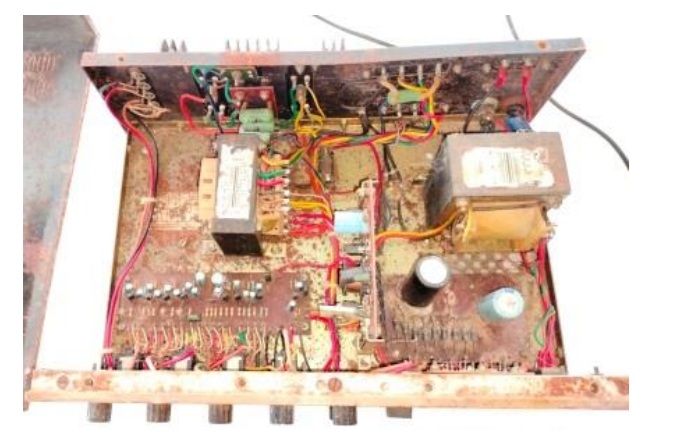
The Amp used four 3055 Transistors in the output with an output transformer with tapings for four connections from 4 to 16 Ohms, with a separate 70V and 110V connections for connecting such type of speakers.
You can have a look of the caps that I found on the PS Board and the Pre-Amp Board:
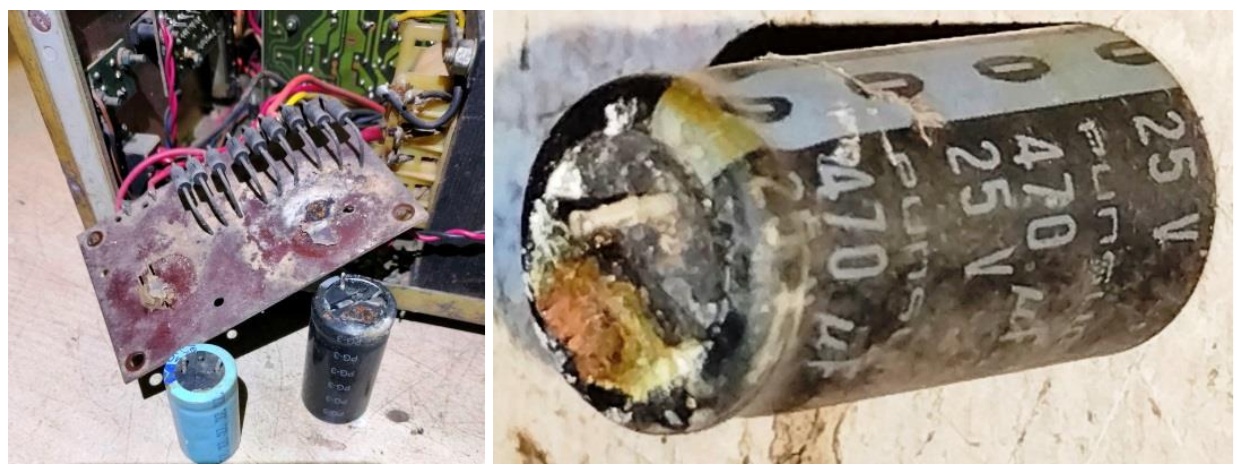
The PS used 10,000uF/25V along with one 4700uF/25 in parallel. I cleaned up the board thoroughly and drilled holes and fixed four 4700uF/50V capacitors to give a total of 18,800uF instead of the 14,700uF. This would give a better filter and smoothing. Replaced all the electrolytic capacitors in both the pre-amp boards. Then removed the four burnt resistors and the base board that were connected to the Emitters of 3055 transistors.
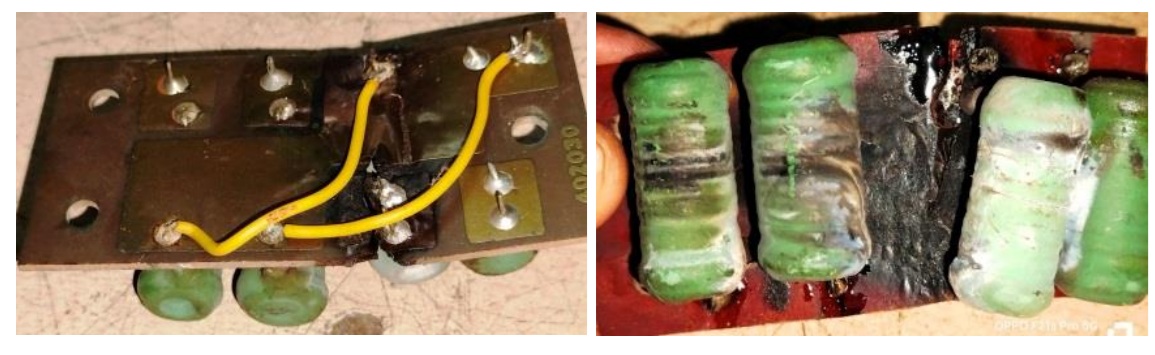
The 0.25 ohm 5W resistors were used to connect the emitters of the four transistors to the ground. I checked the transistors using the Analogue Multimeter in X1 range and found these to be in good condition. The resistors could have got burnt due to dry solders or over load or over voltage or both. The bulged capacitor was an indication of high voltage.
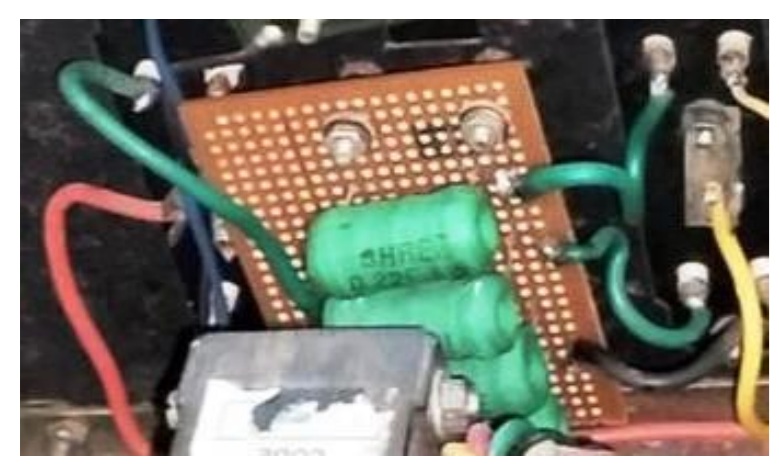
I picked up a Vero Board and cut it to the same size and fixed four 0.22 Ohms 5W resistors as 0.25 Ohms were not available in the market. Then drilled holes for the mounting screws and fixed the board the same way as how it was.
As repainting of the exterior of my house was being done, I requested one of the painters to scrape the top cover and paint the same colour that was used for the gates. It looked neat and clean then. In the meantime, I replaced the main cord, which was in a very bad condition and cleaned controls, input points, speakers etc. using CRC 2-26 and applied power and input signal to the aux. The Amp was working so well that amazed me with its performance. I tried to remove the knobs and take out the front panel for cleaning the dirt in it. But the screws of the knobs were rusted and even though I left these soaked with CRC 2-26 overnight, it did not budge. I told the customer that since the requirement was very urgent, I had no time to remove the front panel breaking the knobs and finding replacements, and also to clean a couple of mic inputs which were filled with mud-wasps. He accepted. I did try to clean the front panel using cabinet cleaner liquid. But it was taking too much of my time and I could do only a partial cleaning. Anyhow I told the customer that I wanted to check the speakers and other connections in the temple and ensure that Amp was not in danger of another breakdown. There were two speakers connected parallelly.
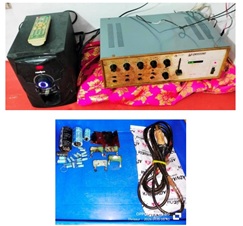
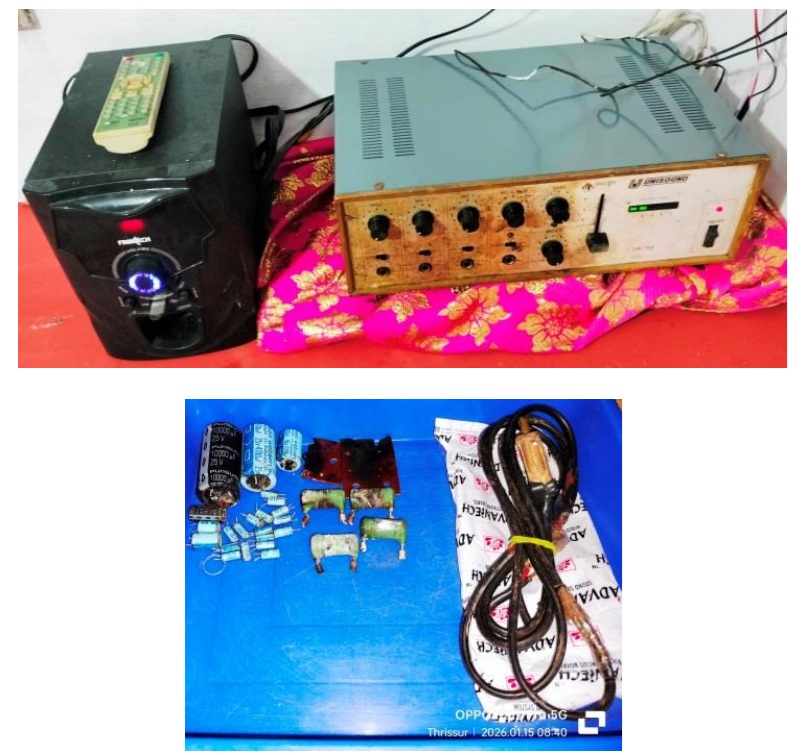
These were found to be ok when checked using my Analogue Multimeter in X1 range. The Aux input was from a 2.1 Speaker system. It was giving slight hum, probably due to worn out filters in the set. I had no such problems when I tested in my workshop. After cutting the ends and tinning the speaker wires at the connection end, fixed the speaker wires and Aux inputs. The Amp worked very well. The mic connector was also in bad shape. I borrowed a knife and cleaned the connector to the extent possible. Mic was also found to be working very well when tested. Here is the picture after it was fit at the customer’s place and played:
Mission accomplished with satisfaction getting added to the collections!

This article was prepared for you by Parasuraman Subramanian from India. He is 76 years old and has more than 30 years’ experience in handling antique equipment like Valve Radio, Amps, Reel Tape Recorders and currently studying latest tech-classes conducted by Kerala State Electronics Technicians’ Association. He has done graduation in BBA degree, private diploma in Radio Engineering and retired as MD of a USA company. Presently working as Consultant to Hospital and other institutions.
Please give a support by clicking on the social buttons below. Your feedback on the post is welcome. Please leave it in the comments.
P.S-If you enjoyed reading this, click here to subscribe to my blog (free subscription). That way, you’ll never miss a post. You can also forward this website link to your friends and colleagues-thanks!
You may check on his previous article on Jumping Double Image Problem Solved In Samsung LED TV Model UA43AU7700KLXL
 (3)Dislikes
 (0)
(0)
One Comment
Leave a Reply





Albert van Bemmelen
July 12, 2026 at 6:02 pm
It is clear to see that the set was in bad shape with rusts and dirt all over the cabinet, but even that was an understatement LOL!
But you sure made it a much better looking and working pa amplifier!
I am certain that the here used 2N3055 transistors are practically indestructible! Since the 2N3055 is one of the most rugged and historically significant silicon power transistors ever designed!