
LED Driver IC Caused Backlight Failure In IBELL 40 Inch LED TV
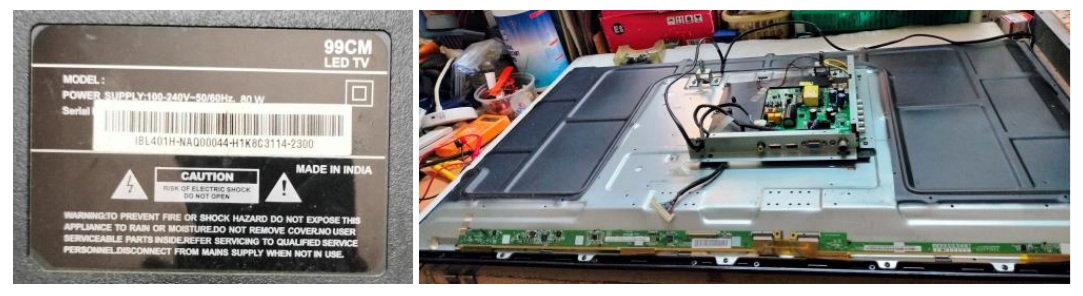
This LED TV belonged to one of my ex-colleagues who have retired from service. The complaint was that the picture was getting dim day by day and finally the display vanished. This was a clear case of backlight issue. So I opened the TV and subjected it to thorough cleaning, picture of which can be seen above. I checked the voltages for the LED drive, it was coming to around 24V, which certainly was not good enough. It was the same even when the backlight was disconnected. The backlights were getting on when tested with the LED tester, but the current drawn was around 0.7A, which definitely was high. So, in all probability, even the driver IC might have developed problems. The first step, therefore, was to replace the backlight and see, for which I had to dismantle the panel and get to the inner bottom. Let us have a look at the connected images:

Even the reflector sheet was fixed with 16 screws apart from 8 diffuser sheet holding brackets. The screws served as LED strip holder too, though it had adhesive at the bottom. I fetched the exact replacement of the strips. Four strips of eight 3V LEDs per strip come to 32 LEDs, which might require around 96V from the driver circuit. I connected the LED strips keeping it externally and applied power to check whether the driver circuit was working ok or not. It was not getting on, though the power on command from the main IC was coming. As such problems can also be due to bad filter caps in the power supply section, I replaced them. But there was no effect, indicating that the LED driver section was not working. I combed the entire area of the surrounding components including the MOSFET and could not find any defective component. Let us have a look at the driver IC (CSC8950) and its surrounding components:
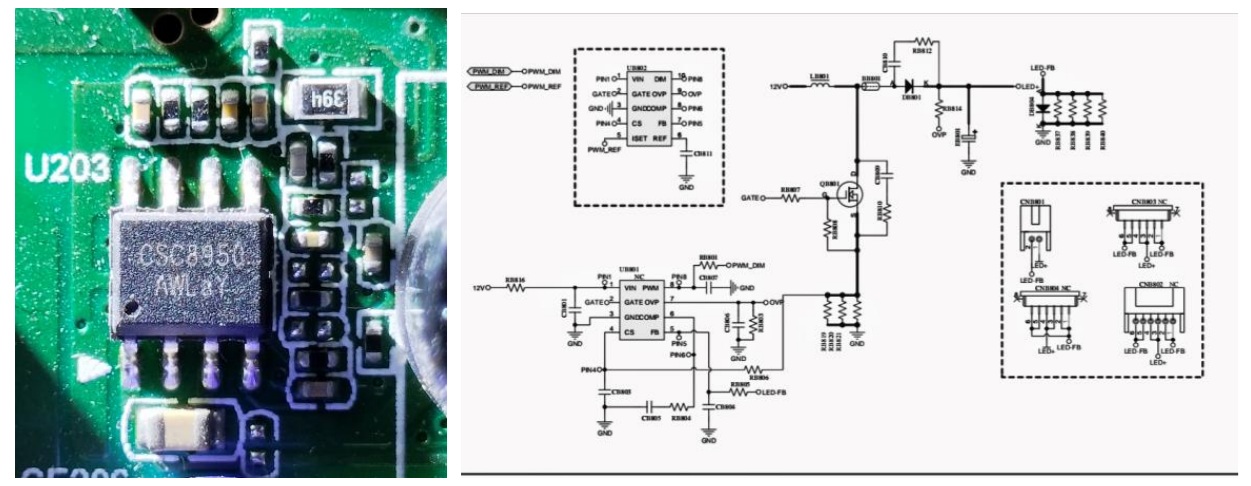
Though the datasheet of this IC was not available in the web, my techie friends helped me identify the pins comparing to similar eight pin LED driver ICs used in Samsung LED driver circuits. According to that 12V was present in pin 1 of the IC, power on voltage of 3V was coming to pin 8. But the gate drive was not present, indicating a defect in the LED driver IC.

Click here to check out the LED TV Panel repair ebook
As a replacement of this IC was not available, I removed the IC and the two electrolytic caps that I had replaced. Then cleaned up the area thoroughly. Then hunted for a suitable LED driver that can deliver around 96V to light up the four strips. I bought two LED drivers one with a single drive circuit and another with a double drive circuit. After testing these, I chose the yellow one, which looked sturdy and was capable of handling the voltages required. Let us have a look at the images of the board; front and back:
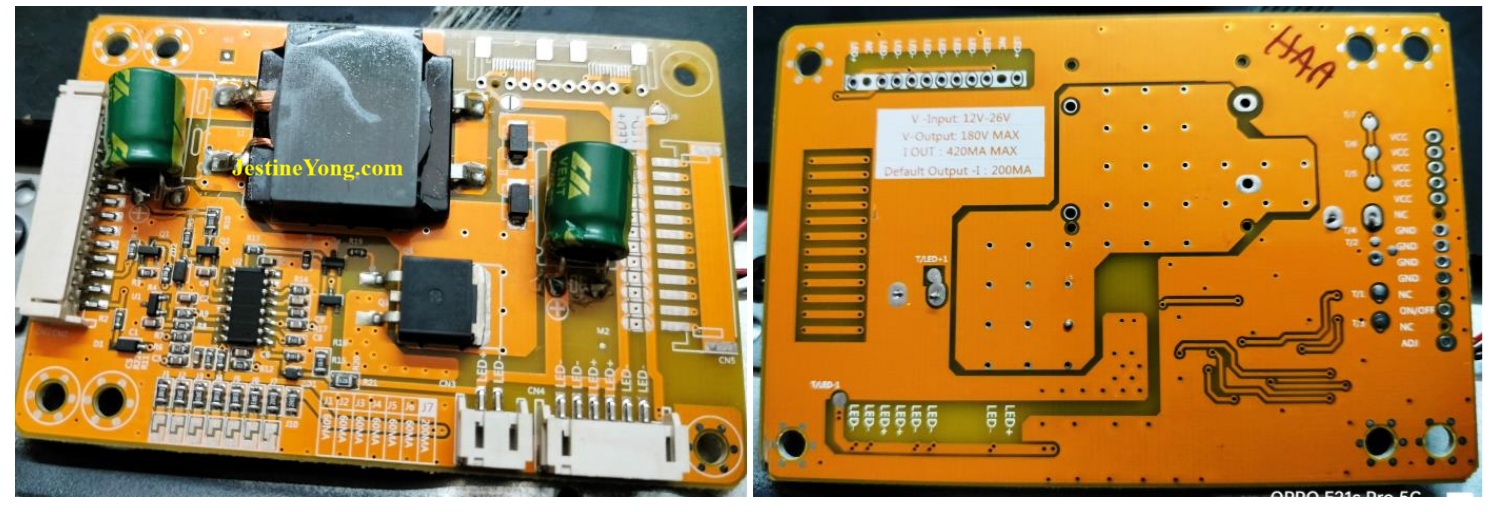
I do not know whether you can read what is written in red on the left top of the second picture. It says it would work from 12V to 26V input to give out a voltage of maximum 180V @ 420mA and the default current was 200mA. As the power on supply of 3V was dropping when given from the LED driver circuit, I gave a 10k resistor from the 12V supply on the LED driver board itself to its power on. Presumably the 3V supply current might have been adjusted to suit the driver IC used in the combo-board of the TV and this external board might be taking slightly larger current, because of which the voltage was dropping. The only disadvantage is that the backlight would remain on even when the set is in standby, which the customer was willing to compromise. I connected the new strips to the yellow board and checked the voltages and current drawn, which are as per images given below:
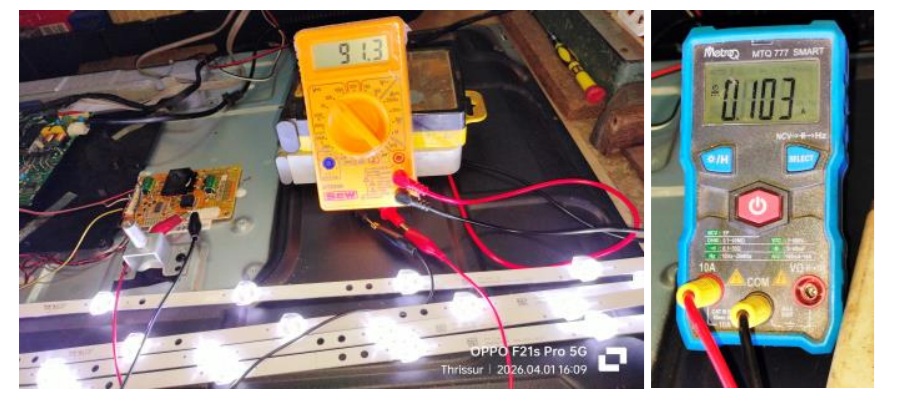
The reading was 91.3V @ 103mA current, which was very, very safe. So, I fixed the strips in its place and reassembled the reflector and diffuser sheets and its holding frame like before and applied power to check the illumination:
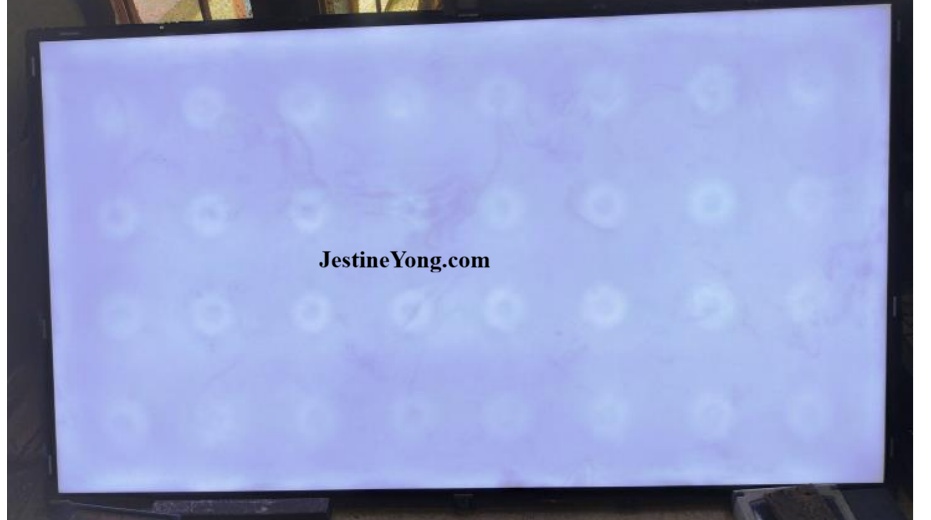
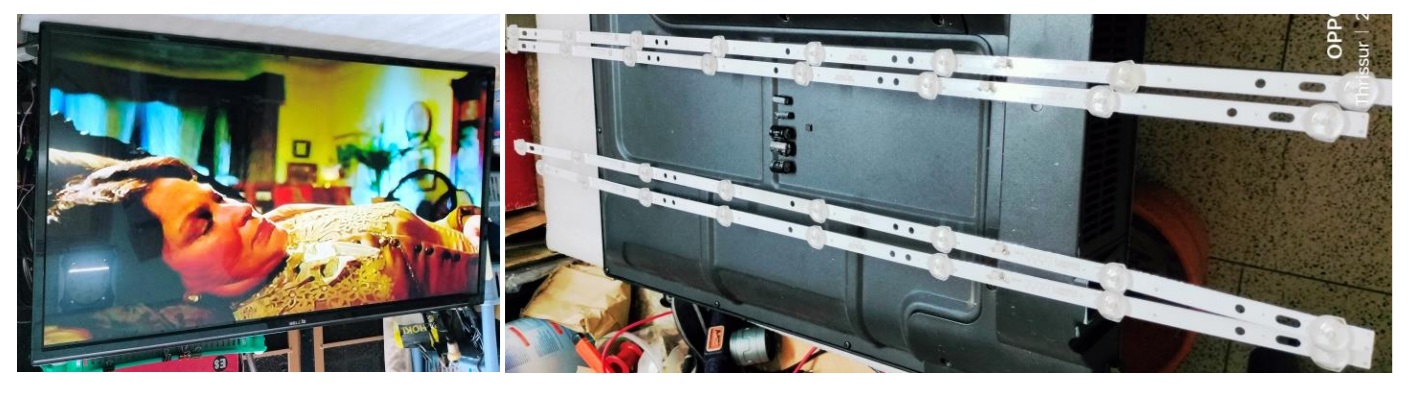
Though the LED lights are having aura type round bright spots around it, these were not visible after the panel was fixed and it did not cause any problem on the picture when tested. The TV was tested for several hours, before the back cover was fixed and customer was informed to collect. Mission accomplished with a lot of learning that helped the satisfaction to gain entry into the collection bag. Following are the images of TV working and discarded components:

This article was prepared for you by Parasuraman Subramanian from India. He is 76 years old and has more than 30 years’ experience in handling antique equipment like Valve Radio, Amps, Reel Tape Recorders and currently studying latest tech-classes conducted by Kerala State Electronics Technicians’ Association. He has done graduation in BBA degree, private diploma in Radio Engineering and retired as MD of a USA company. Presently working as Consultant to Hospital and other institutions.
Please give a support by clicking on the social buttons below. Your feedback on the post is welcome. Please leave it in the comments.
P.S-If you enjoyed reading this, click here to subscribe to my blog (free subscription). That way, you’ll never miss a post. You can also forward this website link to your friends and colleagues-thanks!
You may check on his previous article on Milky Display Necessitated Panel Replacement In Samsung LED TV-UA43N5005AK
 (35)Dislikes
 (1)
(1)
10 Comments
Leave a Reply





Albert van Bemmelen
July 12, 2026 at 5:21 pm
Again a professional repair that shows that these tv's very often only can be fixed using some sort of a compromise. In this case the fact that the backlight stays on even when the tv is in standby mode. Maybe that also could have been avoided by adding a dedicated off-switch in serie with the backlight board or the led strips?
Oddly they keep marking milli-amps as MegaAmps on the pc boards.
Parasuraman S
July 12, 2026 at 6:32 pm
Yes, I do agree with you. Cost of service was also in great consideration, and I wanted to make it as minimum as possible. Many thanks for your expert comments, dear Albert!
Tito Kanshulu
July 12, 2026 at 6:17 pm
Excellent repair Sir. Did the led strips remain on while in stand-by as earlier predicted?
Parasuraman S
July 13, 2026 at 8:30 am
Yes, it remained on! Many thanks!
Yogesh Panchal
July 12, 2026 at 6:59 pm
Good Job!Sir,
Good efforts were made to save the device, but there are limitations regarding the availability of parts. It doesn't feel good when, after such thorough fault finding , the necessary parts cannot be found.
Apart from a few common components, the company specifically uses or manufactures certain parts exclusively for a single model—parts that are neither found in other models nor used by any other company. This is driven by continuous R&D and rapidly evolving technology.
Parasuraman S
July 13, 2026 at 8:31 am
Making board level repair more and more complicated; this is the motto seems to be adopted by the manufacturers, so that the customers will be forced to either go for an exchange or go to them for service. Many thanks for your detailed comments, dear Yogesh Bai!
Imoud.O
July 13, 2026 at 2:32 am
If yellow led driver input voltage is 12-26v,then from where did u draw that voltage from to yellow driver card for use?
Your explanation about 3v usage on yellow card seems cloudy to me, does it need also 3v for operation for some reason?
Parasuraman S
July 13, 2026 at 8:37 am
The backlight power on requires a 3V apart from the 12V as its VCC. Some circuits would not work if DIM is also given a volt like this, in some other circuits it would not work if DIM is connected with a Voltage. Strange are the ways the circuits are designed. Such requirements have already been explained by me in several articles before! Many thanks for your comments!
Mark J
July 13, 2026 at 3:30 am
Good job once again Parasuraman. Good thinking outside of the box troubleshooting and repair.
Parasuraman S
July 13, 2026 at 8:37 am
Many thanks, dear Mark!