
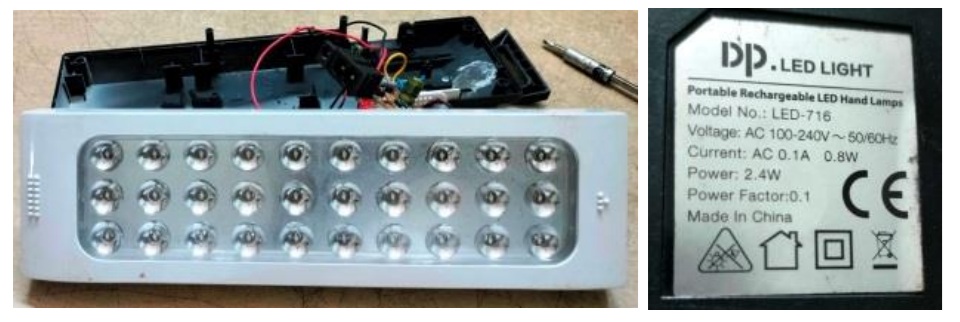
AC Drop Capacitor Found Burst In DP Emergency Light Model LED-716
I request you all to read the article on repair of a similar light published in July, 2018:
https://jestineyong.com/how-to-service-dp-30-led-emergency-lamp/
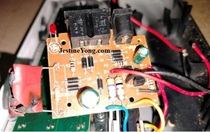
The model number was 30, which is now 716 showing the number of times it got changed, while the board remained the same! I saw only one difference. Earlier they were using IN4007 diodes in all sections. But this time I saw two IN5819 diodes used in the switching sections. Otherwise it was exactly same, using a 155/400V capacitor for dropping the 230 AC Volt to around 6V on load.
I noticed the capacitor burst in this light and I am sharing a few connected snaps before I delve into the rectification works done:
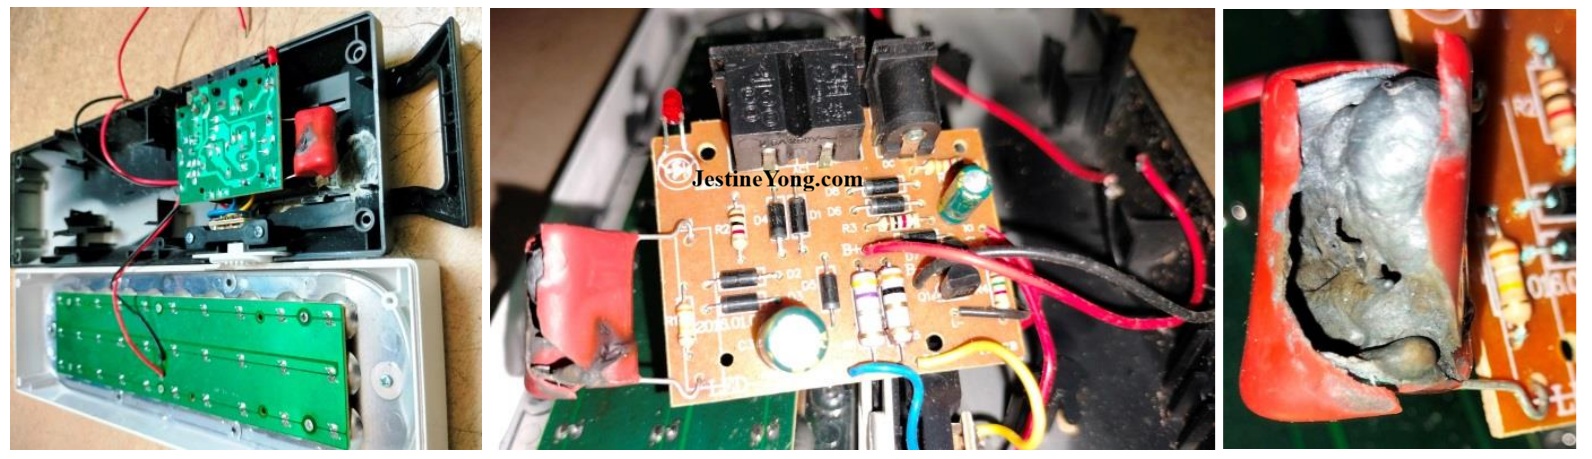
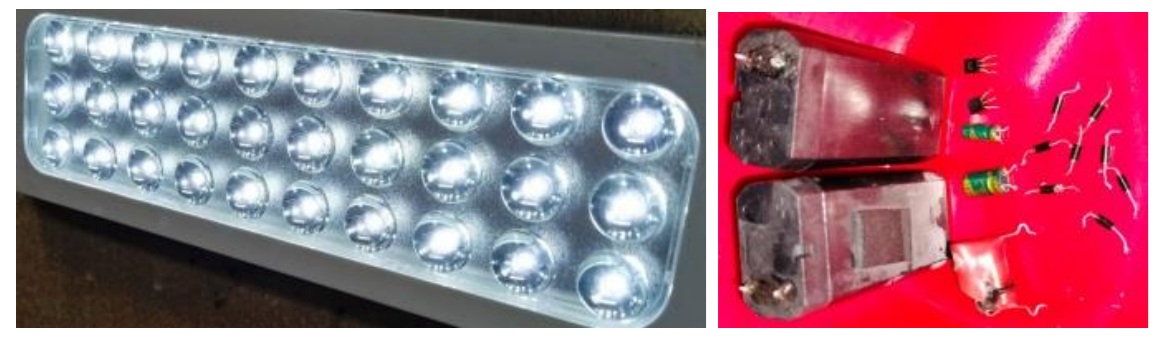
I also observed fungi formation on many components which was not surprising as it is monsoon season here. Without any hesitation, I went ahead and replaced all the caps, diodes and two transistors (C945 & D965) as these would have got affected and might cause another burst. I also replaced the batteries that were found drained, which caused drawing of high current that resulted in bursting of the cap. After all these exercises, I retouched all solder joints and connected the batteries which were in parallel and found the light to be working ok.
Connected the light to the Mains and saw LED lit indicating that the charging was taking place. The auto light on mode when the power goes off was also found functional. After putting the light on mains for quite some time, I closed the covers and kept it ready for customer to come and collect. Mission accomplished with satisfaction getting gathered!

This article was prepared for you by Parasuraman Subramanian from India. He is 76 years old and has more than 30 years’ experience in handling antique equipment like Valve Radio, Amps, Reel Tape Recorders and currently studying latest tech-classes conducted by Kerala State Electronics Technicians’ Association. He has done graduation in BBA degree, private diploma in Radio Engineering and retired as MD of a USA company. Presently working as Consultant to Hospital and other institutions.
Please give a support by clicking on the social buttons below. Your feedback on the post is welcome. Please leave it in the comments.
P.S-If you enjoyed reading this, click here to subscribe to my blog (free subscription). That way, you’ll never miss a post. You can also forward this website link to your friends and colleagues-thanks!
You may check on his previous article on Rebuilding Battery Pack Of Schiller Ventilator Model GRAPHNET TS
 (28)Dislikes
 (0)
(0)
7 Comments
Leave a Reply


Albert van Bemmelen
March 8, 2026 at 4:32 pm
That they now decided to replace the 1N4007 diodes into two 40V, 1A Schottky 1N5819 diodes is odd since the 1A 1N4007 diodes easily rectify upto voltages of 1000V safely. Whereas the high frequency low voltage dropping 1N5819 diodes only have a reverse voltage of 40V, they do have a peak amperage of max 25Amps. Which makes some sense since the leds are low voltage themselves.
I have seen this schottky diode also being used in several of DIY made projects too.
Parasuraman S
March 8, 2026 at 6:03 pm
Odd are the ways manufacturers design circuits and use components! Many thanks for your expert comments, dear Albert!
Mark J
March 9, 2026 at 4:02 am
Parasuraman good job on the repair.
Parasuraman S
March 9, 2026 at 12:48 pm
Many thanks, dear Mark!
MP
March 9, 2026 at 6:15 pm
Thank you, Subramanian. The bursted capacitor looks to me like a lightening strike 'victim'. The cap itself, with the resistor that its connected in parallel to form a voltage altering RC circuit, are the immediate components connected to the mains voltage and hence vulnerable to destractive overvoltage. Its okey to suspected the shorted batteries for excessive current draw, in which case replacing the resistor and transistor among other components would have been necessary, to be double sure of a complete repair. The small rechargeable torches I often come across have a simpler charging circuit - less components e.g fewer diodes, no transistor, etc. Looseness of the cable pins in the mains socket during a recharge can cause unstable voltage supply to the board, leading to component(s) failure. Its easier to find a needle in a haystalk than finding new replacement batteries. So rather than keeping on throwing these faulty torches, some fellows returned to using torches with non-rechargeable batteries.
Parasuraman S
March 9, 2026 at 6:46 pm
Thanks for your evaluating comments, suggestions and sharing your experiences.
Yogesh Panchal
March 9, 2026 at 10:46 pm
Good Job!Sir
No fuse used?