
Restoring A CRT TV With Philips China Kit

SET MODEL NUMBER AND MAKE: Toshiba 219X6M fitted with very old China kit using Philips circuit.
Complaint: Intermittent colour, poor picture quality, set goes off.
Action taken: Opened and cleaned the set thoroughly, as it had collected a lot of dust, dirt and cobweb.
Observation and troubleshooting done: Saw a lot of dry solders all around. The ESR of electrolytic capacitors were almost all out of range.
Rectification done: Replaced all electrolytic capacitors on the board. Then completed dry solder patch up on the main board and CRT PCB. Replaced the CRT Socket. Replaced the Anode connector and cap. Replaced one speaker as it was open. Rechecked board for any man made shorts. After cleaning and lubricating all the contacts and connectors, mounted the Board to the CRT Tube.
Result: Set worked perfectly well. Satisfaction thus jumped into the bag, which looks like has become automatic!
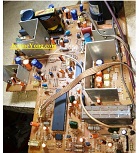
The Calcom Board (now no longer available)

The Board with all electrolytic capacitors replaced (inserted before soldering and cutting the leads)
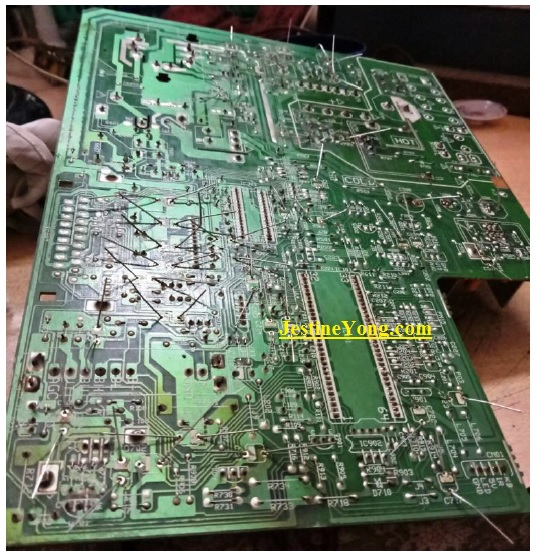
The Board after soldering the caps and thorough cleaning:

Proof for working


This article was prepared for you by Parasuraman Subramanian from India. He is 69 years old and has more than 30 years’ experience in handling antique equipment like Valve Radio, Amps, Reel Tape Recorders and currently studying latest tech-classes conducted by Kerala State Electronics Technicians’ Association. He has done graduation in BBA degree, private diploma in Radio Engineering and retired as MD of a USA company. Presently working as Consultant to Hospital and other institutions.
Please give a support by clicking on the social buttons below. Your feedback on the post is welcome. Please leave it in the comments.
P.S-If you enjoyed reading this, click here to subscribe to my blog (free subscription). That way, you’ll never miss a post. You can also forward this website link to your friends and colleagues-thanks!
You may check on his previous repair article below:
https://jestineyong.com/modifying-bpl-m9903-two-in-one-to-house-usb-unit-in-place-of-tape/
 (62)Dislikes
 (1)
(1)
11 Comments
Leave a Reply


Albert
April 11, 2020 at 6:19 pm
Another astonishing repair that even if we wanted to can't be repeated because the mentioned Calcom C25N2V3 board you fixed is no longer available.
Parasuraman S
April 11, 2020 at 8:35 pm
Many thanks, Albert! You always encourage me very much!
Henrique J. G. Ulbrich
April 11, 2020 at 11:48 pm
Very good, Parasuraman. Thanks for sharing, and happy to know your satisfaction bag is enriched. I realized that you adopted a practical way of reporting, separating the subjects and putting the things in an organized text flow. Like a real technical report. Practical, fast and objective, without transforming the report in a soap opera. Very good.
Parasuraman S
April 15, 2020 at 6:54 pm
Yes. I have changed the format to make it easier and shorter. But many other articles already prepared and waiting are in the old style. I felt that a lengthy article might become irksome to at-least some. Hence the change. Many thanks for your valuable feedback.
Gassan Ali
April 12, 2020 at 4:03 am
This is the most number of capacitor changes I've seen in a single repair job. Great job.
Parasuraman S
April 15, 2020 at 6:54 pm
Yes, and I love replacing all the old electrolytic capacitors in a board. Many thanks for your feedback!
Yogesh Panchal
April 15, 2020 at 3:25 pm
Good Job! Sir
Parasuraman S
April 15, 2020 at 6:52 pm
Many thanks!
Robert Calk Jr
April 15, 2020 at 5:28 pm
Nice work, Parasuraman!
Parasuraman S
April 15, 2020 at 9:37 pm
Many thanks!
Manikandan M
December 1, 2020 at 11:59 am
வணக்கம் ஐயா,calcom கிட் தான் அவுட் புட் ஆனாகவில்லை
=================================
Hello sir, the calcom kit just did not output