
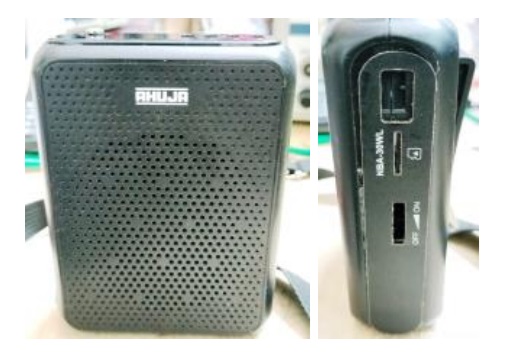
SMD Cap Found Dead Short In AHUJA Portable PA System NBA-30WL
This was brought by a recently added regular customer with the complaint that it became dead. As this portable PA system was used by his wife, a teacher, to address the students, he requested me to give priority and I gladly took up the job in the next slot found free.
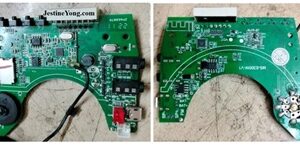
Opened and cleaned the set, which had collected a lot of black moist dust. It had only board with another small board attached to it from the top. Let us have a look:
It was working from an 18650 3.7V 2000mAh Li-ion battery and I found it to be in fully charged condition when checked keeping it outside. But once it was connected, the voltage dropped. Naturally, my suspicion was on the battery and I used a standby battery which I have in stock for testing purposes and the case was same there also. I checked the positive and negative rails for any short and did not find any. I knew that there was some component shorting somewhere, which was causing drop of voltage. As no direct short was detected in the primary power supply, I checked the secondary power supply sections. Yes, the secondary section was showing a dead short between the VCC and ground! In order to trace the defective component, I did a series of cold tests. But the problem was that there was no schematic and I had to check the datasheet of the ICs and other SMD components to pursue my troubleshooting. It was taking a lot of time. The second problem was all components in the secondary would show leak or short because of this and it will be very difficult. I did not want to feed a higher ampere power supply and fume the defective component in such a complicated board as it might damage some working components also.
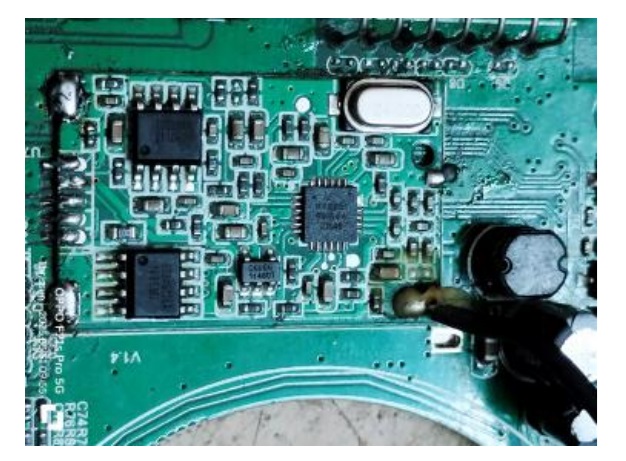
Firstly, getting datasheets of some of the ICs itself was difficult and we won’t get a replacement of any ICs or transistors if fumed, resulting in irreparable condition. So, I removed a few transistors and suspected SMD caps and found these to be ok on cold tests outside. Then removed the attached PCB, which I presume was the µController board. But even then I could not trace the cause. As a careful scrutiny of all the components with a 10X lens, exposed a strained SMD cap after a coil, I removed it upon which the short was removed. Since it was a filter cap after the coil, I used 8uF SMD cap as replacement. There was no way of knowing its correct value. Then fixed the board and other components that I had removed. Following are pictures of the shorted cap and the place where I found it. The IC that you see below the cap is a charger controller.

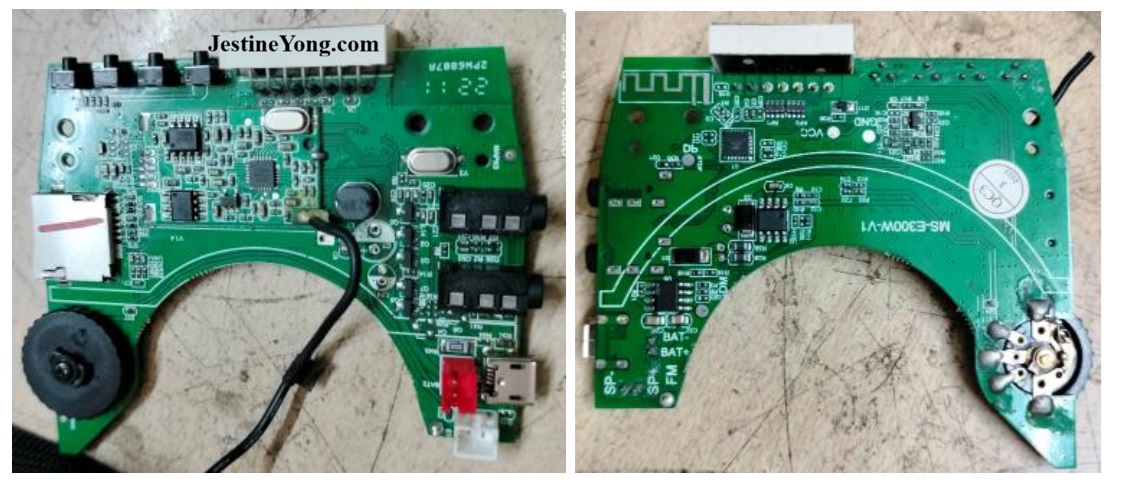
Then re-fixed all the removed components and the board. Let us have a look at the board after it was re-fixed:
I felt happy about the work as it was so neat that no one can easily make out that it was removed and re-fixed.
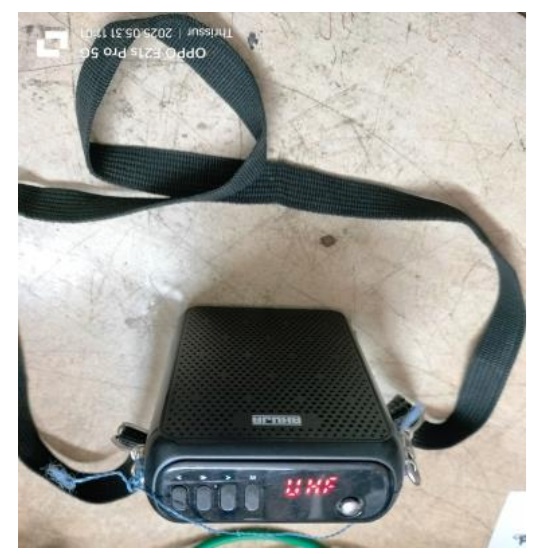
Then applied power from the testing battery and found the PA system working very well in all three modes:

The modes you see are UHF (no idea what this is for), FM and blue tooth. Then fixed the original battery and the covers back and made it look like how it was. Mission accomplished with lessons learnt, because of which great satisfaction got welcome entry into the collection bag!

This article was prepared for you by Parasuraman Subramanian from India. He is 76 years old and has more than 30 years’ experience in handling antique equipment like Valve Radio, Amps, Reel Tape Recorders and currently studying latest tech-classes conducted by Kerala State Electronics Technicians’ Association. He has done graduation in BBA degree, private diploma in Radio Engineering and retired as MD of a USA company. Presently working as Consultant to Hospital and other institutions.
Please give a support by clicking on the social buttons below. Your feedback on the post is welcome. Please leave it in the comments.
P.S-If you enjoyed reading this, click here to subscribe to my blog (free subscription). That way, you’ll never miss a post. You can also forward this website link to your friends and colleagues-thanks!
You may check on his previous article on Mystery Solved In LG Monitor – W1953-TE PF
 (38)Dislikes
 (0)
(0)
18 Comments
Leave a Reply


Waleed Rishmawi
January 11, 2026 at 9:35 pm
A thermal camera and voltage injection method can easily help you out in this repair. But you made it and fixed it and that is a job well done. Have a blessed day
Parasuraman S
January 11, 2026 at 10:21 pm
As mentioned by me earlier, I can ill afford to buy a thermal camera! Voltage injection method can be done only when you have a circuit diagram with voltages marked. Many thanks for your comments, dear friend! Where were you all these days? Long time no see!
Waleed Rishmawi
January 12, 2026 at 3:28 pm
there are very now many afordable cameras in the market that you can add to your phone. most of the time the a circuit diagram is not needed as long you understand the circuit under test..but I understand your point. things are taking me from reading the articles and commenting on them due to the fact that I am very very busy in the shop and I am doing a lot of training for some helpers in my shop and that is taking most of my time... have a blessed day
Parasuraman S
January 12, 2026 at 9:51 pm
Many thanks for your comments and suggestions, dear friend!
Albert van Bemmelen
January 11, 2026 at 11:44 pm
No wonder it was a capacitor again! LOL
Parasuraman S
January 12, 2026 at 8:44 am
Ha! Ha! Many thanks, dear Albert!
Arunkant L Pandit
January 12, 2026 at 1:06 am
Interesing method of finding shorted smd capacitor. Very well fixed.
Ahuja PA system in UHF mode use UHF radio waves for reliable, interference free wireless microphone connections.
Parasuraman S
January 12, 2026 at 8:45 am
Many thanks for your comments and technical clarifications!
Mark J
January 12, 2026 at 1:38 am
Parasuraman well done on the repair. Good board repair.
Parasuraman S
January 12, 2026 at 8:45 am
Many thanks, dear Mark!
Imoudu.O
January 12, 2026 at 3:00 am
I wonder what physical symptom does the smd cap show or observe after using your 10X lens letting you know its the culprit.
Parasuraman S
January 12, 2026 at 8:49 am
A strained capacitor might look differently in its color and soldering. Out of experience, we can make out this. Many thanks!
Yogesh Panchal
January 12, 2026 at 3:26 pm
Good Fix! Sir,
A microscope is a tool that can help you easily locate many faults.
If you're unsure about the voltage rails, a short Killer device can damage the circuit beyond repair.
Sir, now it has become my habit that whatever circuit I get for repair, I write the value of each component on its photo so that it can help me in repairing similar devices in future.
Parasuraman S
January 12, 2026 at 9:53 pm
Many thanks for your comments and suggestions, dear Yogesh Bai!
MP
January 12, 2026 at 3:53 pm
You dont say how the PA sounded when testing it. "1-2 1-2 TESTING ! 1-2". I wonder how far the sound goes, seeing that it has no 'real' amplifier in it and has a 3.7v dc input. Tracing a shortcircuit in a secondary circuit among smd parts is a painstaking exercise, the hardest electronics repair. For capacitor testing, I always prefer lifting from the circuit board only one side of it (capacitor) because I've never known whether removing the whole of it from the board can have a damaging impact when its replaced in a 180 degrees turn. To me an smd looks on one end just as it looks on the other end, the difference is the same. I know your paraphernalia works for you just well enough for electronics repairs, mine is far from being nearly half as good. I nonetheless remove and fit smd components. I have to soldier on. If only you could see my apparatus for checking the integrity of; a capacitor, a diode, a transistor, ...... If only you could see how I manage to remove and replace ICs .... If only ... If only
Parasuraman S
January 12, 2026 at 9:55 pm
Many thanks for your detailed explanatory comments!
MP
January 12, 2026 at 5:36 pm
I'm expressing my thought concerning a certain comment. Having an ICs schematic is very important incase of say a secondary circuit that has a short circuit in it. In such a situation when some tracks to the IC pins run under the IC. If I have no schematic for the ic, it becomes difficult to trace the vcc track to the IC vcc pin because when using a multimeter in continuity mode, almost all the ic pins show they are linked to the vcc source, just because of the short. In such a case desoldering out the IC is what I resort to so as to visually follow the track to the right input pin.
Parasuraman S
January 12, 2026 at 9:56 pm
Yes, I too follow this method, which I have found to be very useful! Many thanks once again!