
The Rotary Encode Was Found Powdered In SONY Radio Model ICF-SW40 Multiband Radio
This compact multi band radio was picked up by me when I visited my school classmate, a retiree from UNESCO doing voluntary social work adopting poor remote villages in the eastern region of India. I visited him to say hello as I saw him sitting in the sit out while I was passing by the road after collecting a transformer from that area. After exchanging a few niceties and spending a few minutes talking about this and that, when I was about to come out, he went inside his home and gave this radio to me saying that it belonged to his brother and now it was reportedly in a dead condition. I opened the battery cover and noticed that the contacts were all rusted and one spring had already got eaten up almost fully. I thanked him and jovially mentioned that it would cover my conveyance expenses for my visit! He dug me saying that I was keeping up my community tradition! We had a good laugh at his dig! I took up the work in the next gap I got and opened the back cover, which should be taken out from its plastic locks after removing the four screws from behind.
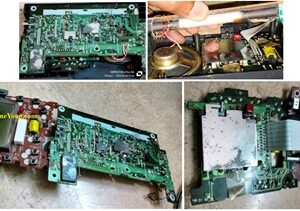
The inside was very neat and clean, except for the damages in the battery compartment caused by leaked batteries. I applied 4.5V DC through an adaptor and was glad to see display getting on though very dull. The radio made hissing noise when I pressed the power on button indicating that it still had life and perhaps hibernating due to negligence. Let us have a look at some pictures of the inside:
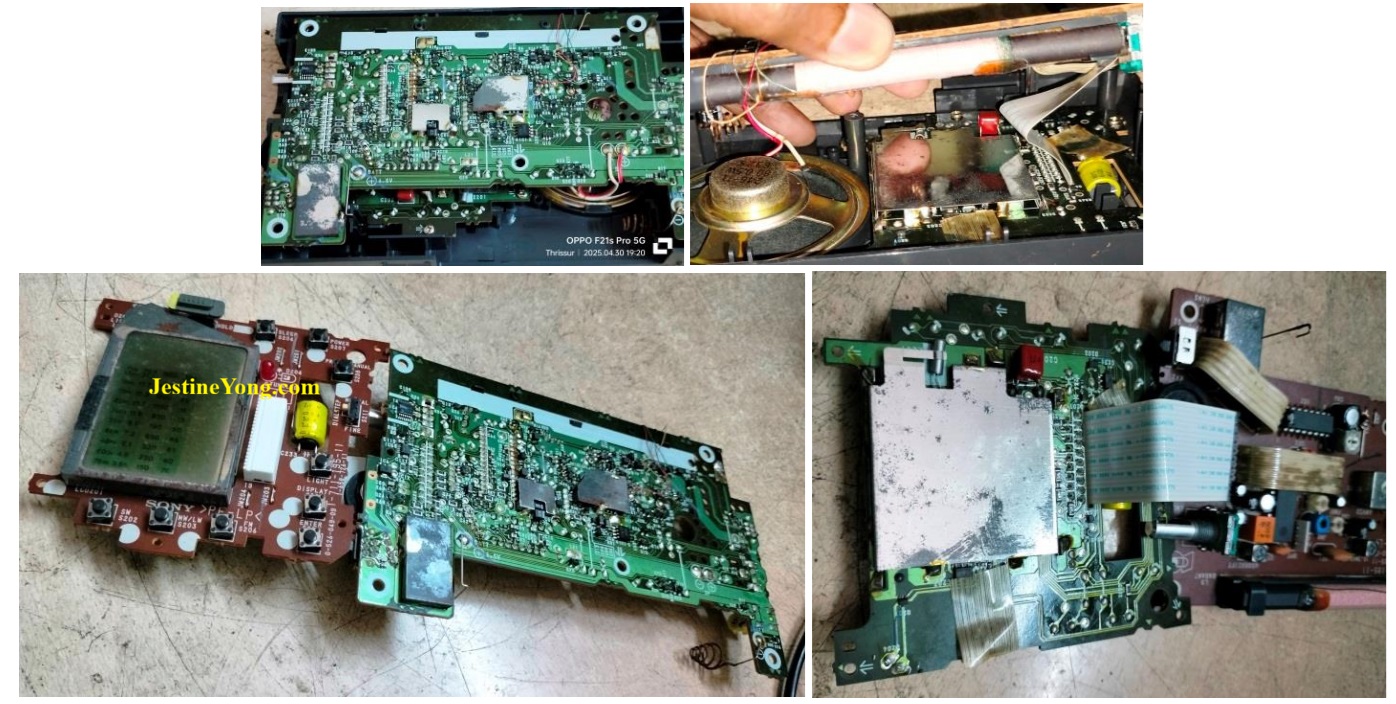
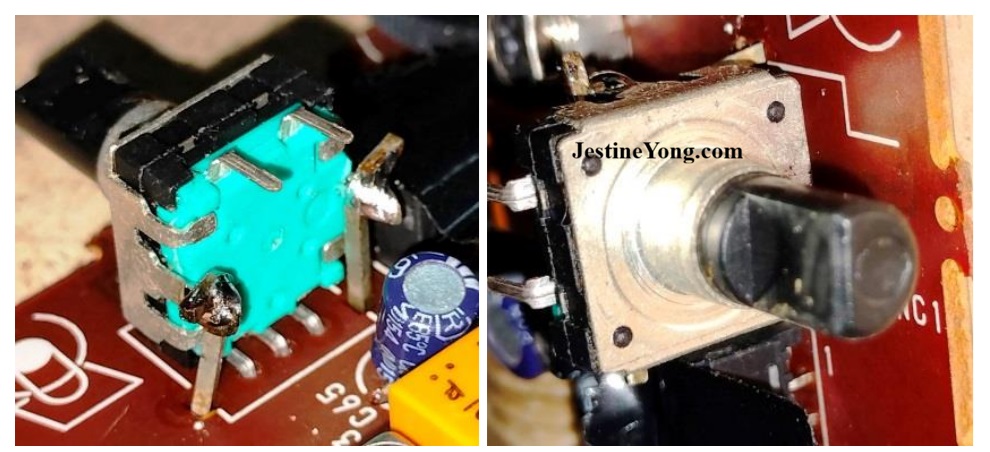
The press- to-on switches were not responding properly and I replaced all the nine of them first. The rotary encoder was just rotating freely without any contact vibration felt. When I checked up a few capacitors using my SMD tweezer tester, the values were almost half and ESRs showed as nil especially in tiny 10uF/6.3V or 10V caps. The small size 2,200uF/10V cap was showing healthy reading. I replaced all the other small caps as I had sufficient stock of good quality caps. Only in one 470uF/10V, I had to use SMD Aluminium capacitor, removing its gasket from the bottom and straightening the pins for a through-hole fix. Then retouched the dry solder points wherever found, cleaned the two boards and reconnected the strip wire and applied power. The display was better and the radio responded very well with high hissing noise. I was using headphones as I had disconnected the speaker for removing the boards. But the tuning was not taking place, as the decoder was not working. I removed the decoder and opened it to check what went wrong inside. Just see it for yourself:
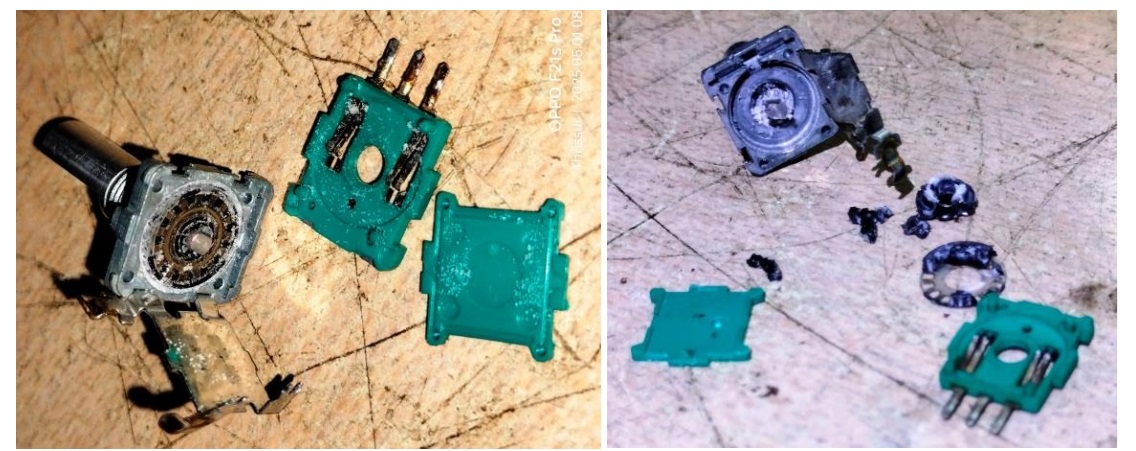
When I tried to clean the dust formed that you can clearly see around the spindle in the first picture above, the whole plastic bracket fell out in the condition that you see in the second picture. So, I had no other go but to fix another in its place at-least to test whether the tuning was working properly or not. I downloaded the service manual from the web, which was very useful for understanding the working and do the troubleshooting. I took one vertically fitting decoder that I had and bent the leads to make it horizontal. It had two leads at the other end as it was with a switch. The one used in the radio did not have a switch in it. Obviously, if the switch is given a function, it would get accidently activated when the encoder is rotated for tuning. I used two strong leads for keeping the control firmly in its place. Let us have a look at this testing arrangement done:
The tuning was taking place, when I applied power and I could pick up stations both in FM and AM. Unfortunately, this had no digital tuning facility or auto search and lock facility. We have to keep rotating the wheel, during the time of which, we might perhaps chant some mantras like Tibetans do! (LOL) There was provision for storing picked up stations in around 20 presets but as the radio was not having a memory storage facility, we may have to redo it every time when the power is removed. This set was supposed to be used from batteries and primary supply was on to keep the memory alive. Everything was working well, but the decoder of correct size was required since the back cover could not be fixed in place as the slightly large sized decoder was not getting inserted into the slot provided. I fetched one with thin body which had a switch connection at the rear but fit on a PCB. I removed it from its PCB and replaced the large size decoder.
The replaced decoder did not have a holding stand, because of which I inserted the three pins deep enough and soldered for holding it in place. Since there was an inner ring on the cabinet for the knob to rotate without wobbling, there won’t be any strain on the decoder and it would serve the purpose. The dull display could not be set right as that required removing the LCD display and replacing the diffuser and polarizer films, which were not available in the market. Even though there was a light switch, the display was not glowing like in any LCD screens because of the sheets. But if we have a proper light in the room, it was possible to read the dial. Anyhow, that was required only to view the tuning frequencies and once stations are selected and stored in the memories, the display did not matter much. There was a printed guidance of frequencies on the dial and an LCD line was jumping on to the correct line as and when we tuned to indicate where we were and that was prominent enough. It had a clock and sleep mode too!
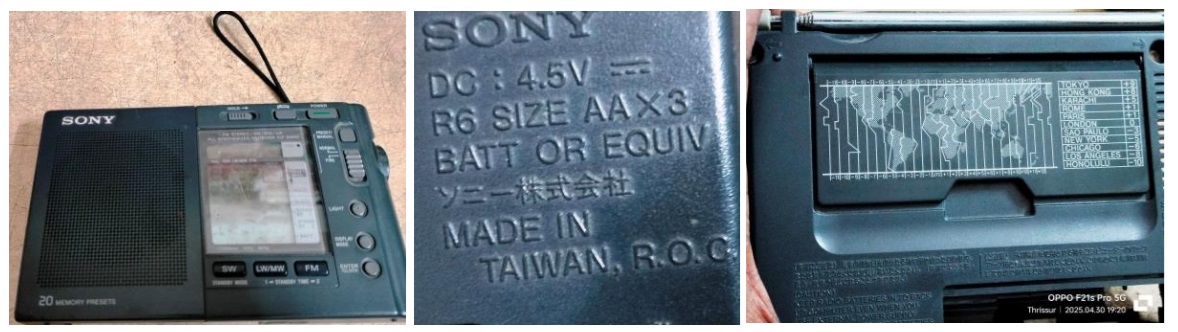
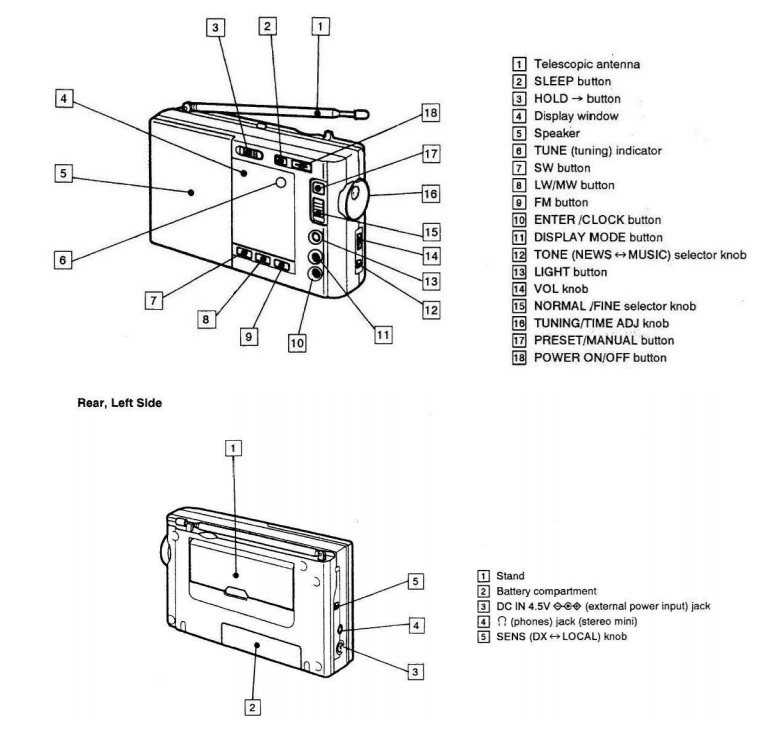
There was a switch to select the tone mode to News/Music. There was yet another to select the frequency step. Let us have a look at the controls it had: (Please zoom and see)
Once the power off button is pressed, the ‘hold’ switch can be slid to avoid accidental switch on, as none of the switches worked in that position. I was amazed to see the kind of functions provided in this radio and appreciated the Japanese guys for designing and producing such a lovely set in a very compact form. The radio worked really well and the sound was very pleasant when headphones were used.
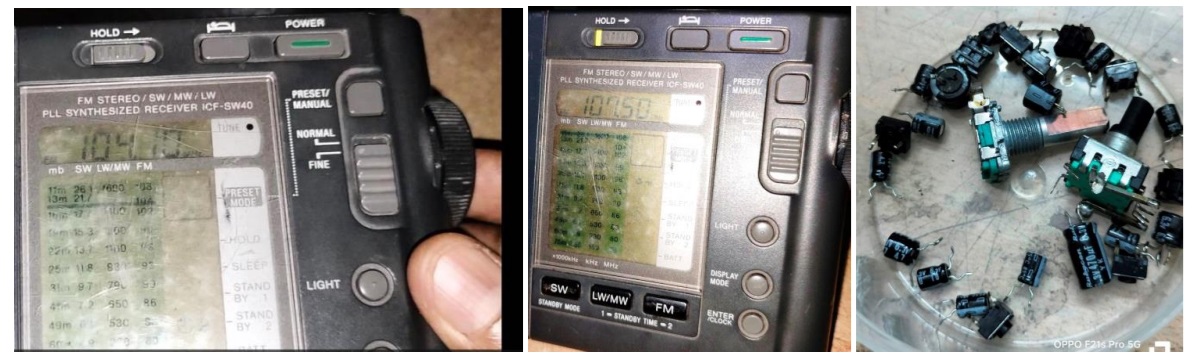
But the output to the speaker was not as good as that. The set worked on three AA size batteries. In fact I was happy to work on this type of devices, as it was very amusing! Now let us have a look at the concluding pictures, with a statement that mission got accomplished with satisfaction gathered to the bag:

This article was prepared for you by Parasuraman Subramanian from India. He is 76 years old and has more than 30 years’ experience in handling antique equipment like Valve Radio, Amps, Reel Tape Recorders and currently studying latest tech-classes conducted by Kerala State Electronics Technicians’ Association. He has done graduation in BBA degree, private diploma in Radio Engineering and retired as MD of a USA company. Presently working as Consultant to Hospital and other institutions.
Please give a support by clicking on the social buttons below. Your feedback on the post is welcome. Please leave it in the comments.
P.S-If you enjoyed reading this, click here to subscribe to my blog (free subscription). That way, you’ll never miss a post. You can also forward this website link to your friends and colleagues-thanks!
You may check on his previous article on Sad Case Of An Irremovable Dial Cord Drum In SONY 2-IN-1 Model CFS1025S
 (38)Dislikes
 (0)
(0)
12 Comments
Leave a Reply


Albert van Bemmelen
January 3, 2026 at 5:46 pm
Although the dull display with the dial even with the light switch on was only readable with proper light in the room, it luckily showed just fine in the photos you took! It is however still a shame that the set stations that are stored in the (not static) radio memory are lost as soon as the power was disconnected.
I remember that this in 80's sets often was partly solved by keeping the memory voltage backed up by using a supercap. But that of course only worked for a short period of time just to be able to reconnect power or batteries without worrying having to restore all stations afterwards again.
Parasuraman S
January 3, 2026 at 10:36 pm
Yes, you are absolutely right! Many thanks for your expert comments and feedback, dear Albert!
Sagar Sen
January 5, 2026 at 3:45 am
Sir do you have any instagram id or any youtube channel or any socialmedia platform?
Parasuraman S
January 5, 2026 at 1:55 pm
Sorry, dear! No!
trebel
January 3, 2026 at 7:02 pm
Thank you for all your hard work.
Thank you kindly.
Good tutorial.
Cheers m8.
Happy New Year.
Parasuraman S
January 3, 2026 at 10:36 pm
Many thanks for your encouragement!
Mark J
January 4, 2026 at 4:32 am
Parasuraman great article. Happy new year.
Parasuraman S
January 4, 2026 at 8:07 am
Happy new year, Mark and thanks for your comments!
ANTHONY PATERSON
January 4, 2026 at 6:10 pm
Parasuraman, apologies for hyjacking your repair but I wanted to comment on the Ideal Bridge Rectifier Video.
I was unaware this arrangement existed and the 'controller' is the key to its operation. The Controller ICs are quite expensive but I have bought two items from AliExpress for £15 UK Pounds (using controller LT4320) A note to Jestine, it would be good to have a comment sheet for the videos.
Parasuraman S
January 4, 2026 at 8:38 pm
Sorry, dear I am unable to follow or connect with the subject you are commenting! Anyhow, many thanks!
Yogesh Panchal
January 6, 2026 at 6:07 pm
Good Job! Sir
Parasuraman S
January 7, 2026 at 4:55 pm
Thanks!