
How To Change Magnetron Socket Of Microwave Oven
If microwave oven is not heating when switch ON and having tested the magnetron and discover the magnetron two pins are shorted to its body, or pins are broken, it can be removed and replace.This was what I did in my last acticle. If you haven’t read this acticle,pls do first for better understanding. Hope you know how to test magnetron for short I suppose.
Now let see how this was done.In my case it was one of the pins that was broken
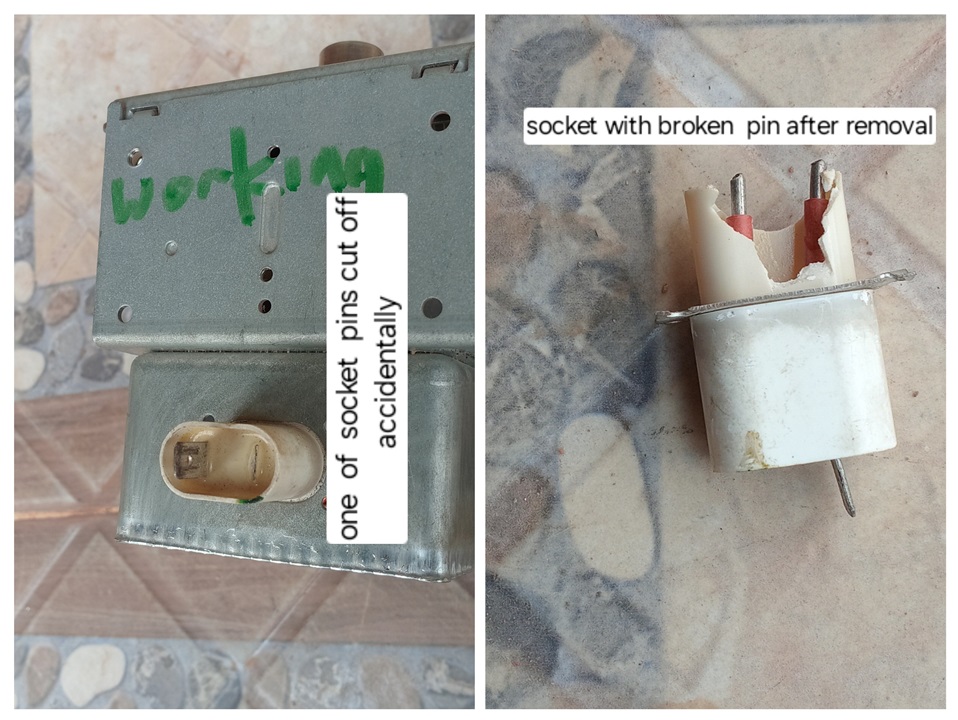
and since I have a ‘not working magnetron, but its socket was not shorted’ as scrab, I did the interchange.
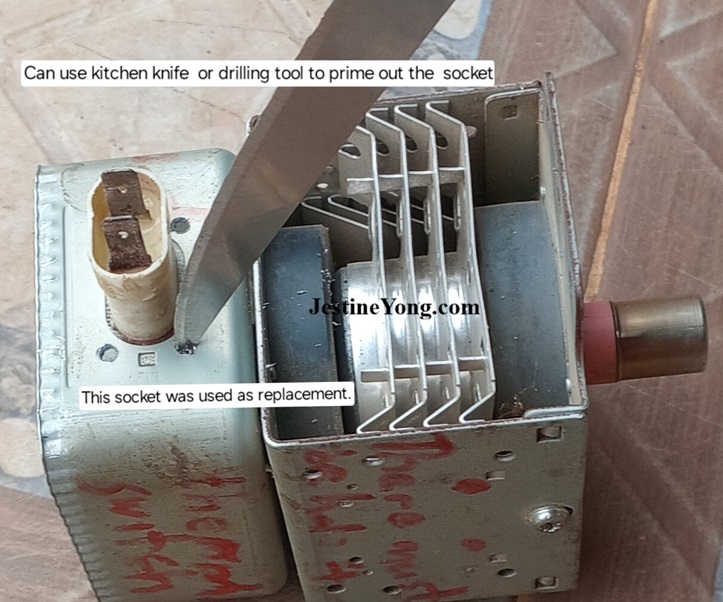
First use a drilling tool or a sharp pointed knife to remove the rebeat that is used to attach socket to top of magnetron….see how I use knife….turning knife clockwise in picture below.
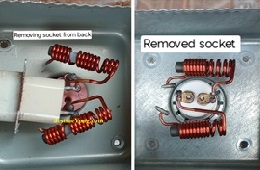
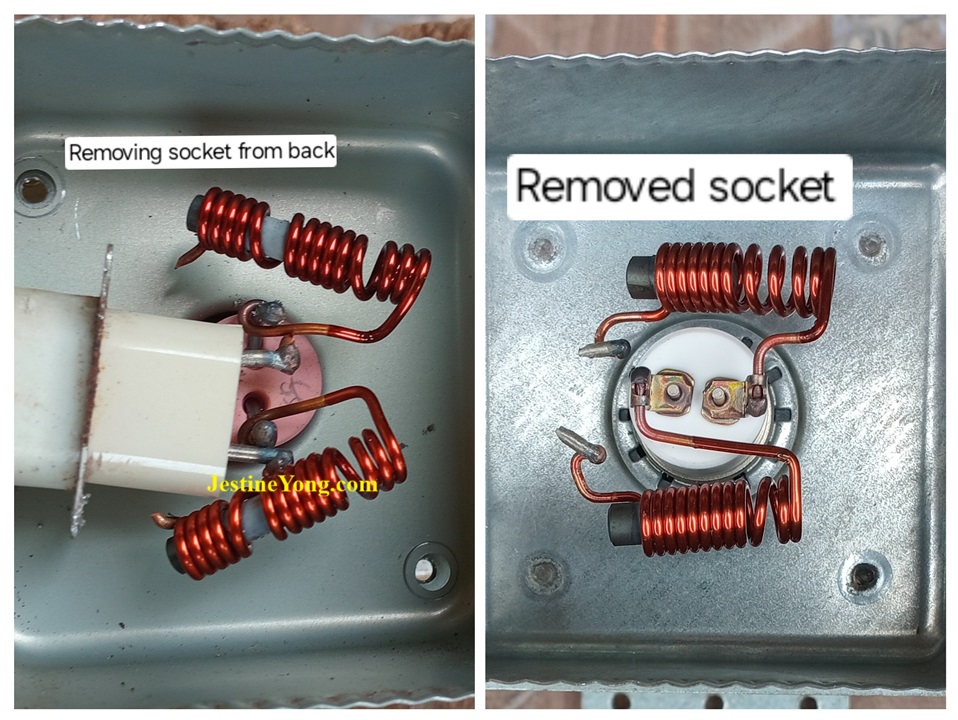
Having removed these,then prime open the flat top cover of magnetron, you will see two copper coil inside.
Use cutter to cut the two coils at the base of socket,then you remove socket from backward.
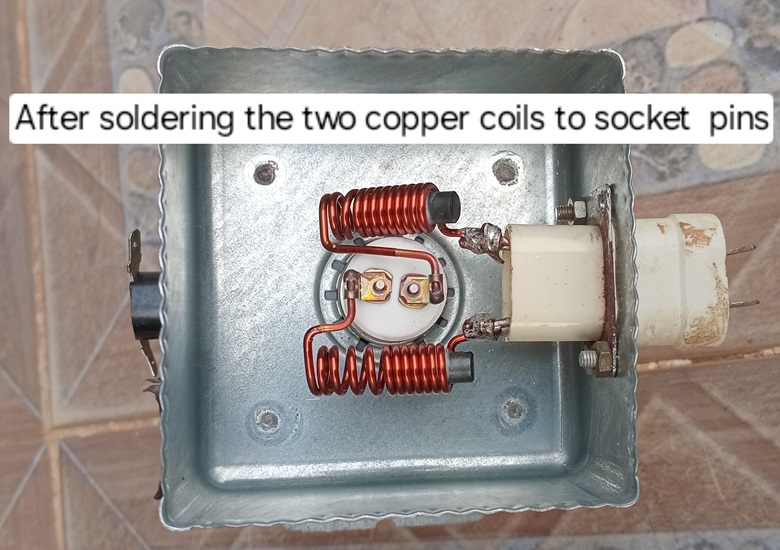
You remove the good socket also the same way,then replace the good socket into the working magnetron, from inside outward, solder the coils to same bases of good socket,this has to be soldered properly and strongly. Test again for short before use.
You can use ring tester tool to test coils if you like.
This is the finished repair work.

This article was prepared for you by Imoudu Onwumah from Nigeria. He is 62 years old and has just 3 years experience in electronics repairs. I started career in hotel industry as a chef, but then I was doing repairs only in electrical repairs as a hobbyist. In 2018, I decided to learn about electronics which through Jestine’s electronics e-books and holding my hand, am an electronics techie today.
P.S- If you enjoyed reading this, click here to subscribe to my blog (free subscription). That way, you’ll never miss a post. You can also forward this website link to your friends and colleagues-thanks!
Note: You can read his previous article on Modification Of Microwave Oven
 (31)Dislikes
 (1)
(1)
8 Comments
Leave a Reply


Parasuraman S
January 11, 2026 at 9:21 pm
Out of the box thinking indeed! Very innovative idea! Thanks for sharing! Very useful tip!
ANTHONY PATERSON
January 12, 2026 at 2:23 am
Imoudu, in soldering it is usual to use minimal solder and ensure good electrical connectivity. However, in this task 'the bigger the blob the better the job' My worry is that the temperatures inside the magnetron could be high enough to melt the solder but having a large mass of solder makes that more difficult. You will note that the connections to the horn of the magnetron are crimped. How was the original connection made? (welded, crimped, soldered?) In the past I have considered using the copper barrel and two screws out of a connector strip to make the connection then soldering that. I think in practice you should try to replicate the original connection type. Thank you for sharing your repair strategy.
RAMESH MOTILALL
January 12, 2026 at 5:00 pm
Agree with Mr. Anthony Paterson.
We have been using his method every time when the connectors were short circuited to ground but never soldered as being risky of melting solder.
Waleed Rishmawi
January 15, 2026 at 5:08 pm
Anthony: I appreciate your comments and your concerns about his method. I have done this method the same way mentioned in this article and i never had issue with metlting soldering joints...before I soldering the two wires together I just make sure it has good connection, twist the wirese together as much as possible and then do the soldering, I never had a complain from the customers. have a blessed day
Albert van Bemmelen
January 11, 2026 at 11:40 pm
Good job but please make sure never to brake the magnetron tube. Because it apparently contains beryllium oxide in older microwave ovens. Where domestic ovens use cheaper, safer aluminum oxide (alumina) for magnetron insulators.
If you find a ceramic part in a magnetron, especially an older one, and suspect it's BeO (pinkish, very thermally conductive), do not break or grind it; wear a respirator and clean carefully, as dust causes severe lung disease (berylliosis).
Mark J
January 12, 2026 at 1:40 am
Imoudu Good job on the repair. That is a useful tip.
Yogesh Panchal
January 12, 2026 at 3:56 pm
Good job!Imoudu
MP
January 13, 2026 at 1:44 pm
Really nice photography brother Imoudu, and thanks for keeping the promise for the continuation article. And as for you Anthony Paterson, your comments are well worth noting.